Before you begin, make sure that you are using the WordPress Gutenberg editor on your website. Follow the steps below to install Essential Blocks for Gutenberg.
How To Install Essential Blocks #
Step 1: Go to your WordPress Dashboard and navigate to ‘Plugins’ → ‘Add New’. Then in the search box, put out the keyword ‘Essential Blocks for Gutenberg’. Then simply click on the ‘Install Now’ and ‘Activate’ buttons to install and activate the plugin.

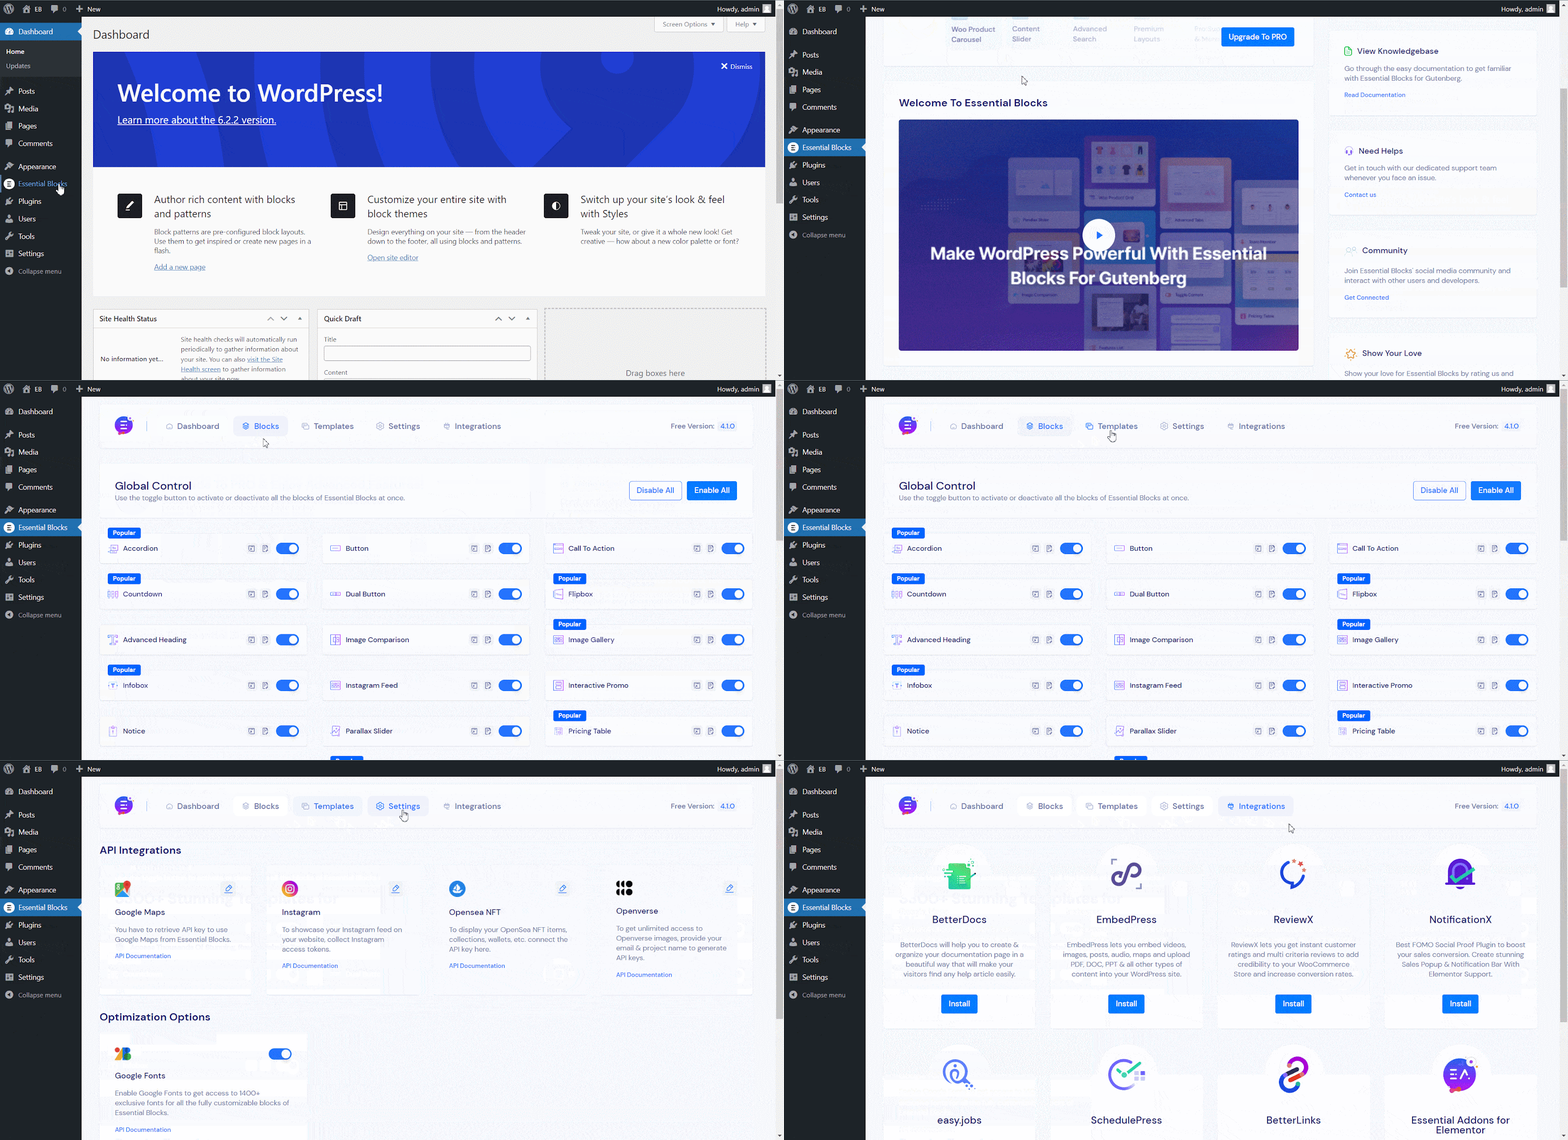
Step 2: After you have successfully completed Step 1, ‘Essential Blocks for Gutenberg’ will appear in the WordPress Dashboard.

Step 3: Navigate to the Settings page of Essential Blocks for Gutenberg. Here you will find five tabs: Dashboard, Blocks, Templates, Settings, and Integrations.

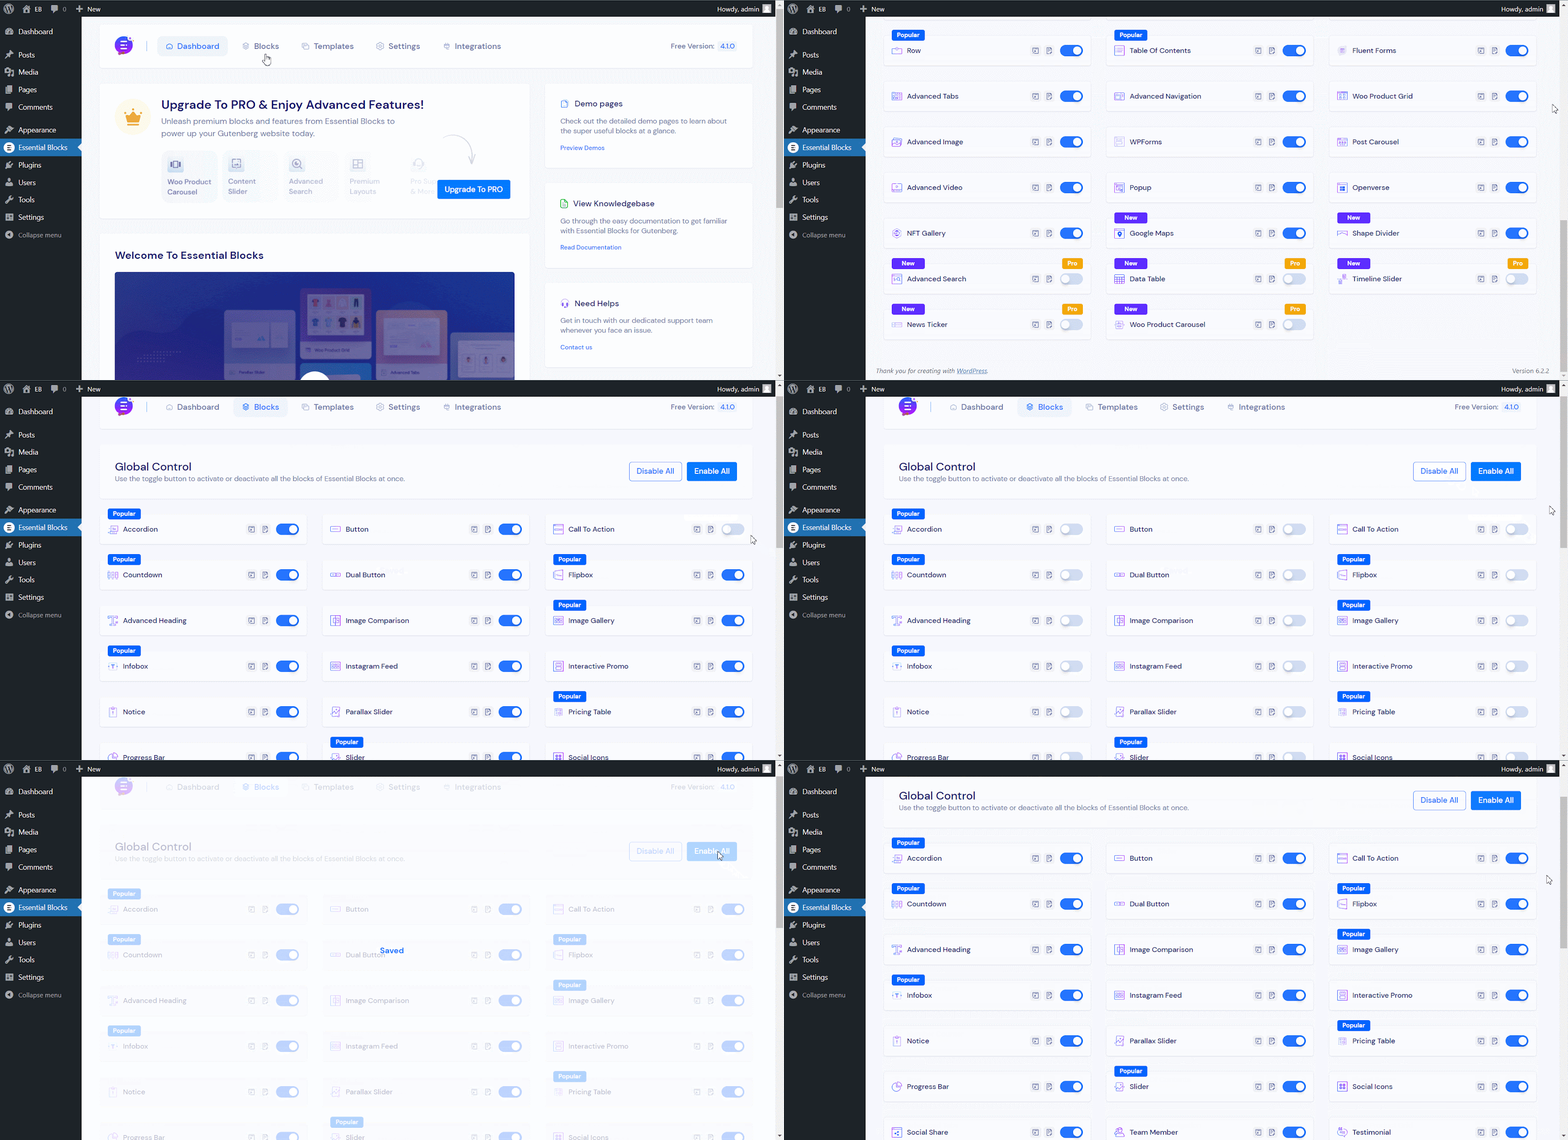
Step 4: Switch to the ‘Blocks’ tab to check out all the available blocks that come with Essential Blocks. You can use the toggle to enable or disable any specific block as per your requirements or you can also disable or enable all the blocks globally too.

Step 5: To start using Essential Blocks, simply create a new post or page from your WordPress Dashboard. Click on the ‘+’ icon at the top of the page and add a new block. Scroll down to find Essential Blocks, and click on any of the blocks you like to start using them.

This is how easily you can install Essential Blocks and unlock the ultimate blocks library for Gutenberg.
Installing Essential Blocks PRO #
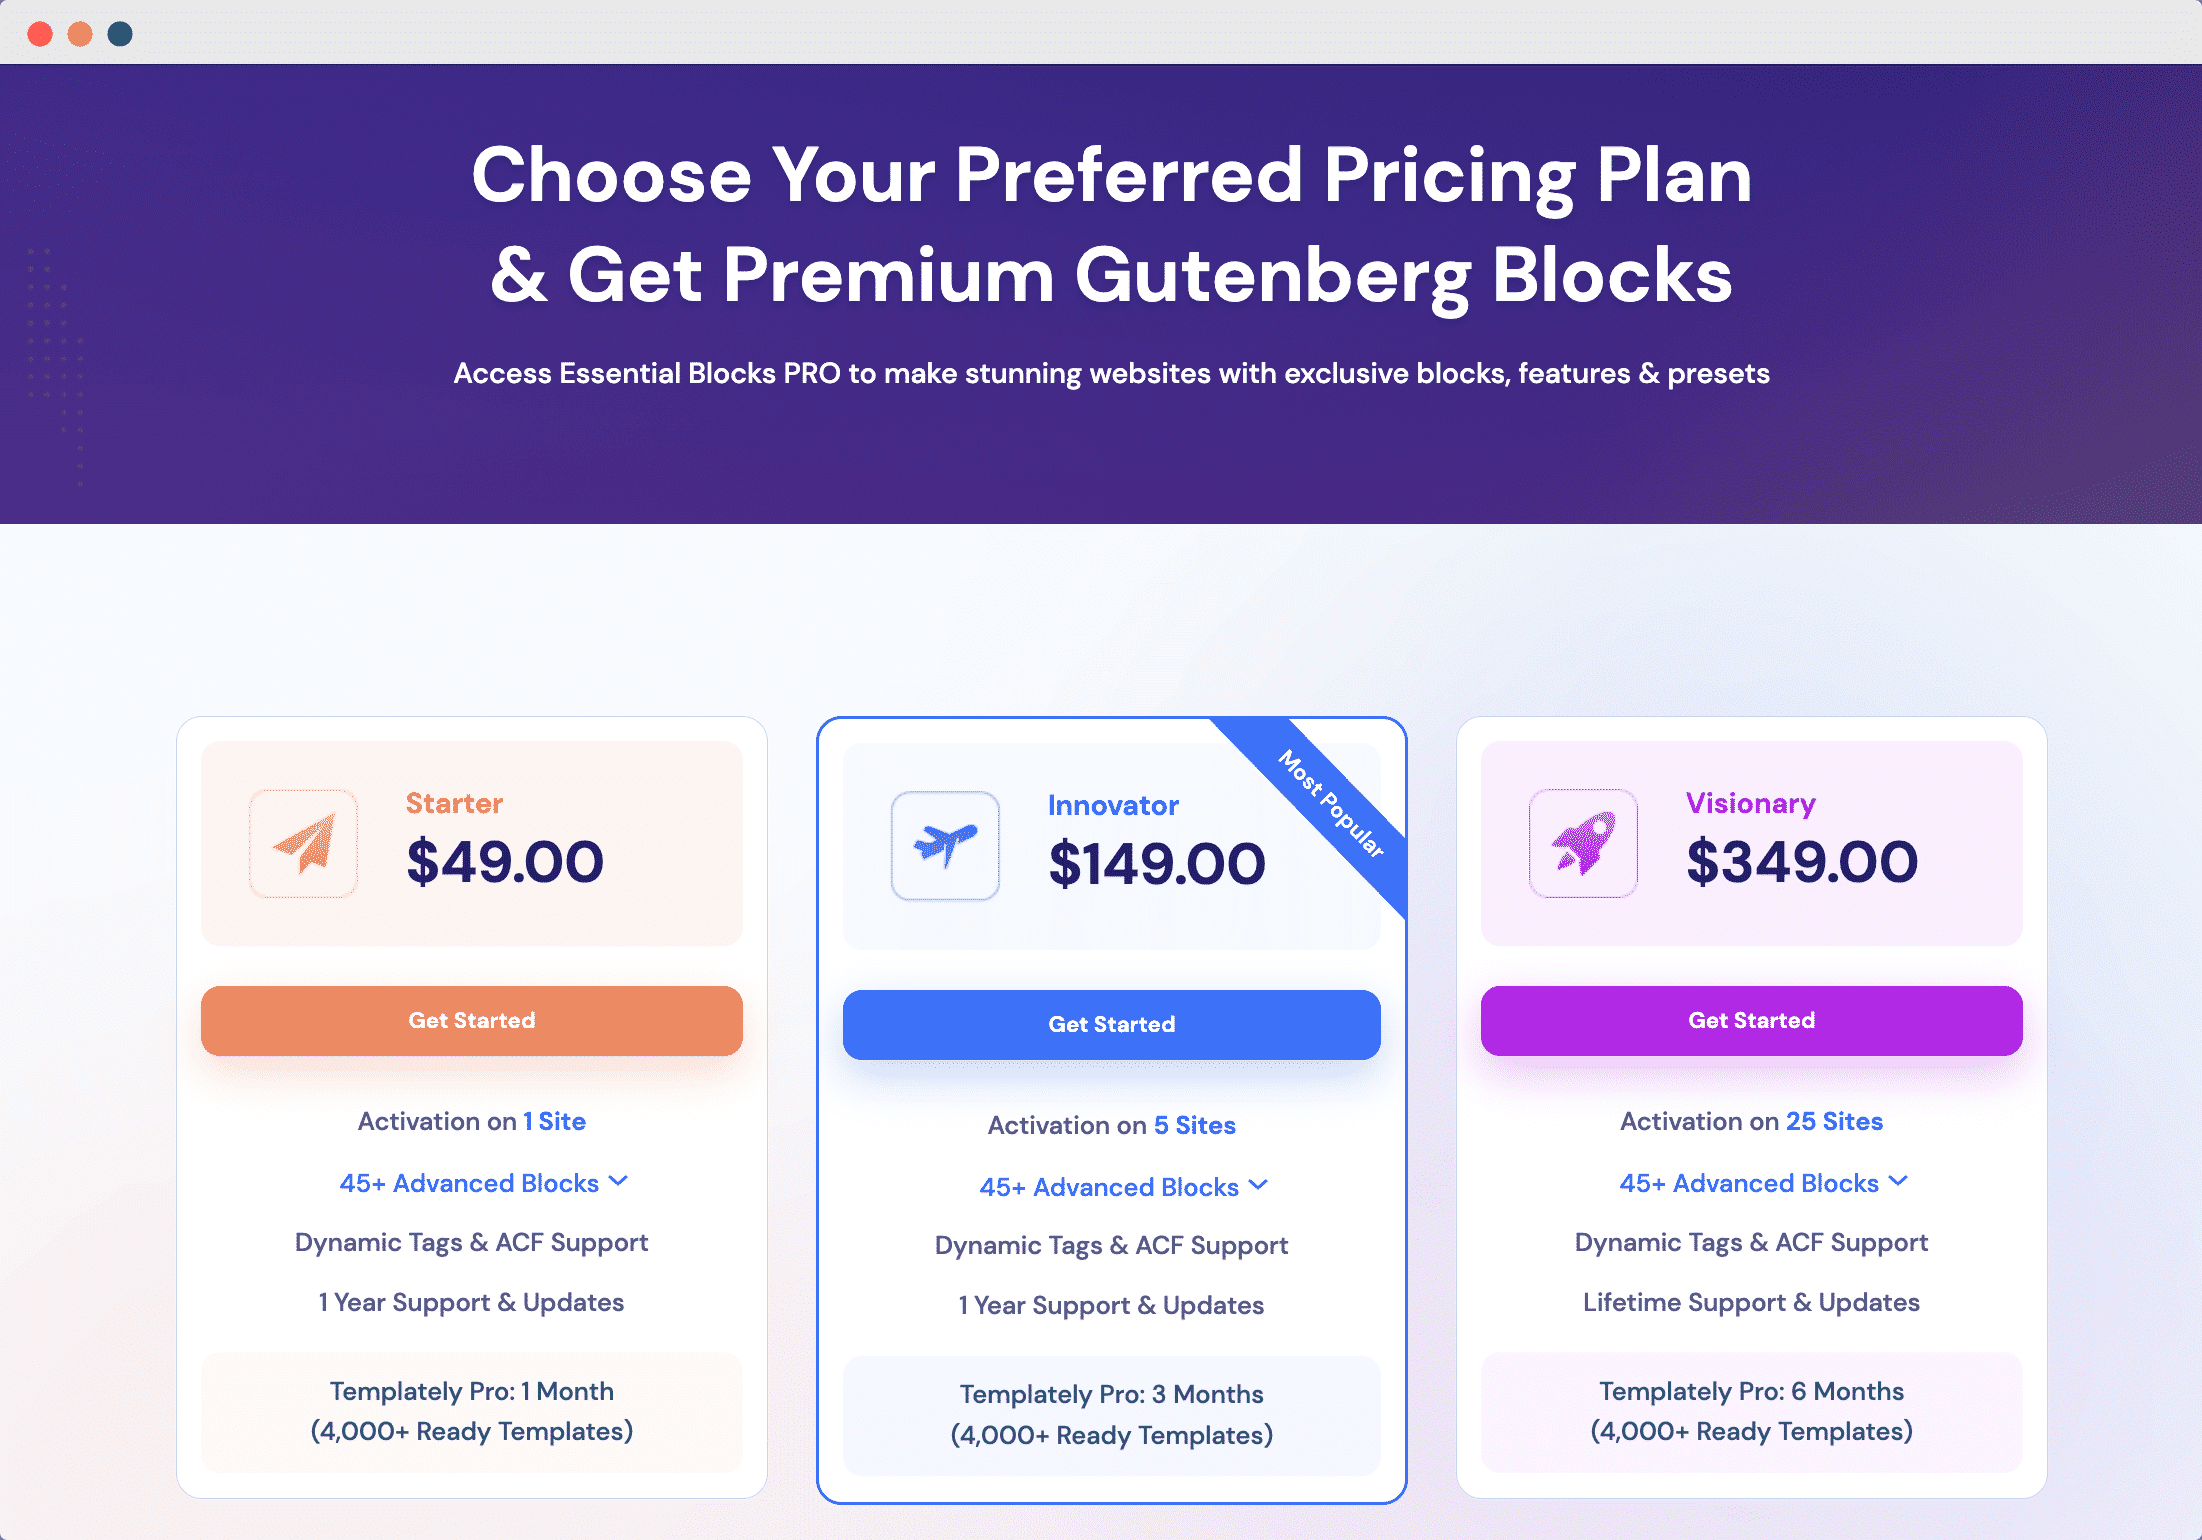
To gain access to the premium features, simply visit the Essential Blocks pricing page and select the package that suits your requirements. Once you’ve made your choice, proceed to purchase the package and start enjoying the advanced premium features to create stunning designs. For further details, please review our documentation on installing and activating Essential Blocks PRO.

Getting stuck? Feel free to Contact Our Support for further assistance.


