The EB Countdown is a great block to add a sense of anticipation among your readers. You can include easily add this outstanding block section on your Website to inform your customers about any discount offer you have running. Moreover, you can also let your customers know when you will launch future upgrades to your product and service.
Note: This Block has some PRO features. To access all of the features and create stunning designs, make sure to activate both Essential Blocks Free and PRO.
How to Activate EB Countdown & Choose Template #
To activate this Essential Blocks element, click on the ‘+’ icon to add a new Block. Afterward, find ‘Countdown’ from the search option. Simply just click on the Block, and it will be activated. Now, Choose a template for the Countdown or start blank.
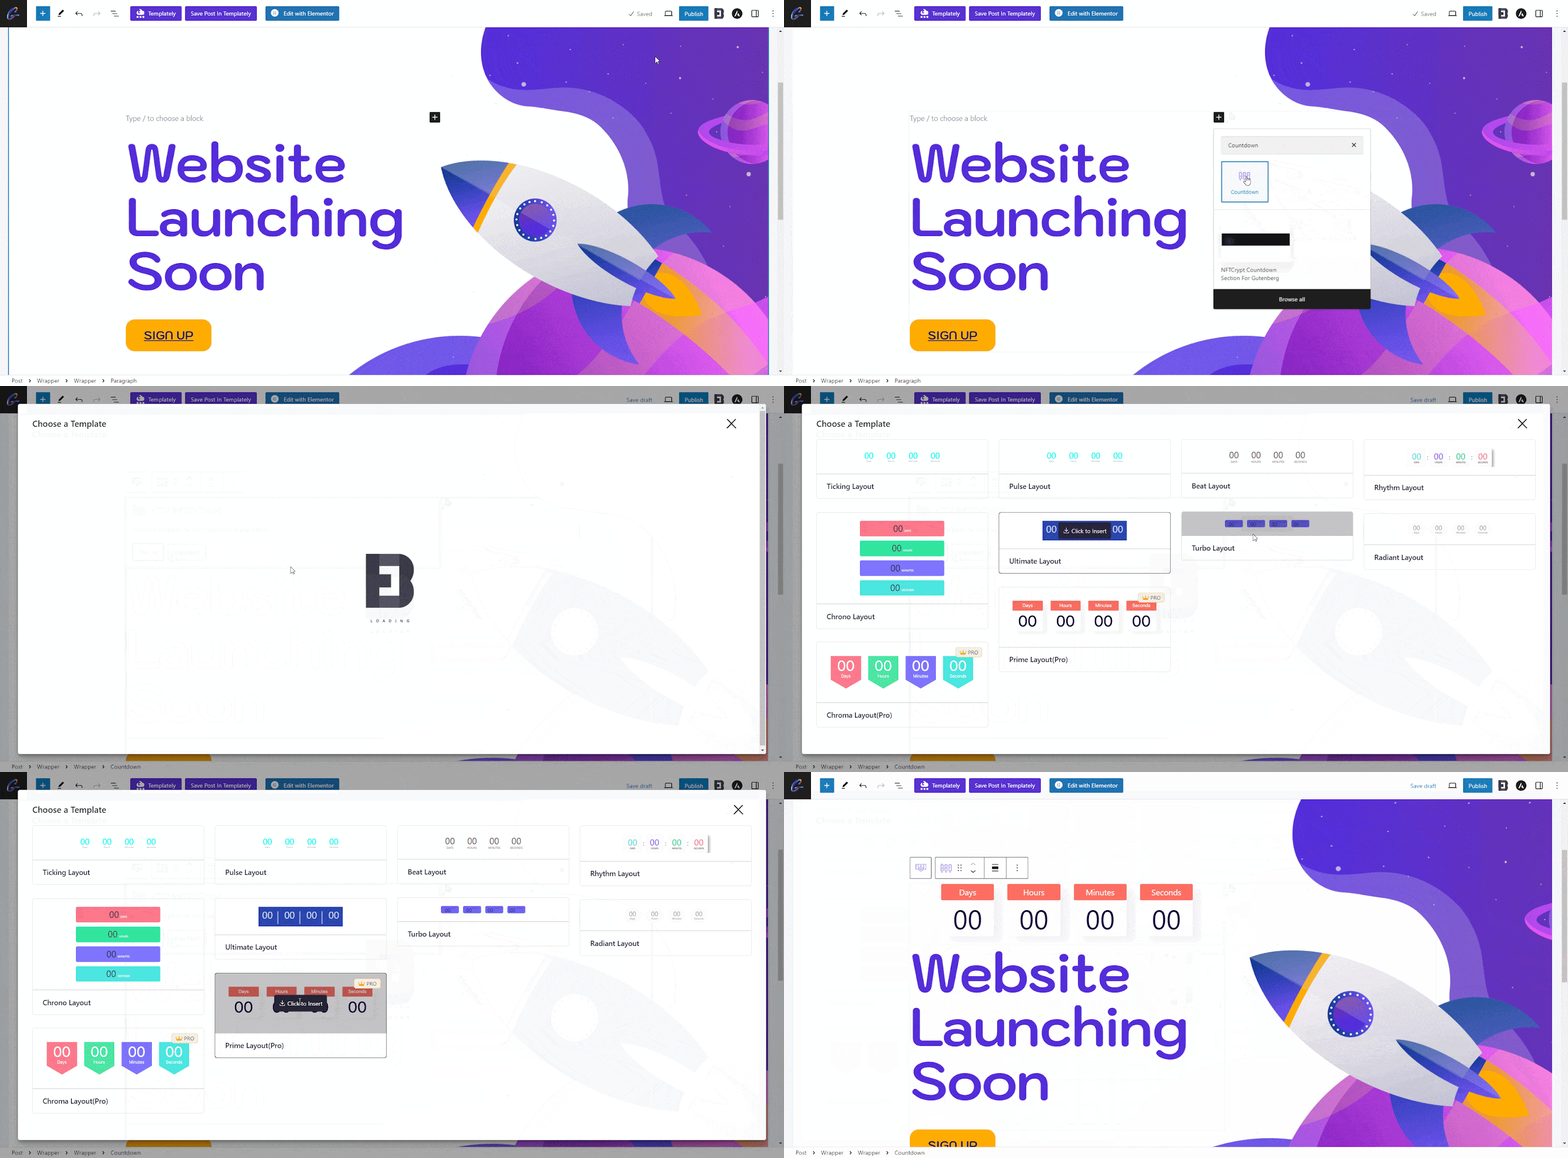
Note: This Block has some premium Template. To access all of the presets and create stunning designs, make sure to activate both Essential Blocks Free and PRO.
How The Configure The Content Settings #
Under the ‘General’ tab, you’ll find ‘Countdown Settings,’ ‘Content Settings,’ to configure your block. In the Countdown Settings section, you can set the Due Date easily with inline editing for the time and a calendar for the date.
You can also create an Evergreen timer by toggling the ‘Evergreen Timer’ option and setting the hours and minutes. Make it a recurring timer by toggling the ‘Recurring Countdown’ option.
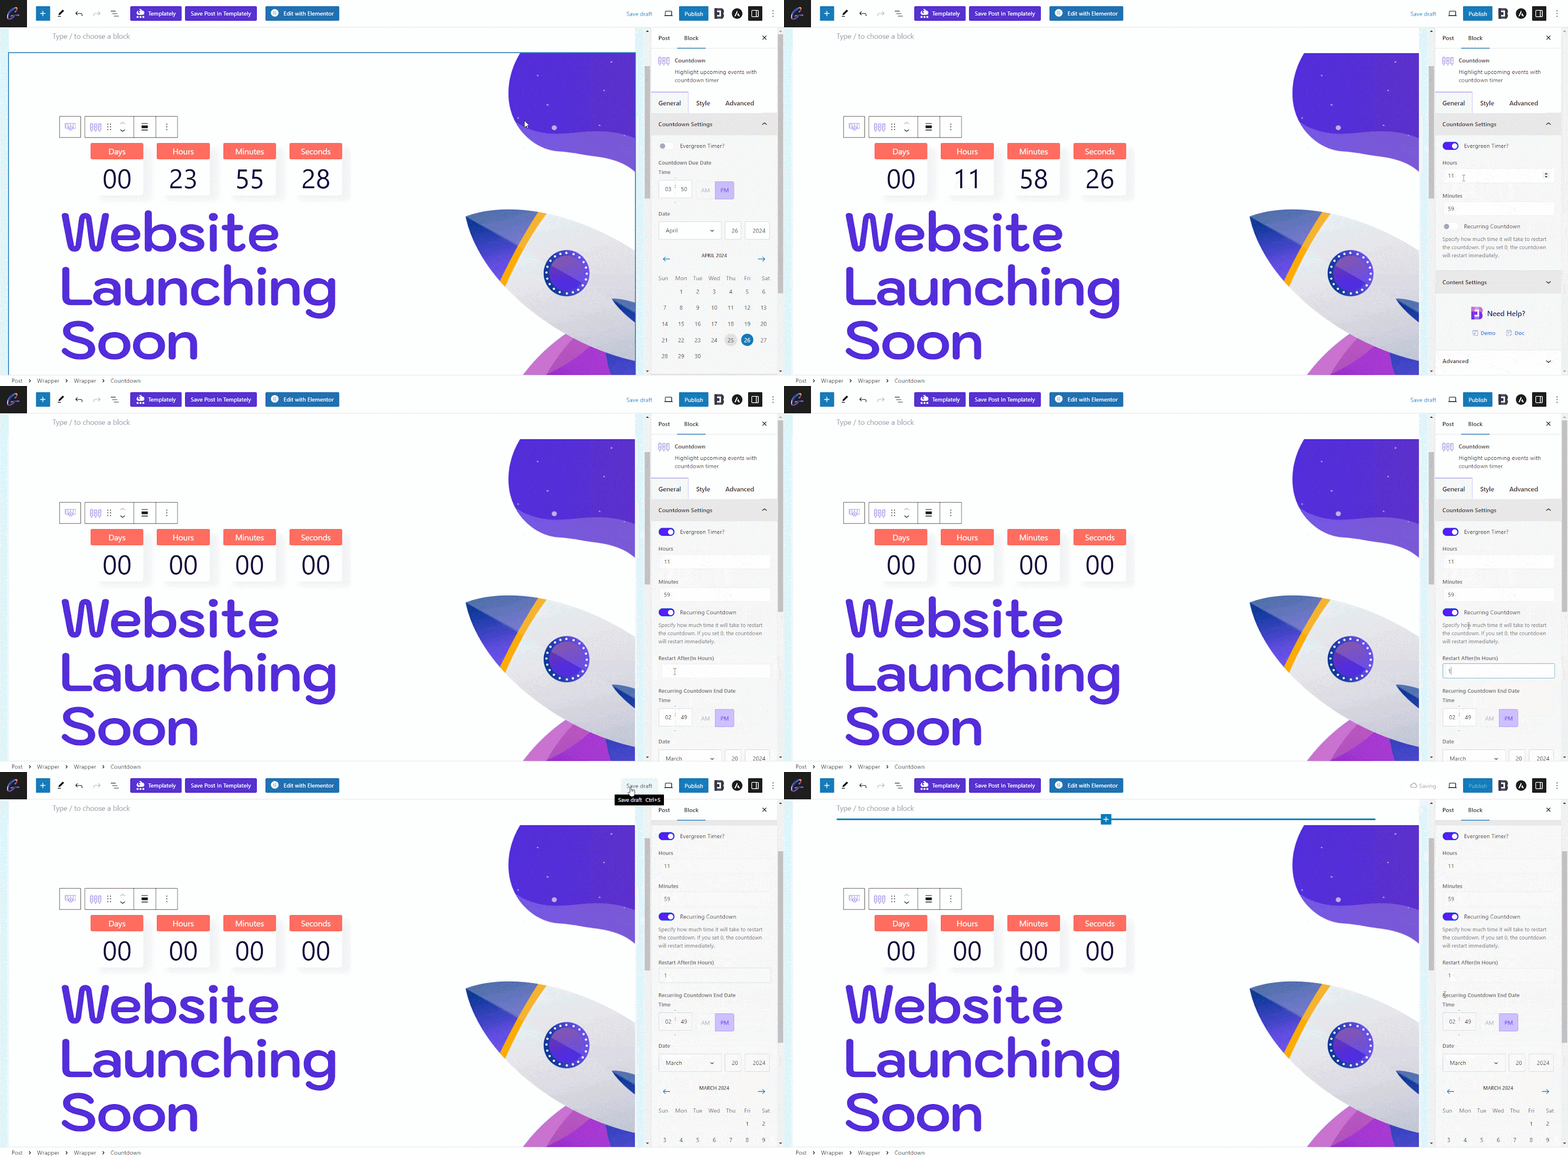
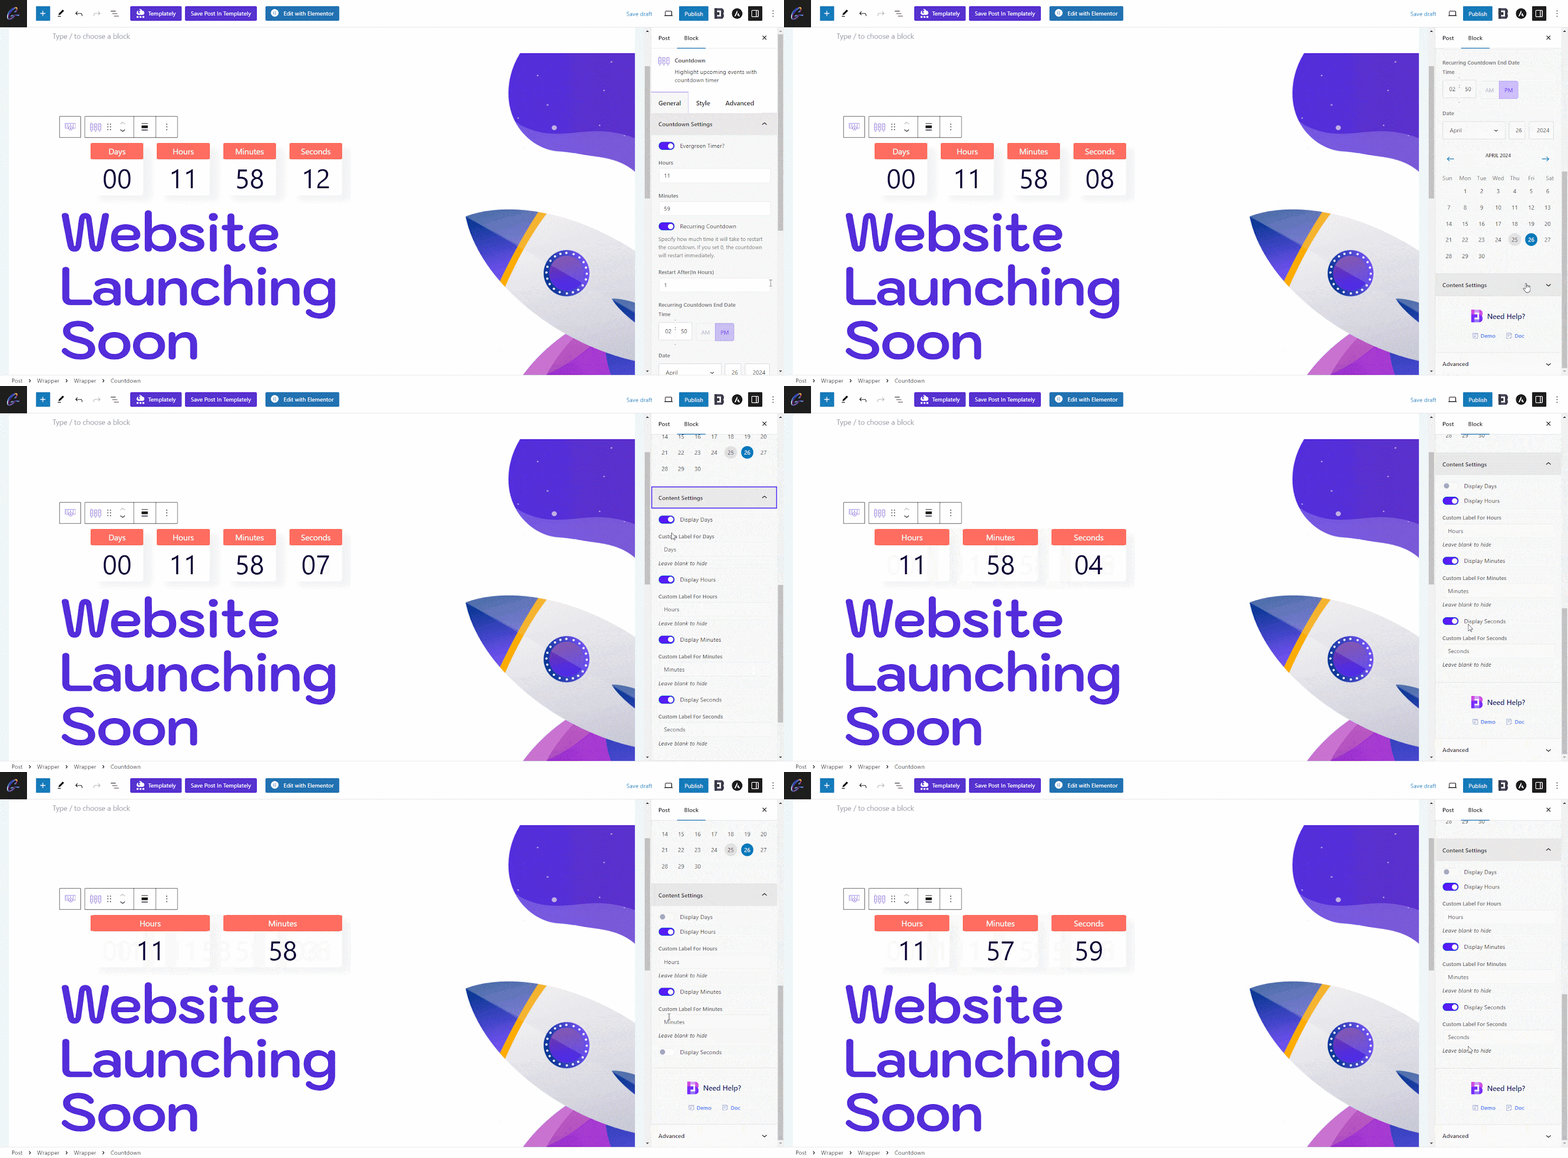
You can add further customization to your timer block by changing how many counters you want to display and the labels for each counter. To do this, simply click on the Content Settings Tab and edit however you want.
How to Style & Advanced Customize EB Countdown #
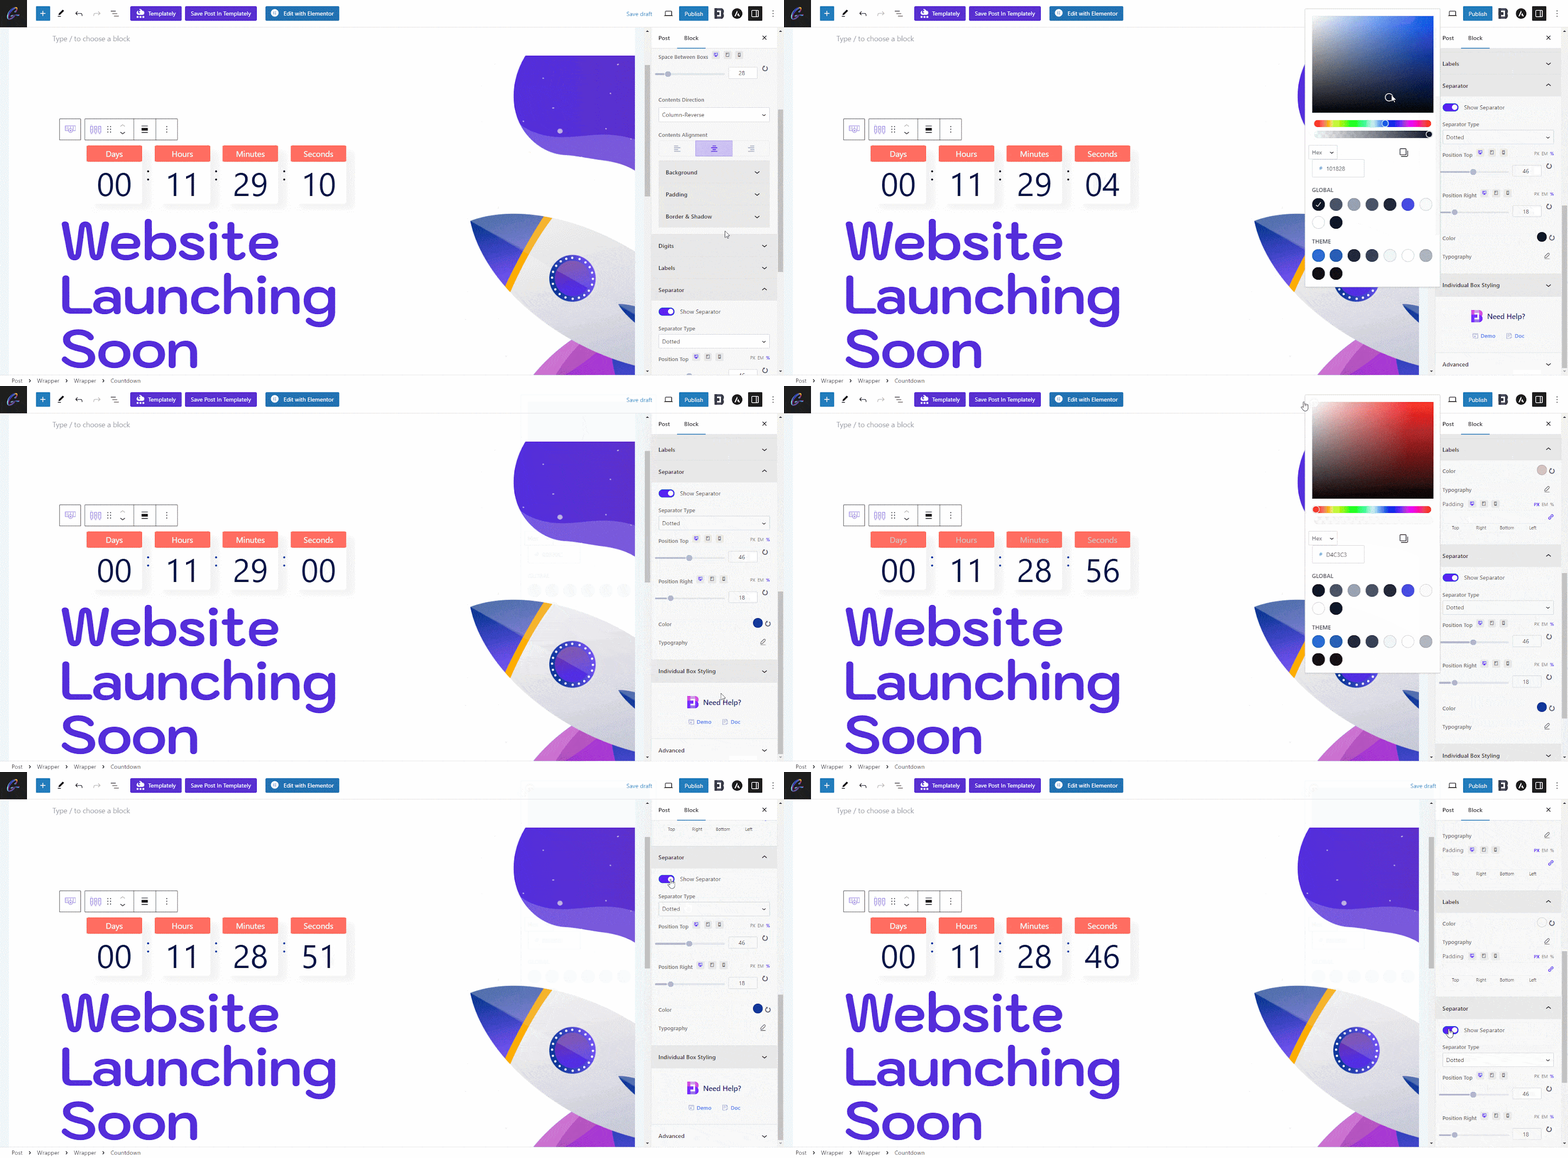
You can make necessary styling to your block from the Style & Advanced tab. Here, you’ll find five different sections in the Style Tab: ‘Boxes Styles,’ ‘Digits,’ ‘Labels,’ ‘Separator,’ ‘Individual Box Styling,’ and ‘Advanced.’
From the Boxes Style section, you can change the layout, container width, space between boxes, content direction, content alignment, background color, padding, border, and much more for the timer block.
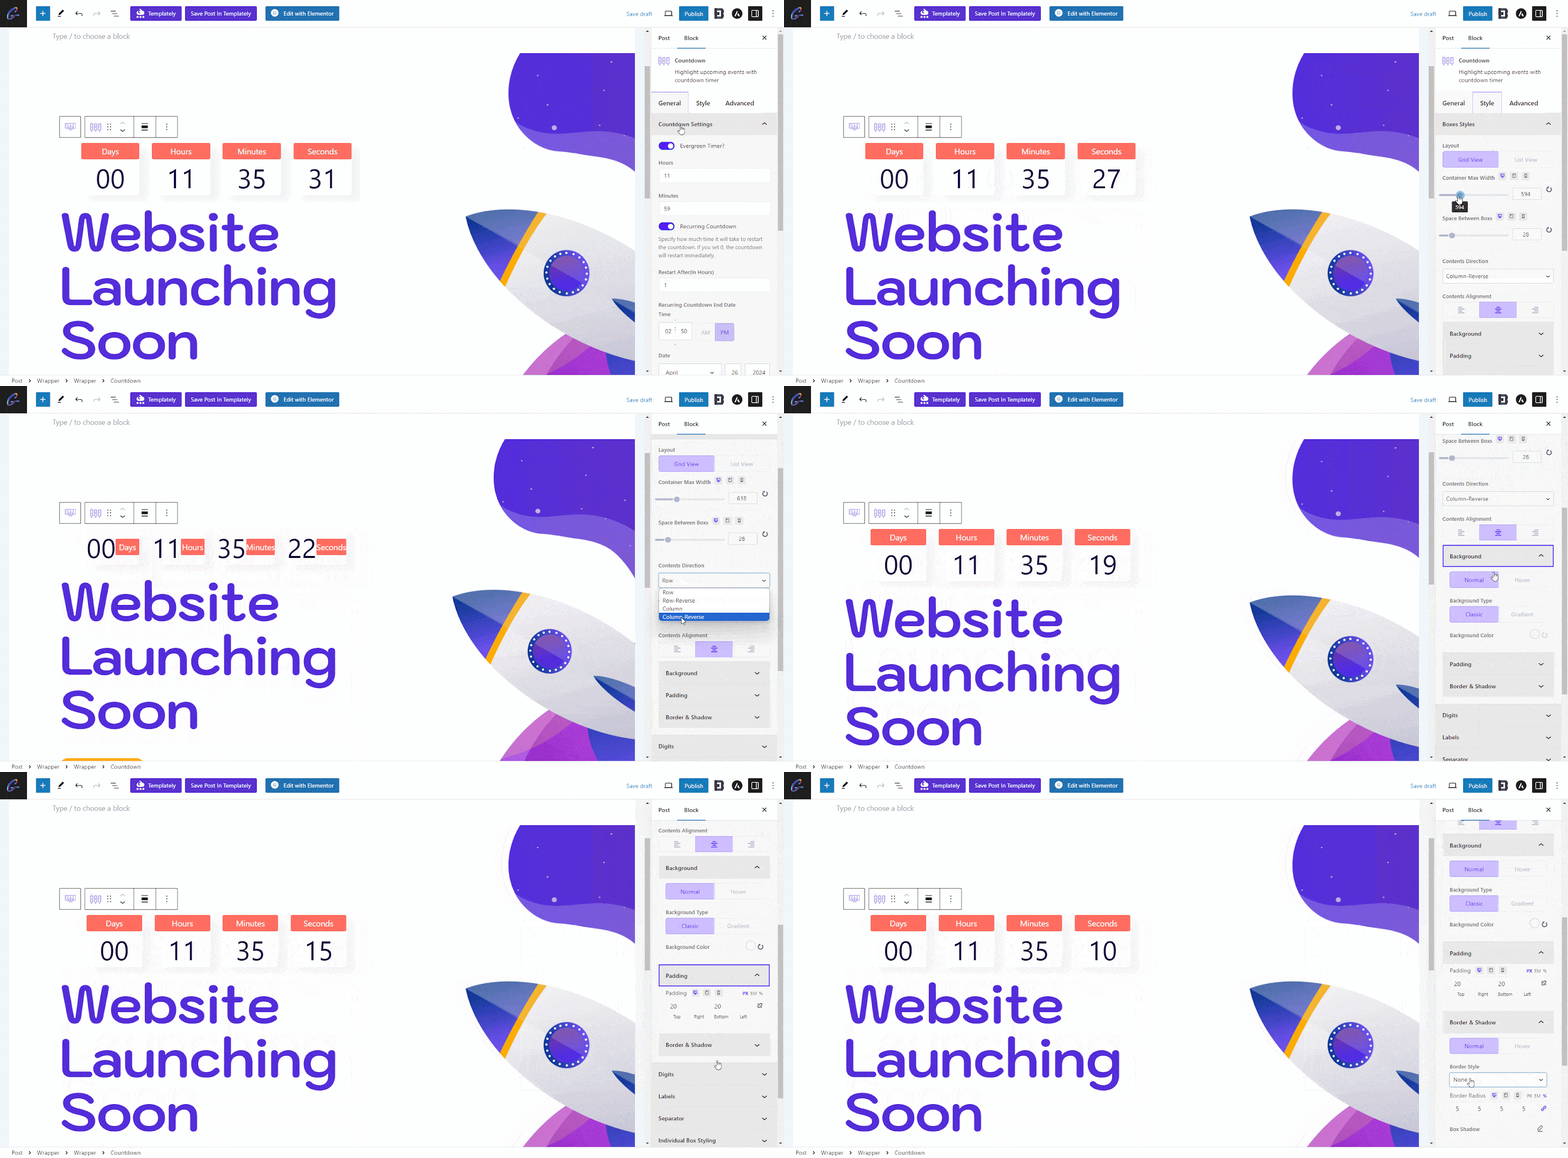
You can change the color and typography for the digits and labels of your Countdown timer block from the Digits and Labels section. You can also display a separator, change its color, and more from the Seperator section.
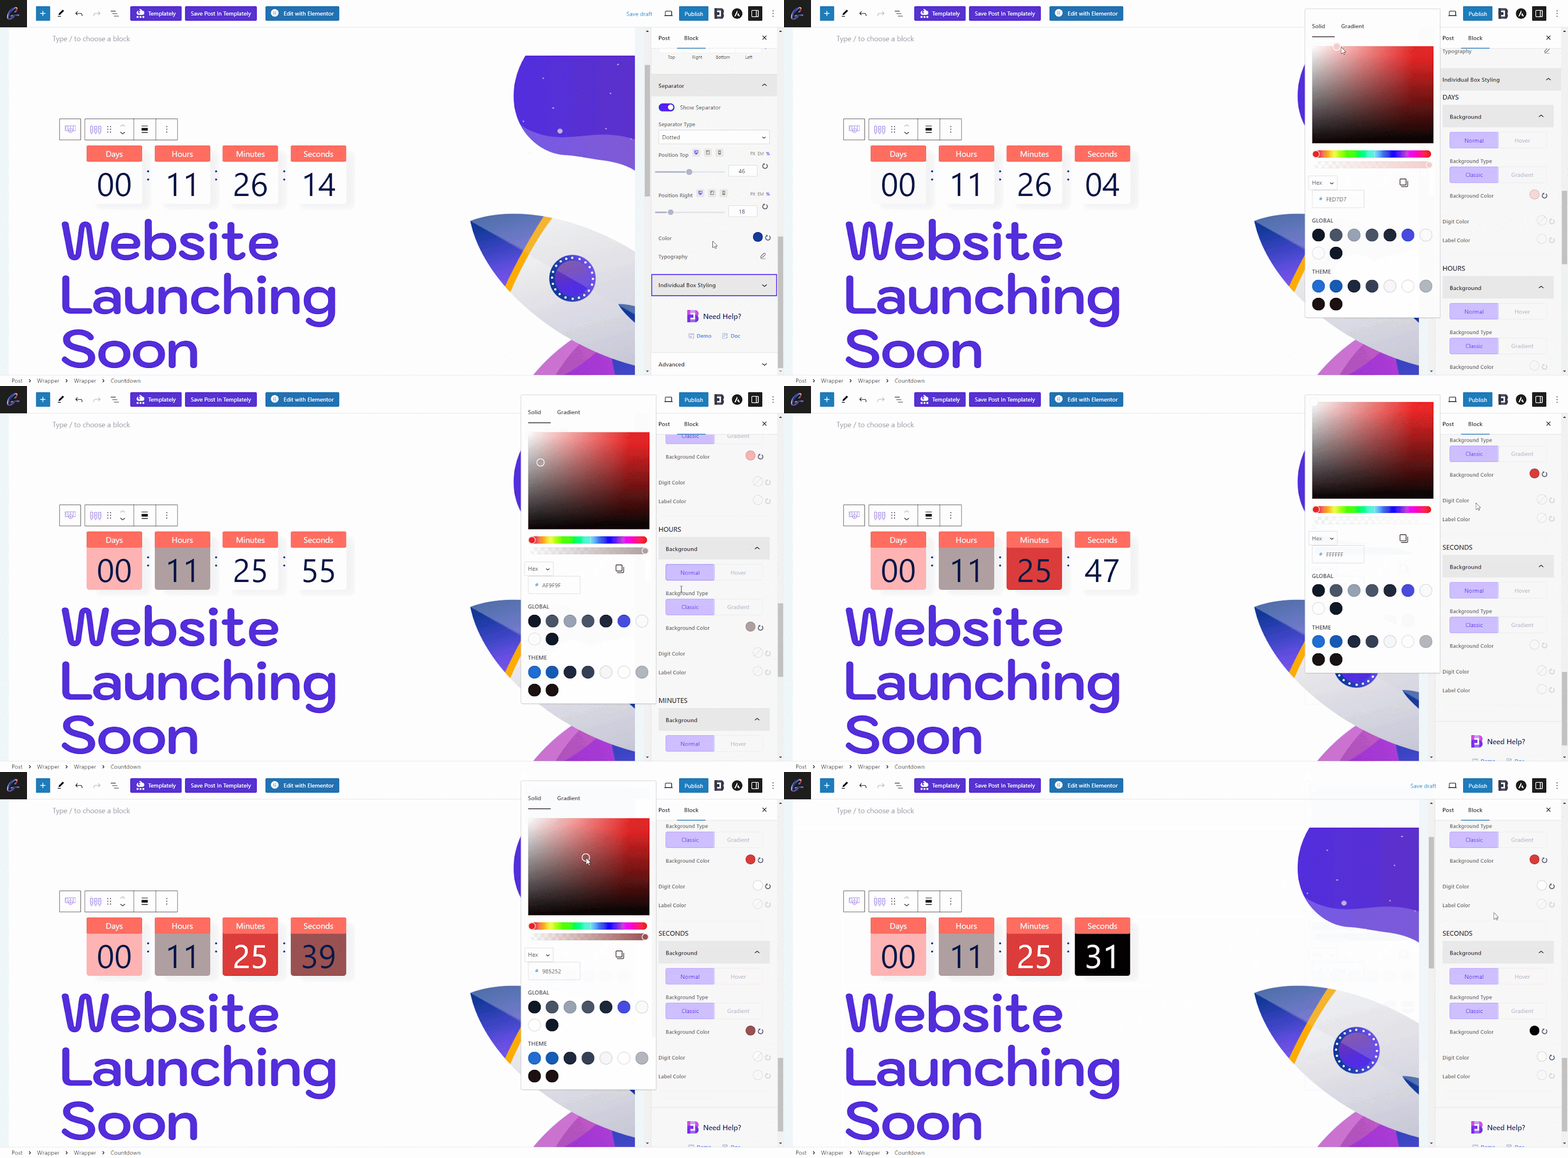
You can also customize the colors of each box, their digit color, level color, etc.
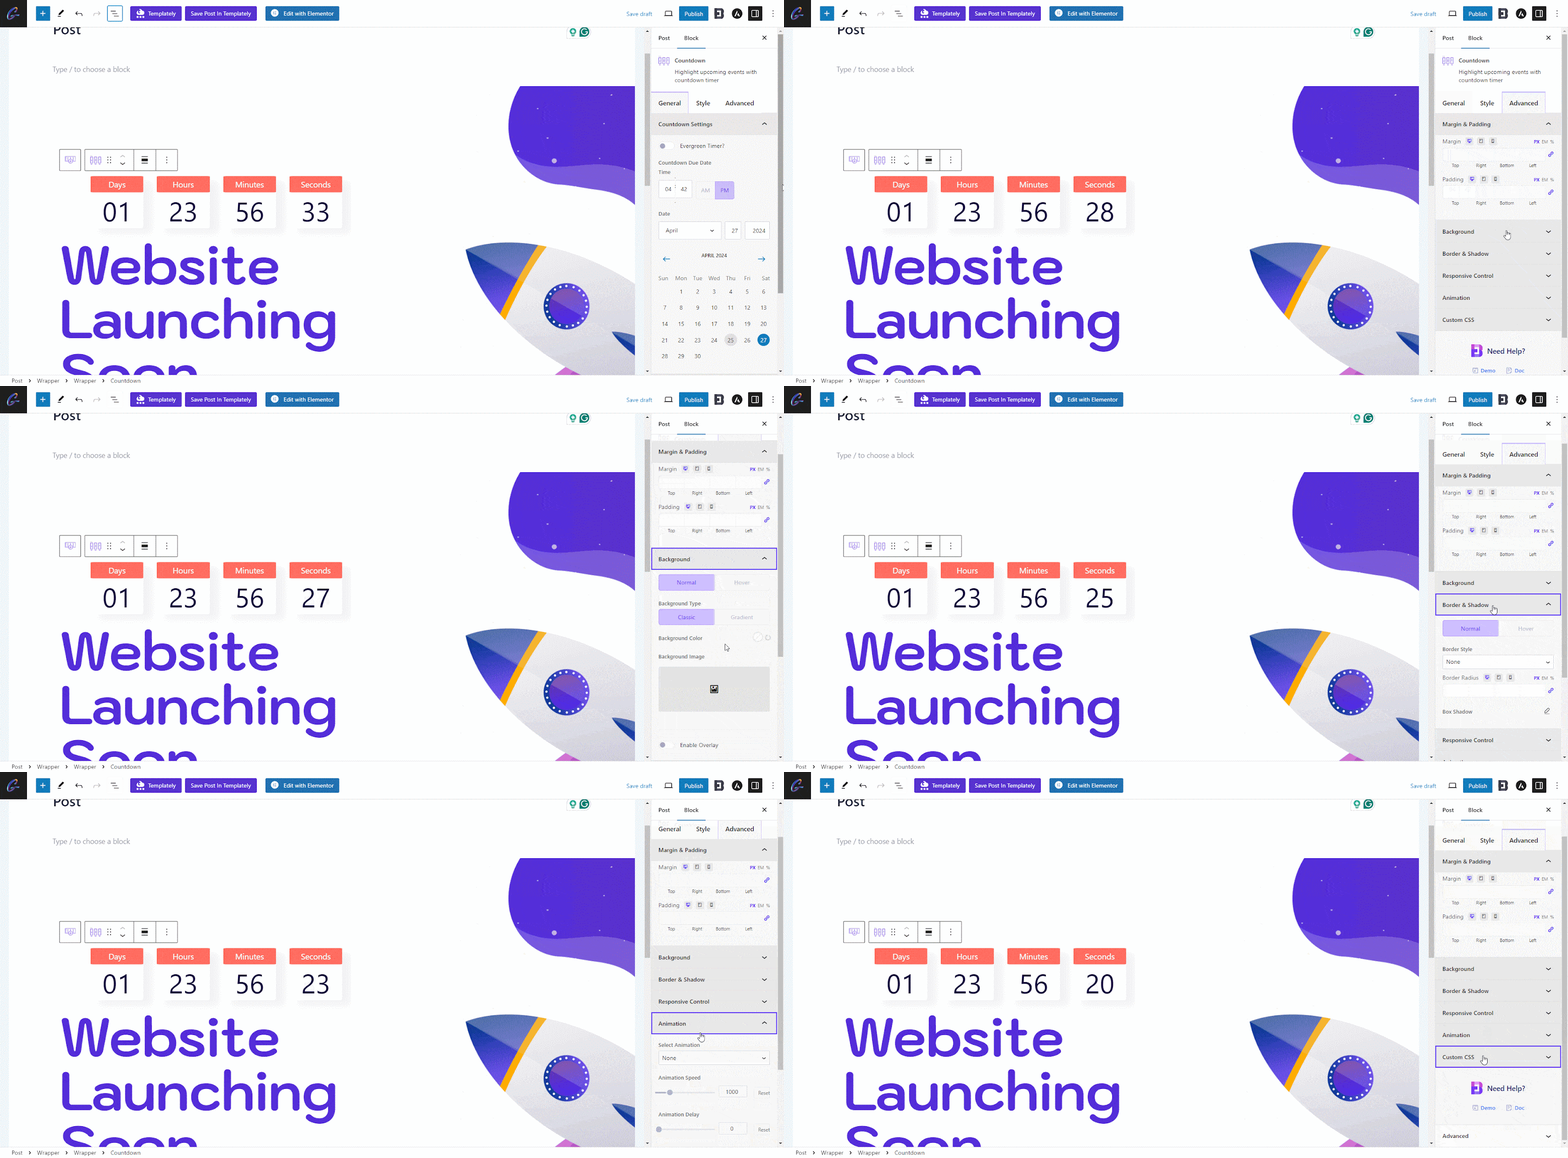
In the Advance tab, you will find six sections: where you can customize blocks margin and padding, Border & Shadow, Responsive control on devices, Animation and custom CSS.
Final Outcome #
By following the basic steps and a bit more modifying, you can style your EB Countdown however you want.

Getting stuck? Feel free to contact our support for further assistance.


