With the Multicolumn Pricing Table block, you can present your product or service pricing plans to visitors with a detailed comparison. Additionally, this Gutenberg block allows you to display interactive call-to-action buttons, multiple block-adding options, and more to help your visitors make informed decisions and convert them into potential customers.
Follow the step-by-step guidelines below to learn how to add a Multicolumn Pricing Table on your WordPress website using Essential Blocks For Gutenberg.
How To Activate Multicolumn Pricing Table? #
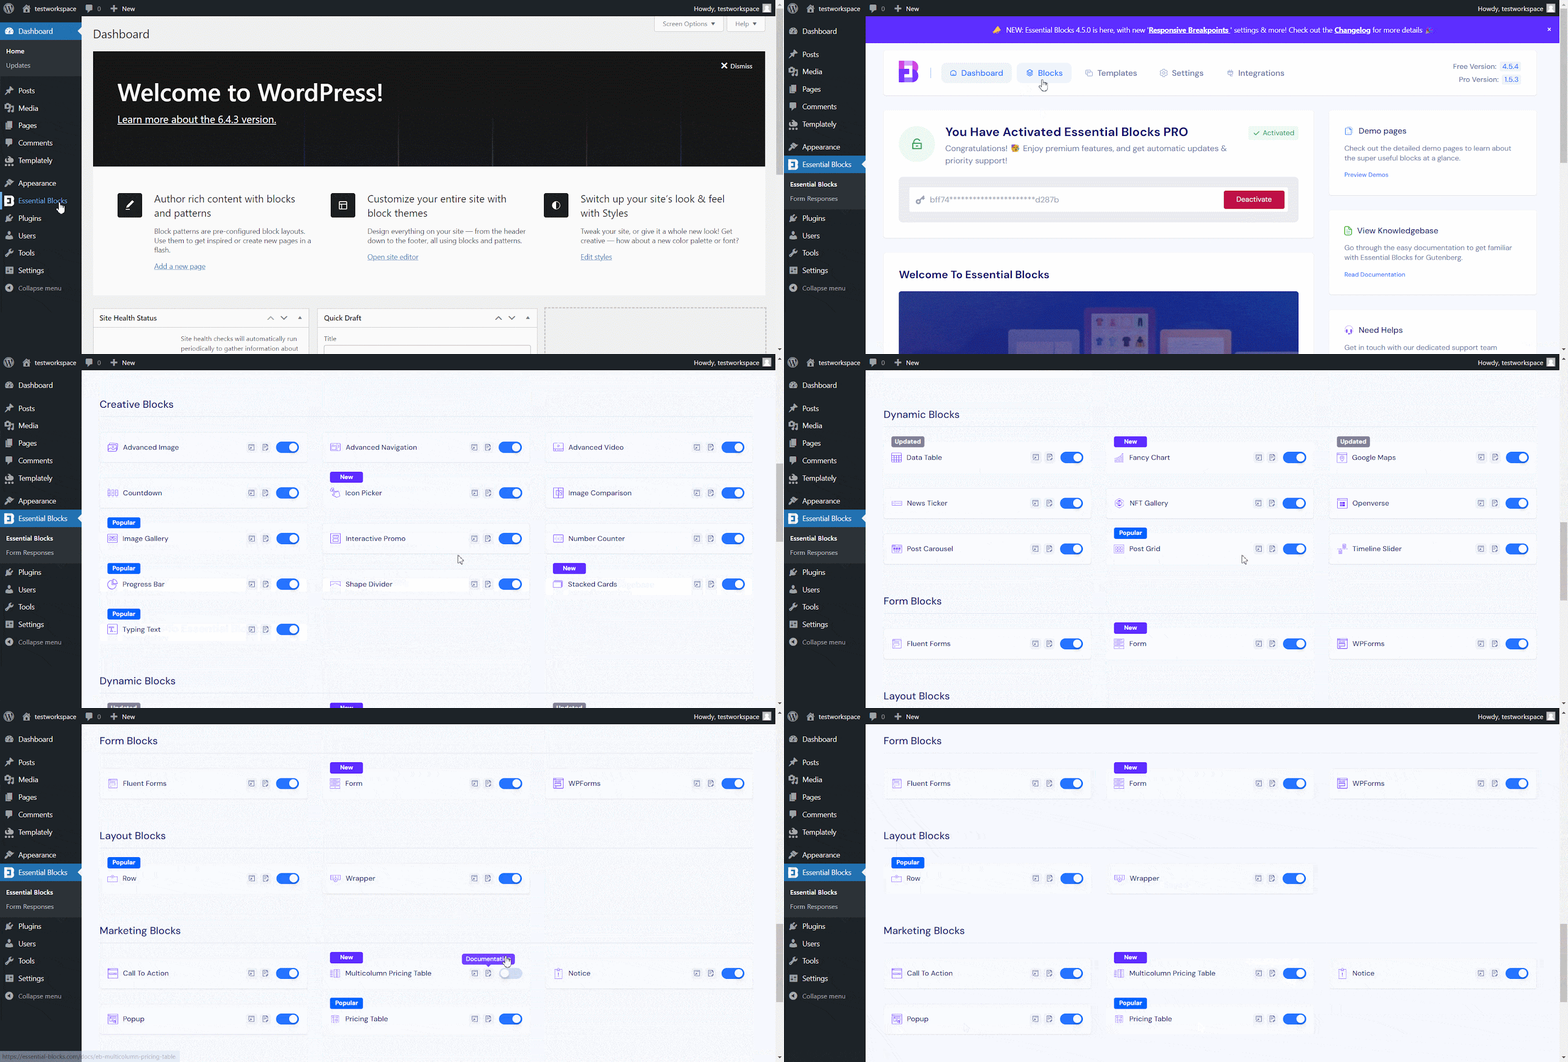
To activate the Multicolumn Pricing Table block, navigate to ‘Essential Blocks → ‘Blocks’. Then, toggle to enable this ‘Multicolumn Pricing Table’ block.
Note: As the Essential Blocks Multicolumn Pricing Table is a premium block, you need to install and activate Essential Blocks PRO on your website along with the free version.
How To Add Essential Blocks Multicolumn Pricing Table? #
From your WordPress dashboard, navigate to ‘Pages/Posts’ → ‘Add New’ and create a new one, or open the page/post if you already have one created where you want to add the Multicolumn Pricing Table.
To add the block, click on the ‘+’ icon and find ’Multicolumn Pricing Table’ in the search bar. Simply click on the block. After clicking, it will give you two options ‘Choose’ or ‘Start blank’ to start with.
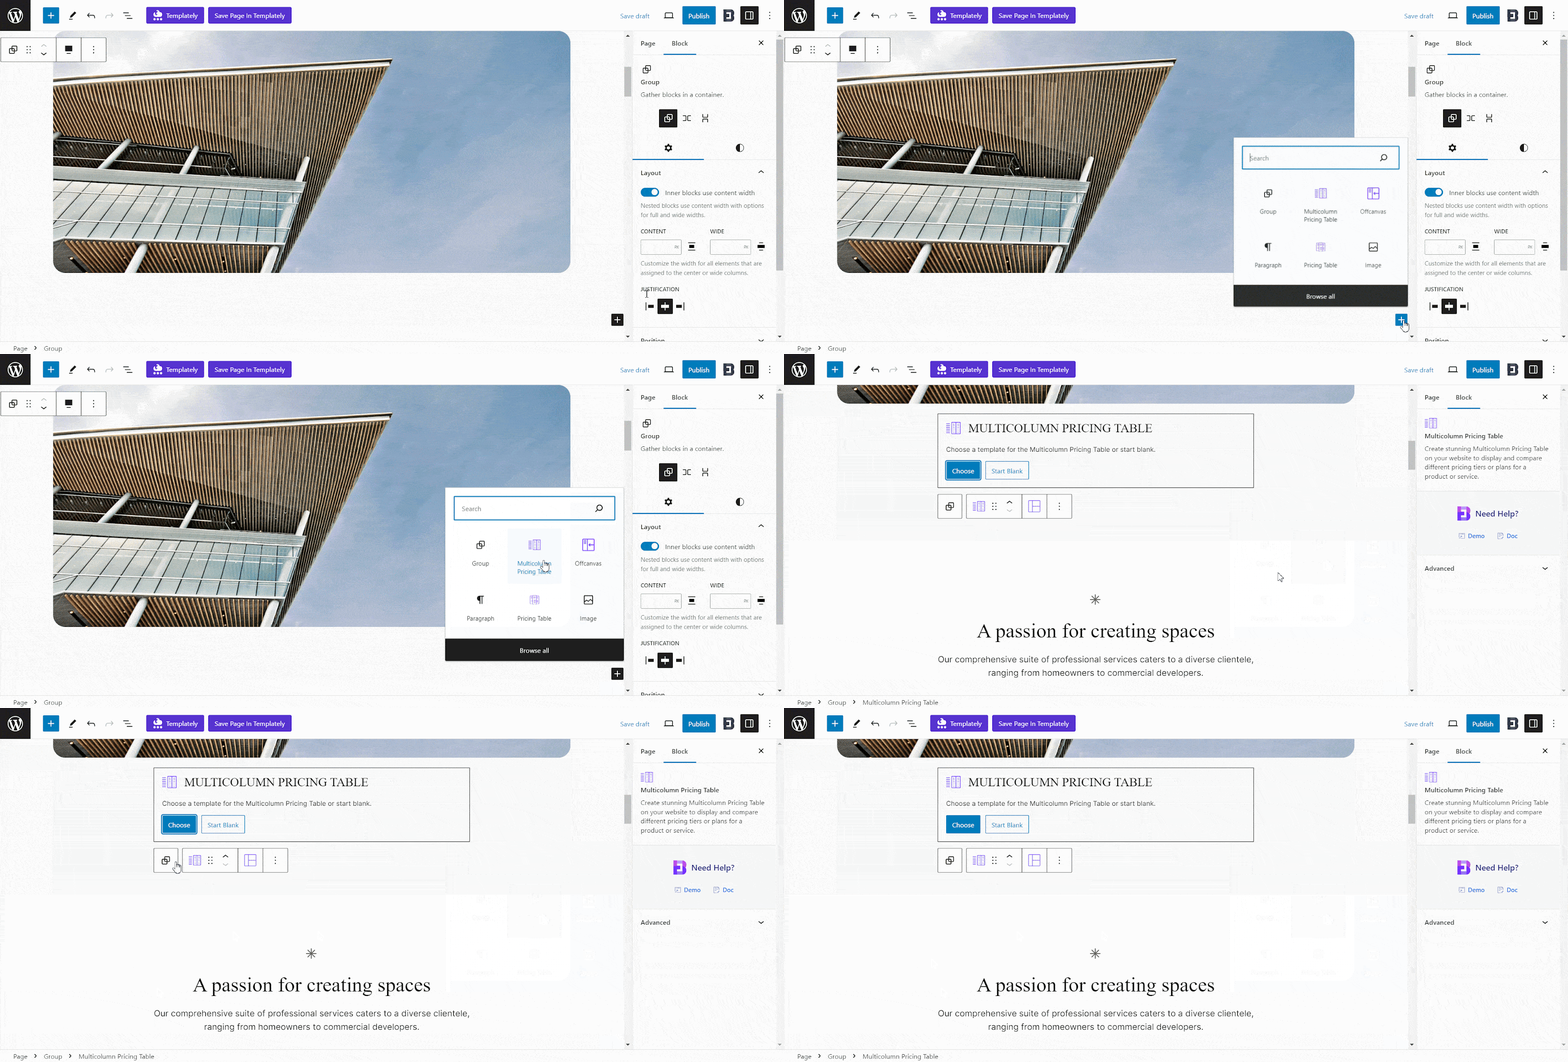
Now that you have added the Multicolumn Pricing Table block to your post/page, you can configure the preferences according to your needs.
Add and Configure Essential Blocks Multicolumn Pricing Table #
The Essential Blocks Multicolumn Pricing has multiple presets, layout options, and separate blocks on each column/row to enjoy the most customization options to maximize your pricing table dynamics.
Choose ‘Start blank’ #
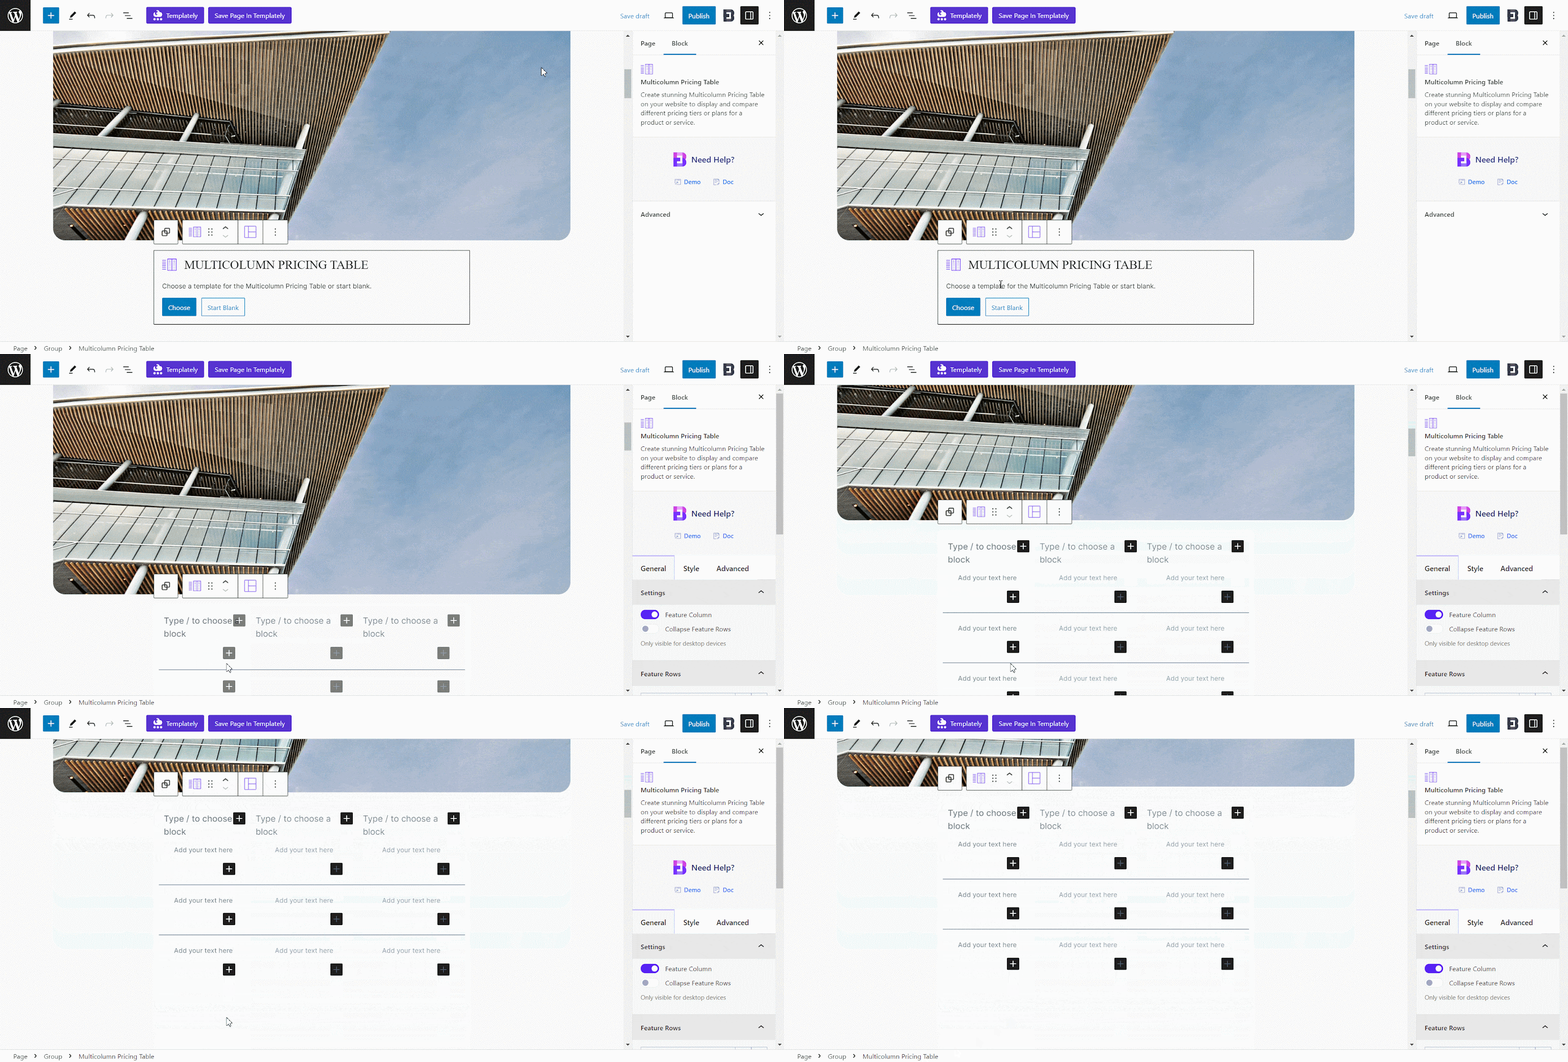
If you select the ‘Start blank’ option, it will provide you with a blank pricing column. You can add texts, prices and make changes to the styles of the column.
Choose From Presets #
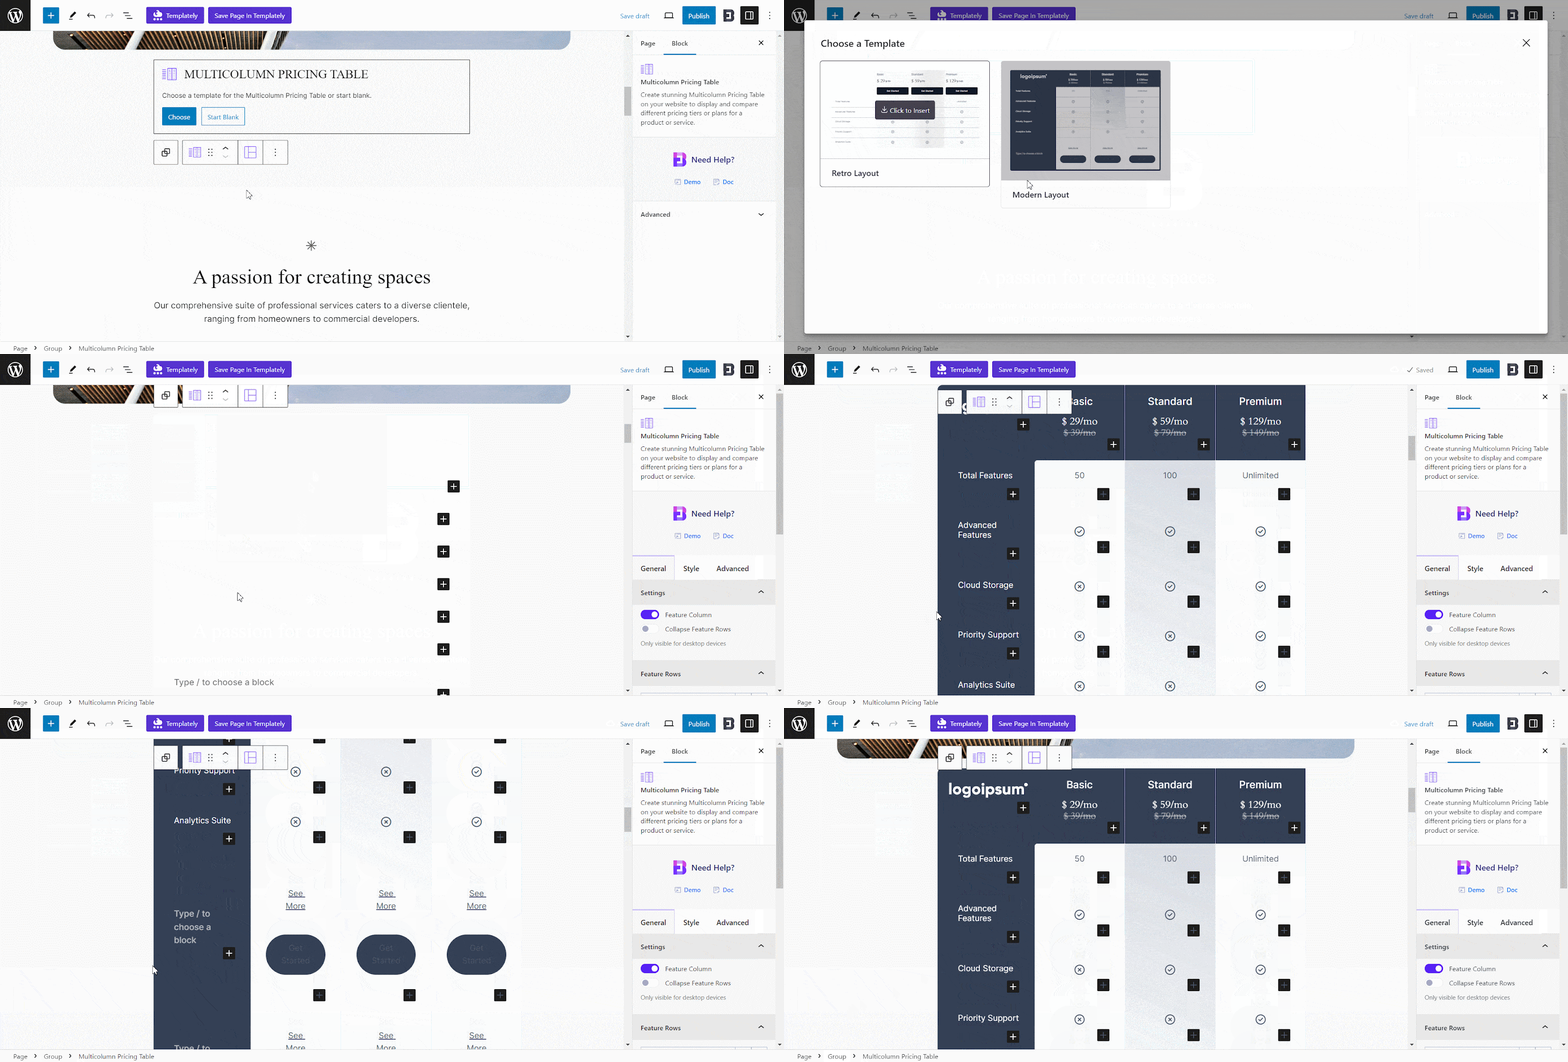
To choose from the presets, just click on ‘Choose’ and you will get a popup with the presets. The Multicolumn Pricing Table comes with two preset design choices, from which you can select your preferred one and design even more to reflect your website’s color palette or brand image.
Add Additional Blocks #
Each of the pricing table’s columns/rows has a separate block-adding feature, so you can add more blocks to integrate into the Multicolumn Pricing Table and maximize your creativity while displaying your pricing plans.
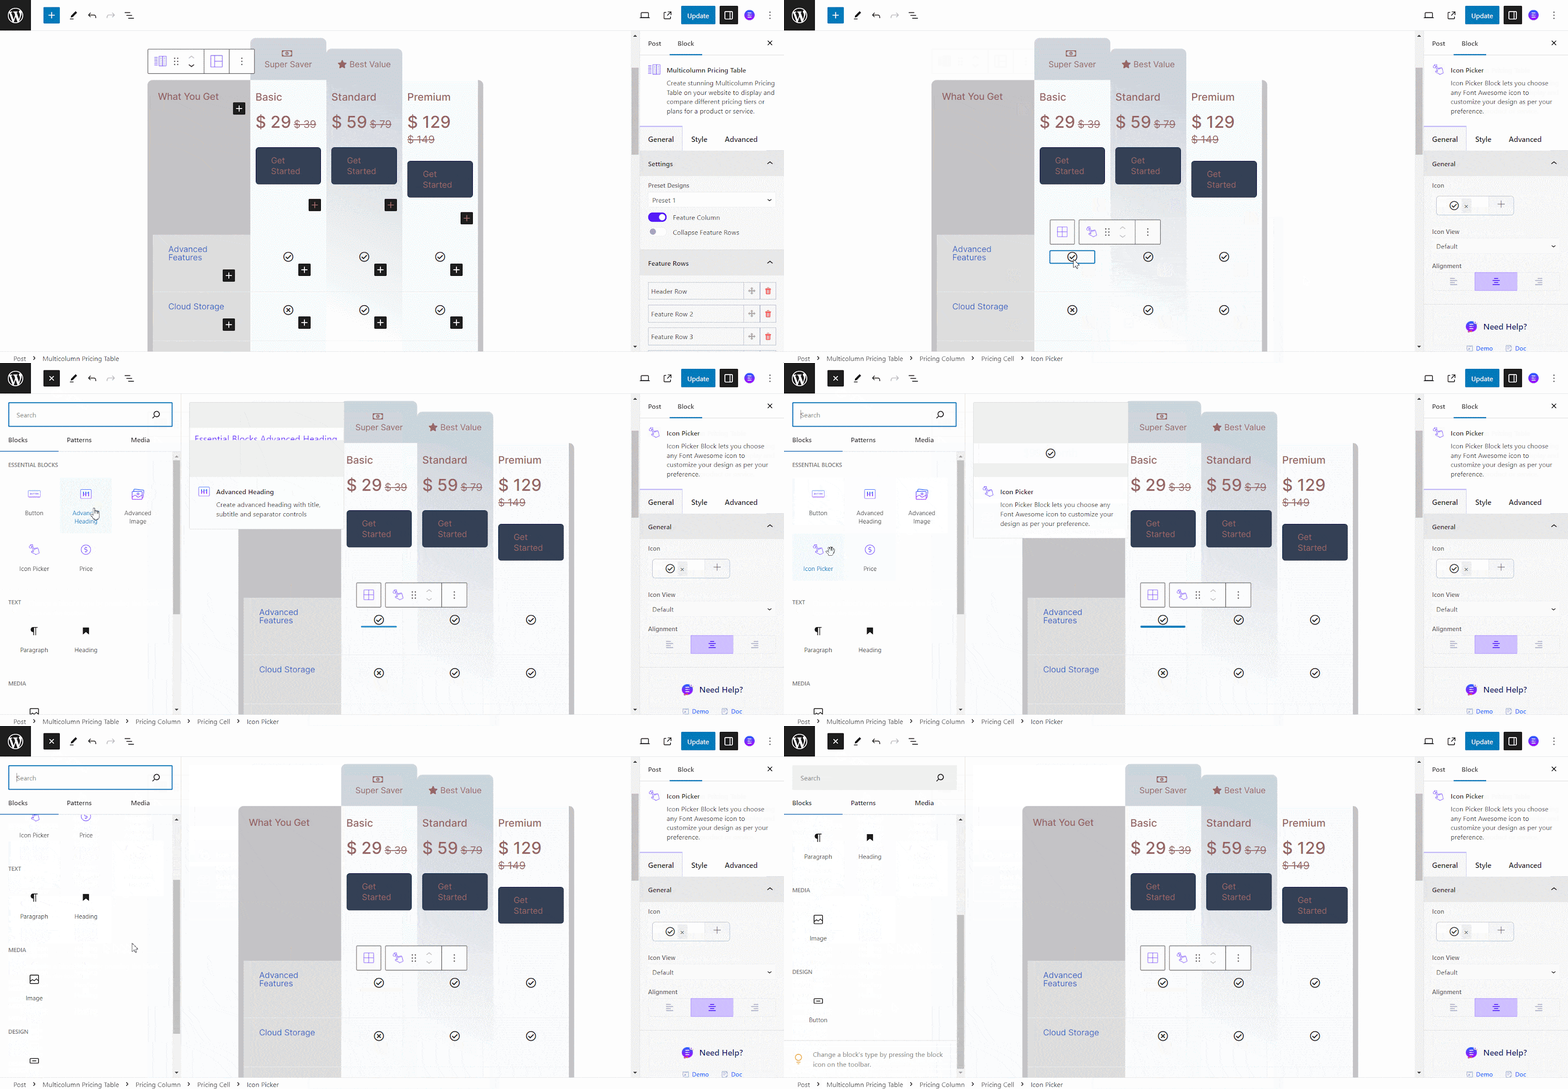
Essential Blocks has introduced an Icon Picker and Price blocks alongside other advanced blocks for this Multicolumn Pricing Table. These blocks help display a suitable icon for your pricing table.
Customize Pricing Table Rows & Columns #
The Feature Row option from the Multicolumn Pricing Table lets you add or delete as many rows as you need. You can change the title of each row, reposition them with dragging options, and more.
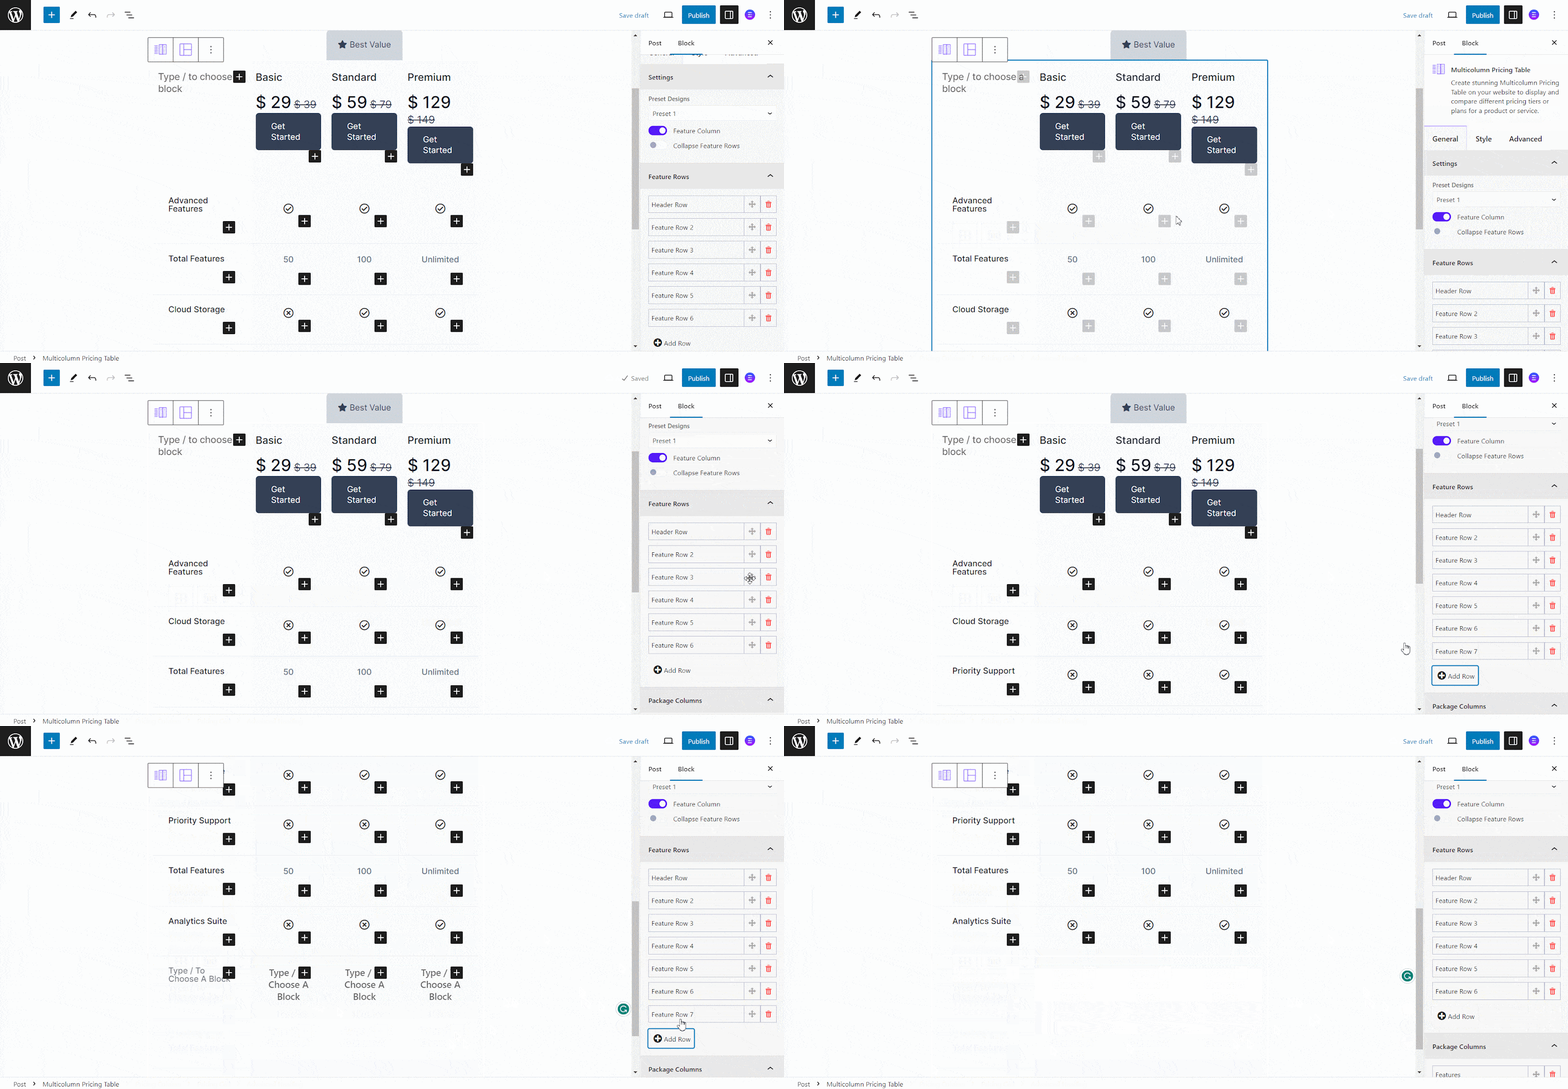
You can enable or disable the Collapse options with a single button for the rows. Keep in mind that this collapse feature is only visible for desktop devices. With it enabled comes the option to set the number of rows, icons, text, and more. This feature helps display the most advanced elements you want to highlight on your pricing plans while allowing visitors to expand to see all the available items in each column.

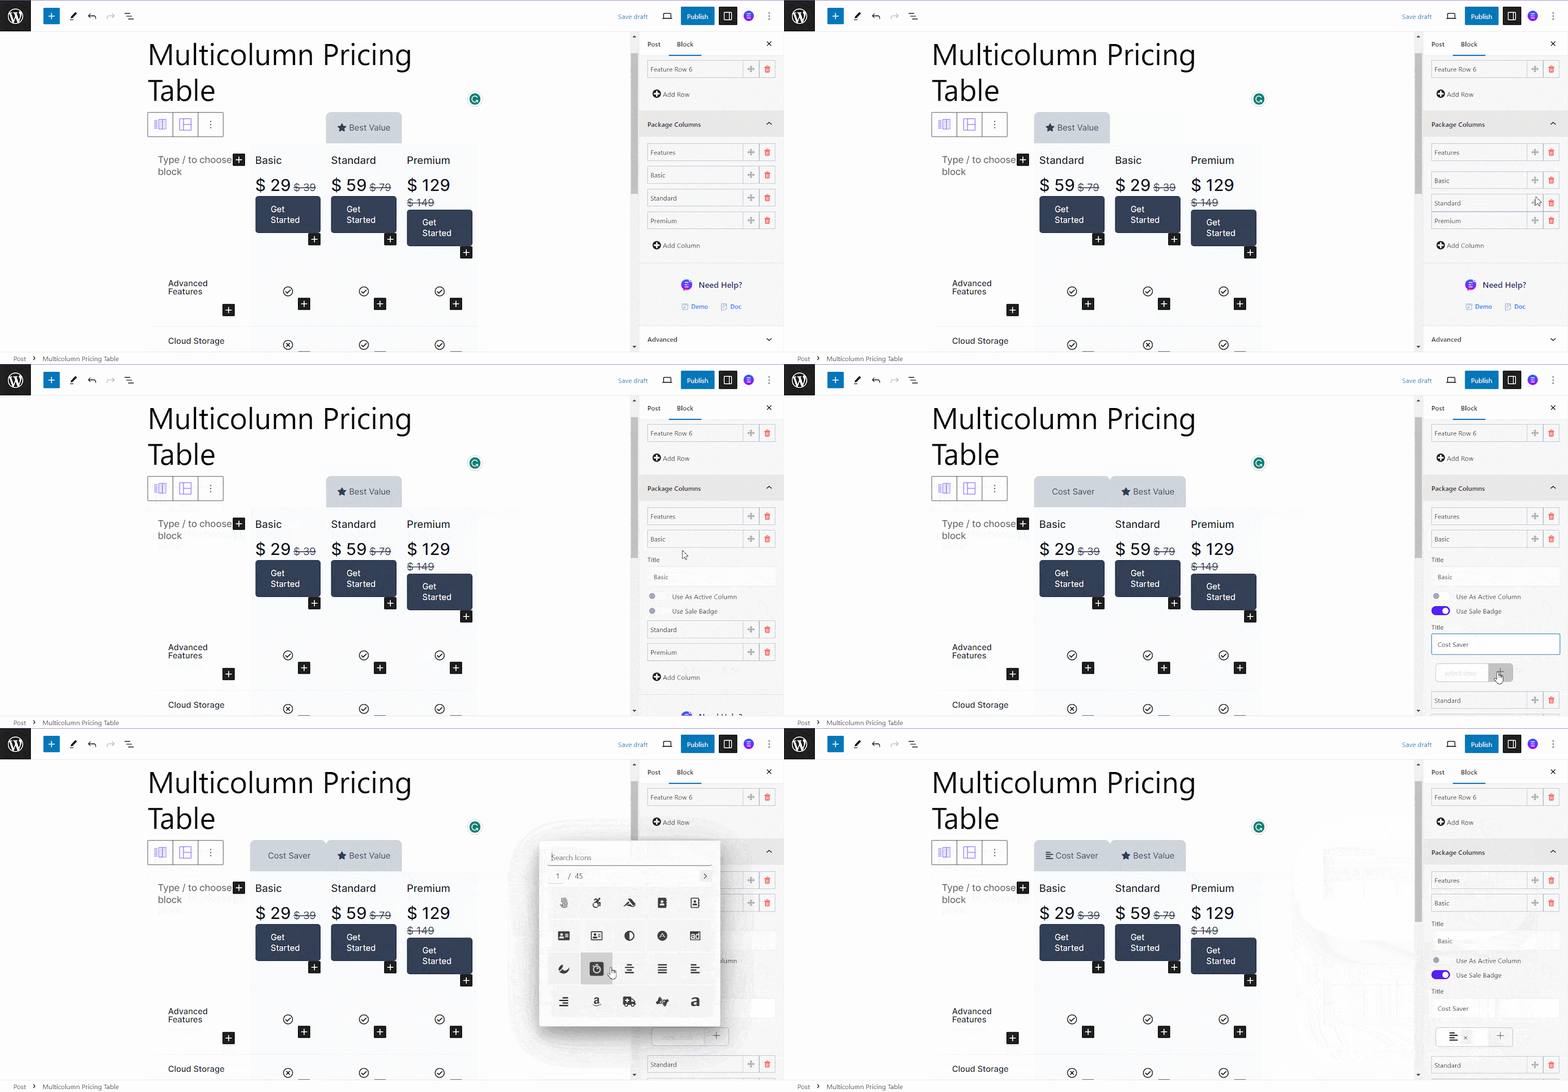
Like the Feature Rows option, you can add or remove columns and customize them to your needs. Additionally, you can choose an active column, add a badge, and use icons to design even more dynamically.
How To Style Multicolumn Pricing Table Style? #
After building your Multicolumn Pricing Table, you can design it with different colour and styling options to make it more interactive for visitors. Go to the ‘Style’ tab, and you will find options to adjust the margin and padding to align your table with the page position.
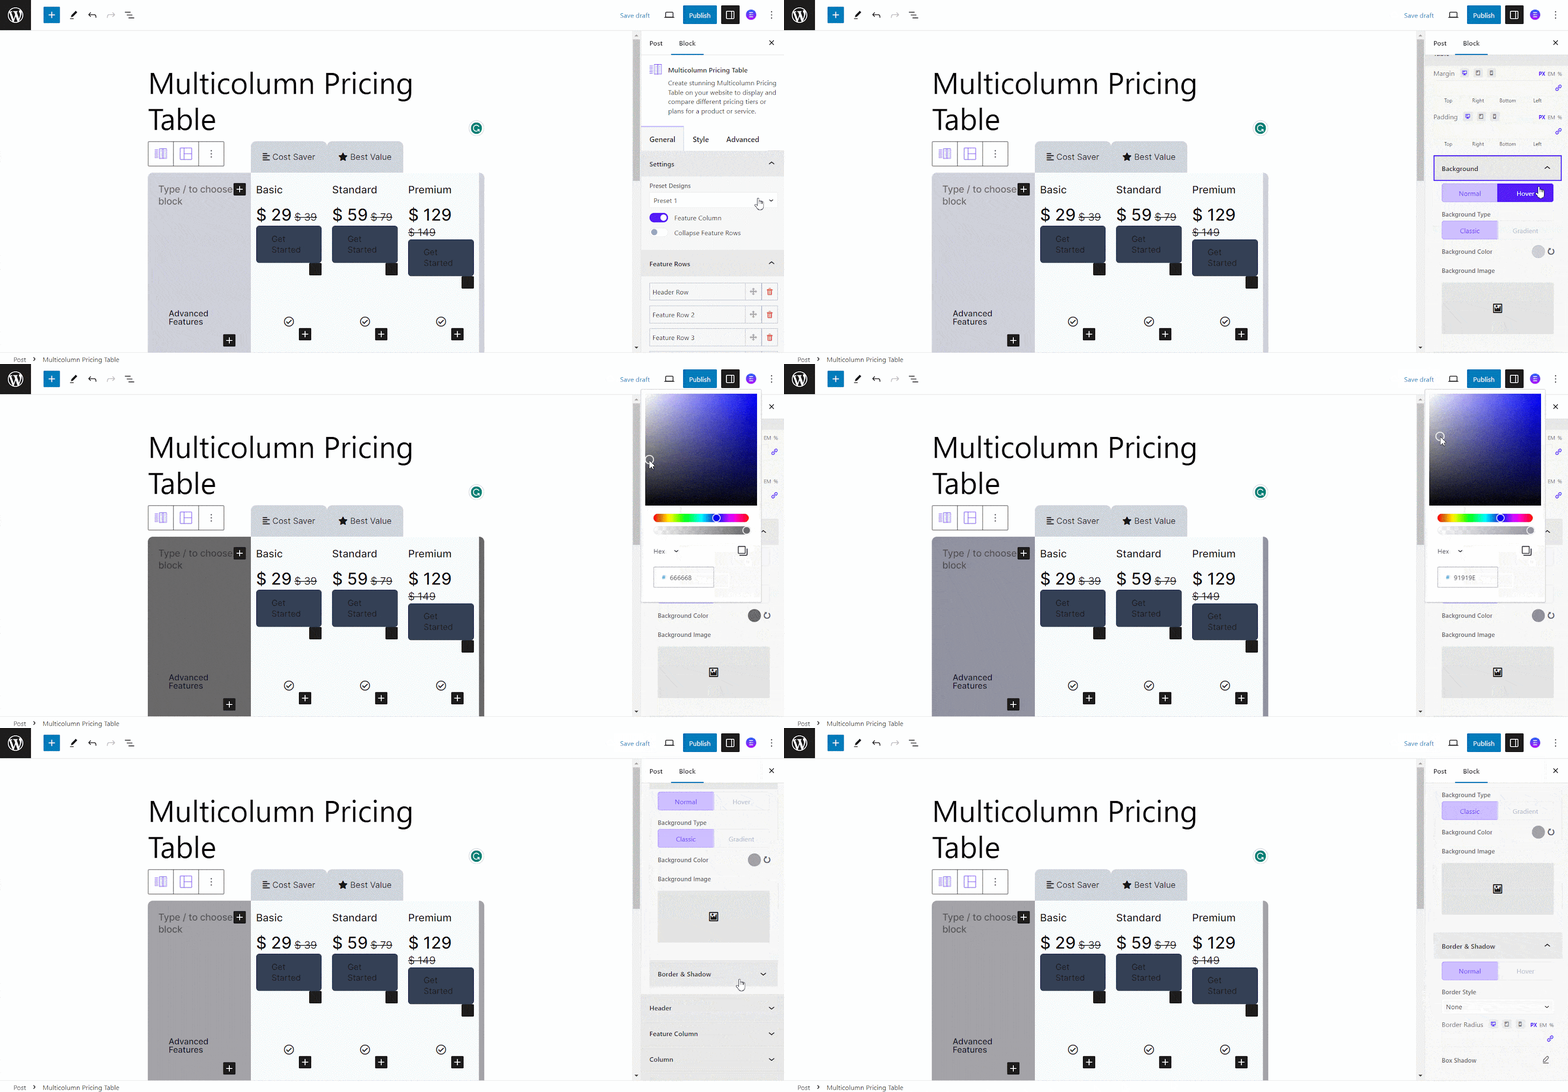
Additionally, you will have options to adjust the background color, border style, and more to make the perfect color combination and table adjustment for your pricing table’s elements.
However, the Multiple Pricing Table has a few unique design customization options in the Style tab, developed solely for this block, including Column, Body, Sale Badge, and Collapse Button. You will find alignment, color, and design options to design the table elements separately as you see fit.

Advance Settings #
If you are done with the General and Styles tabs, you can customize your pricing table further with hover effects, animation options, background images, overlays, border styles, screen options, and more on the Advanced tab.

Final Outcome #
After you are done adding all the rows, columns, and designing according to your preferences, publish your page/post.
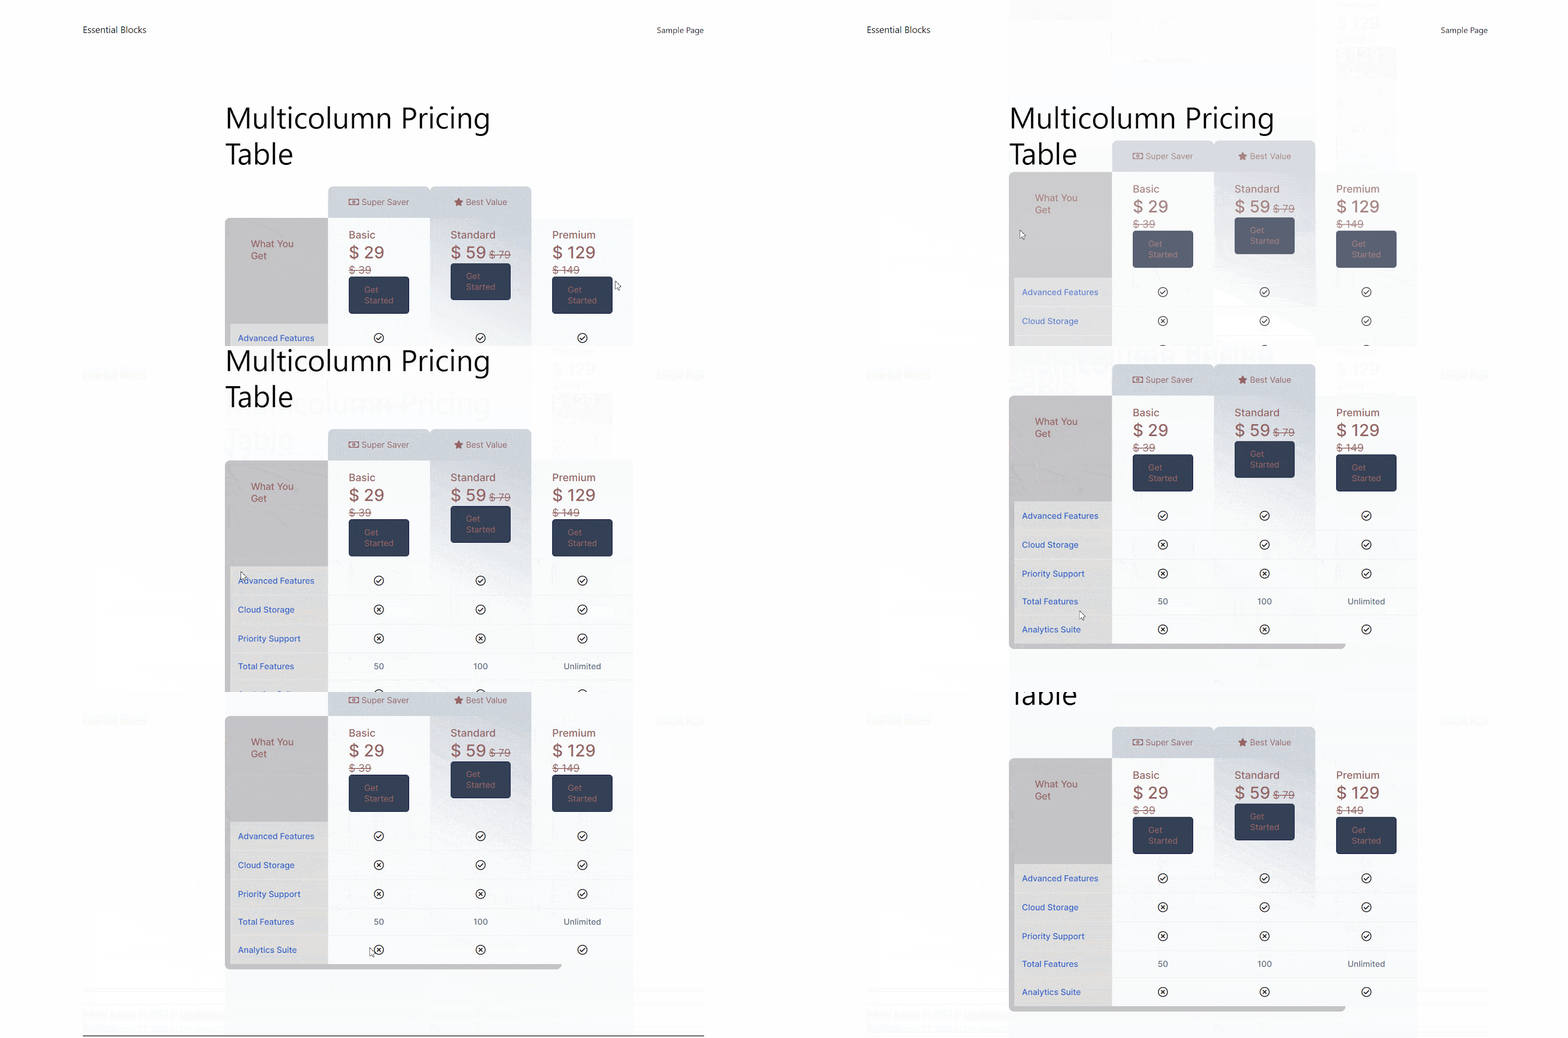
Thus, following the simple steps, you can quickly add and configure the Multicolumn Pricing Table on your website.
This is how easily you can design and configure a Multicolumn Pricing Table block in Gutenberg.
Getting stuck? Feel free to contact our support for further assistance.


