With EB Woo Product Grid, you can easily showcase your WooCommerce products anywhere on your website with amazing styling & customization options. This Gutenberg block can give your online store an eye-catching look that boosts sales.
Follow the step-by-step guidelines to add Essential Blocks Woo Product Grid using Gutenberg.
Note: Before starting with the EB Woo Product Grid, you have to install & activate the WooCommerce plugin on your WordPress dashboard. After that add & save any product on your site easily.
How To Activate Essential Blocks Woo Product Grid? #
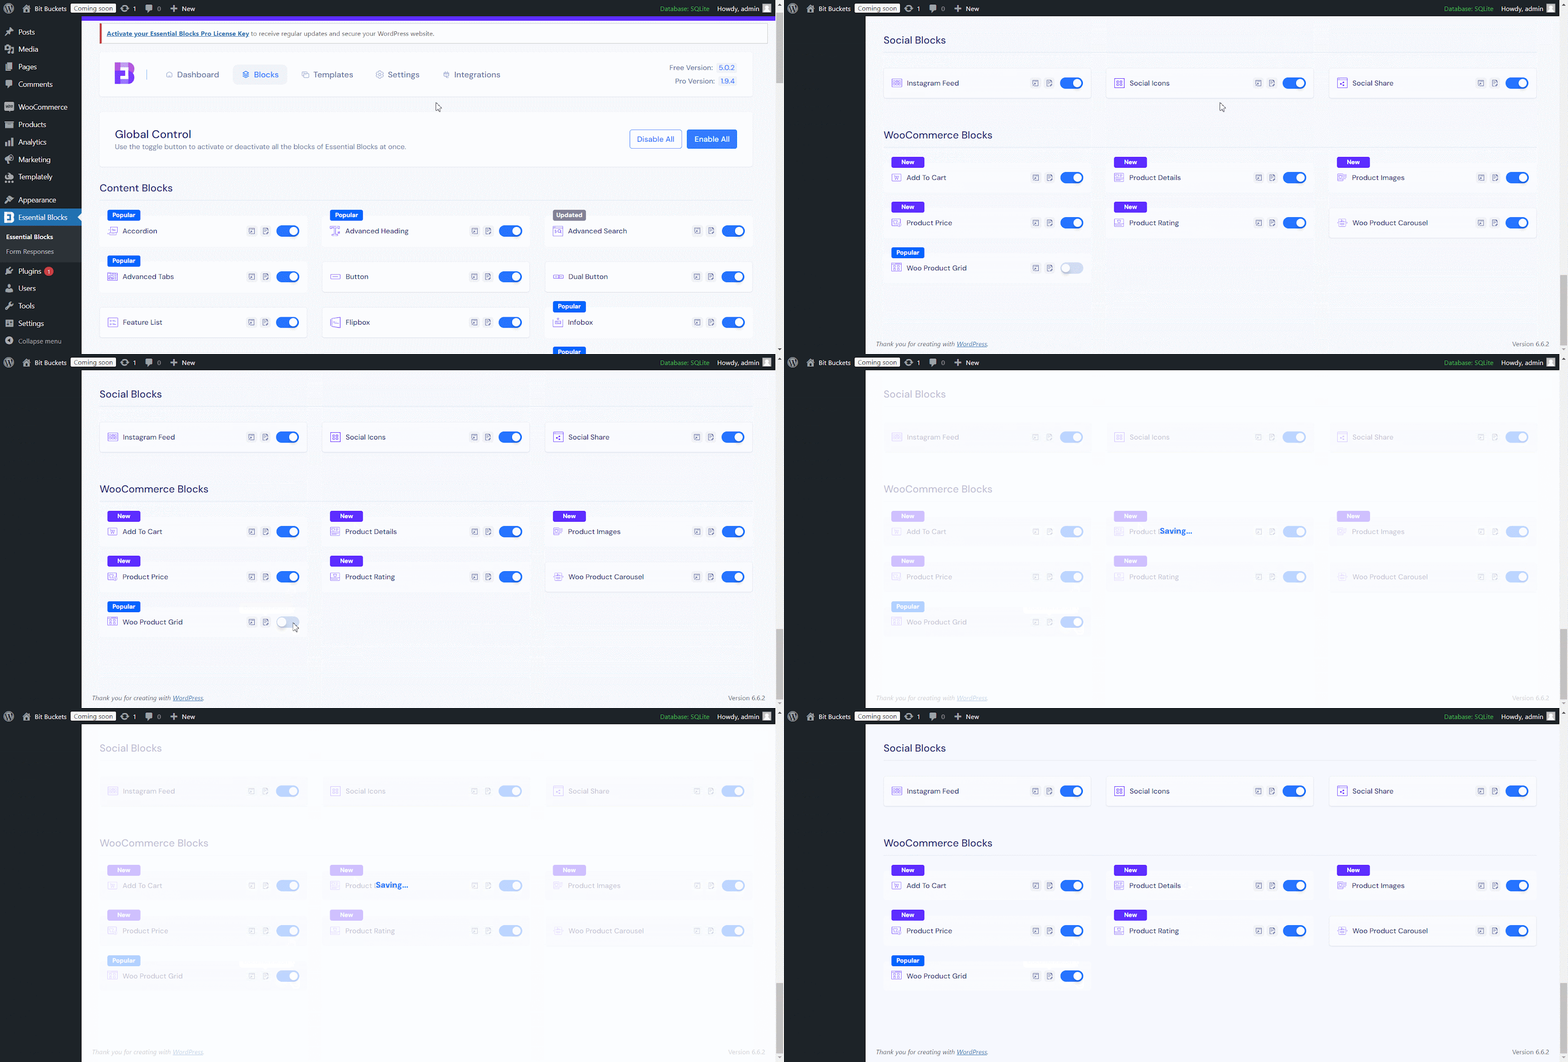
To activate EB Woo Product Grid, navigate to ‘Essential Blocks → ‘Blocks’. Then, toggle to enable this ‘Woo Product Grid’ block and the block will be automatically saved.
How To Configure Essential Blocks Woo Product Grid? #
First, navigate to WordPress dashboard Page → Add New and create a new or select the page if you already have a created one where you want to add a WooCommerce Product Grid in Gutenberg.
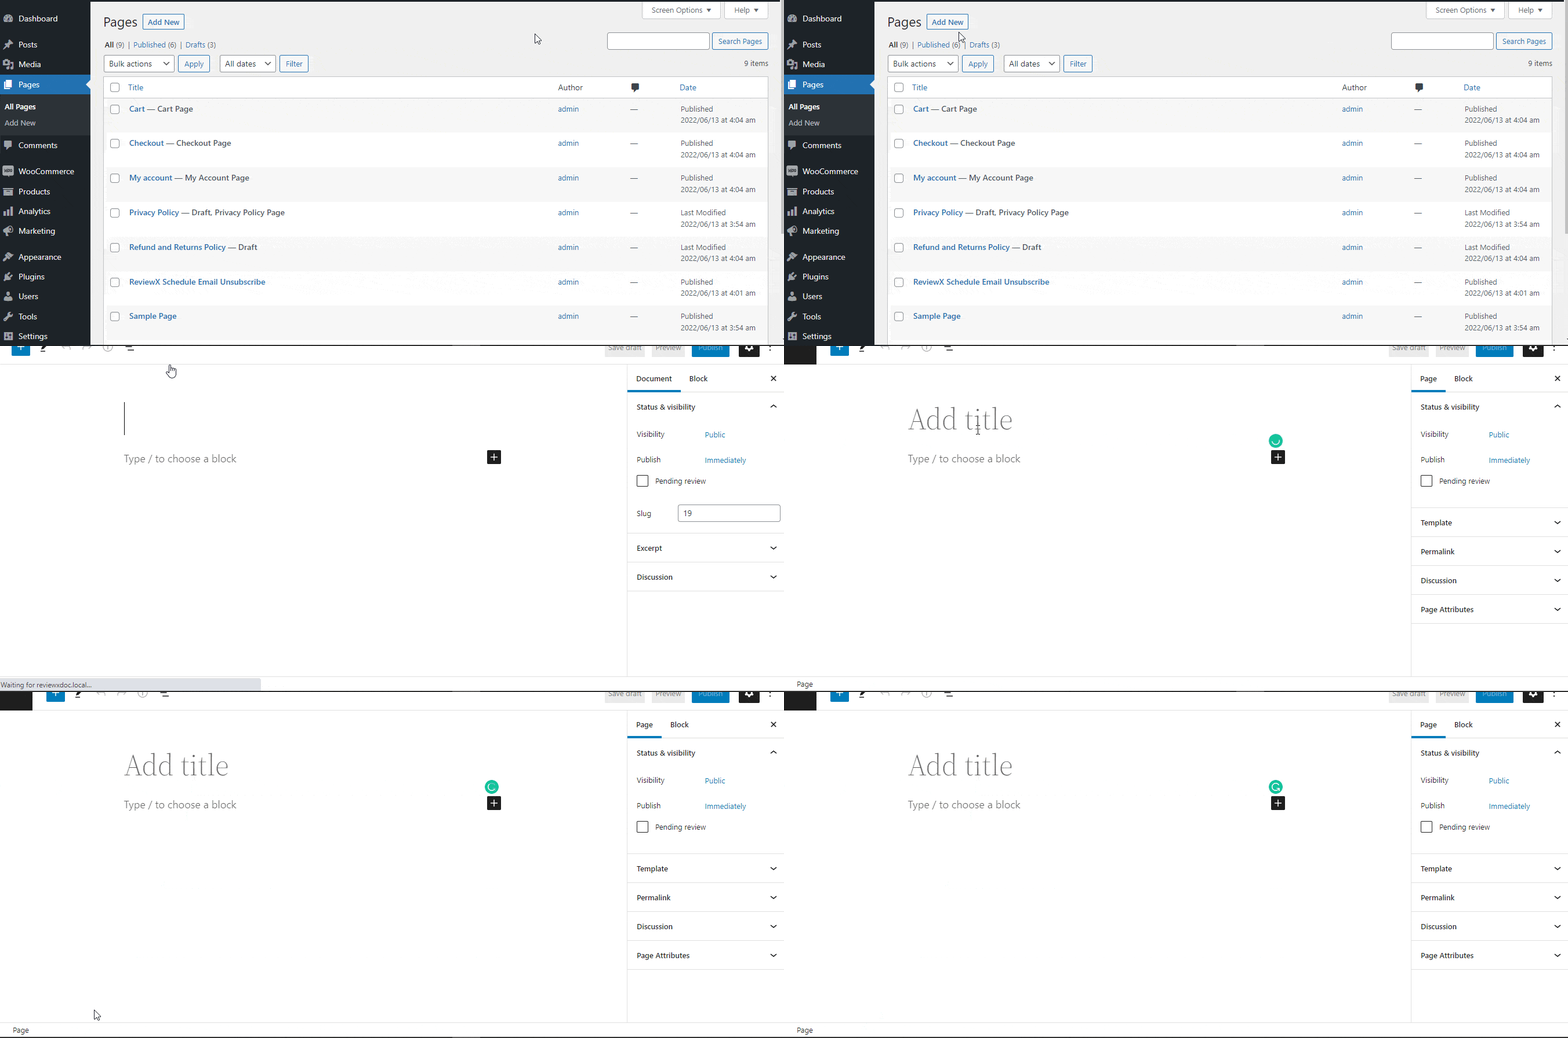
To add the Essential Blocks element, click on the ‘+’ icon. Find ‘Woo Product Grid’ from the search bar. Simply click on the block and it will be added.

Alternatively, you can click on the ‘+’ icon and search ‘Woo Product Grid’ at the search bar, and you will get the block. Simply drag and drop the block as shown.

After you have inserted the block, You will get two options: ‘Choose’ or ‘Start blank’. Select ‘Start blank’ and a default layout will appear on the page.
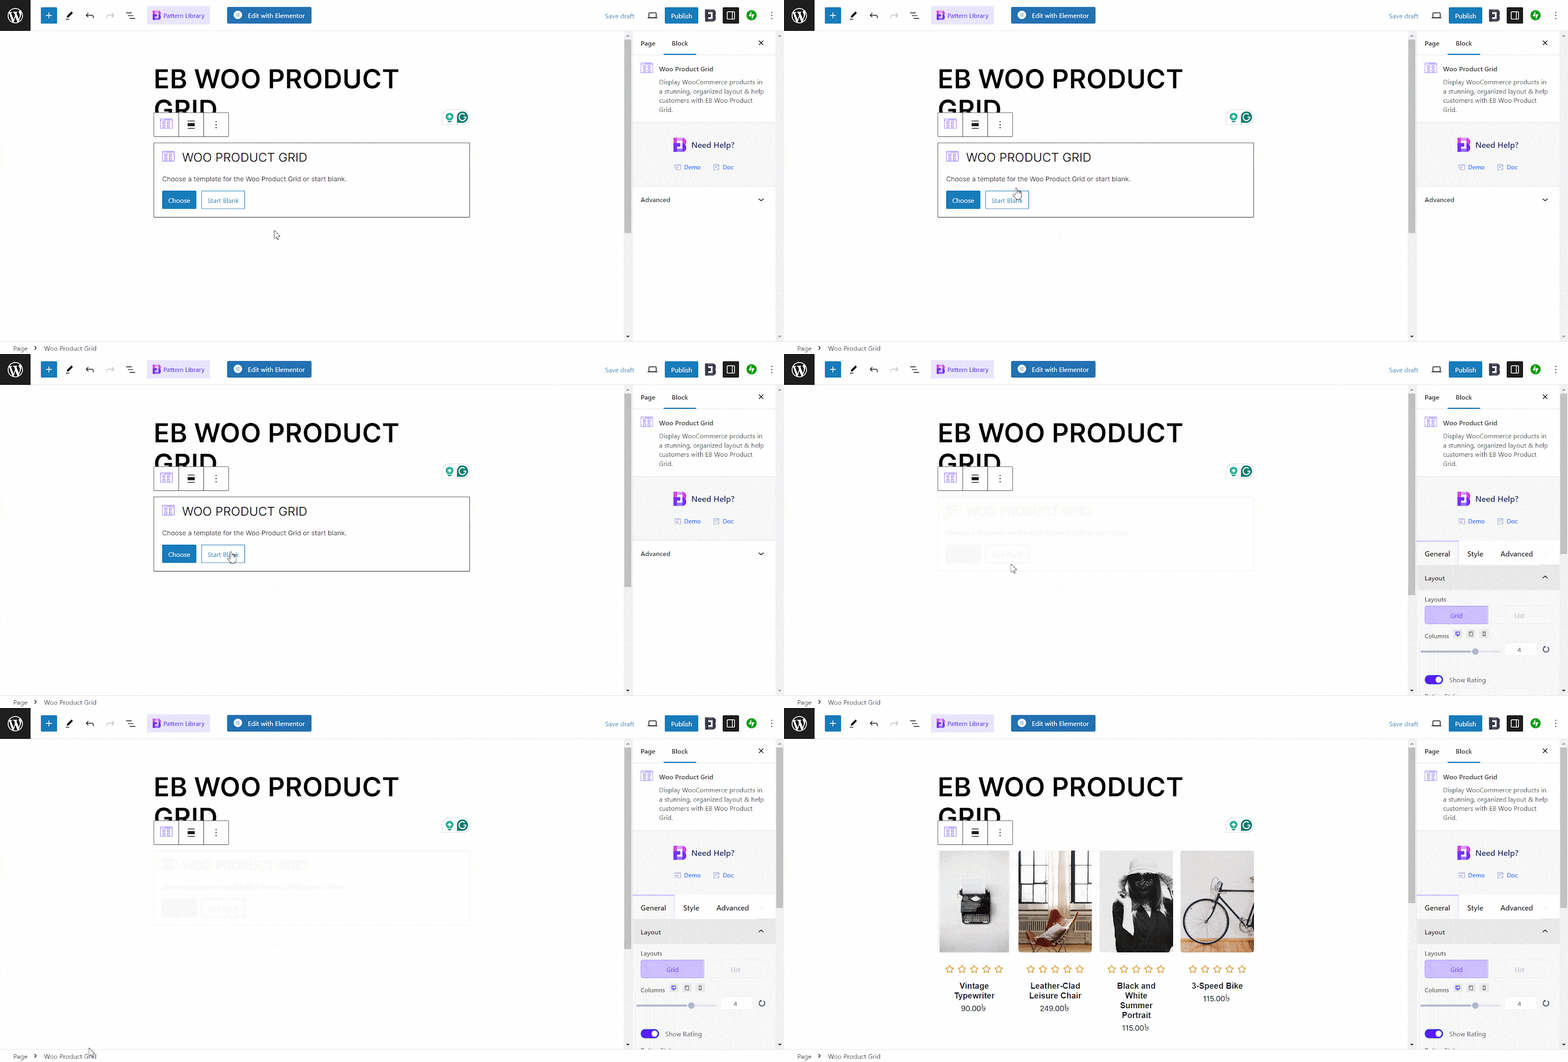
On the other hand, select ‘Choose’ to access the premade Product Grid Templates. You will have 4 Woo Product Grid templates to set team member profile. Pick the one that suits your needs.
Now, click on the settings icon. A side panel will appear on the right side of your page. From here, you can configure and personalize the contents and appearance of the EB Woo Product Grid.

General #
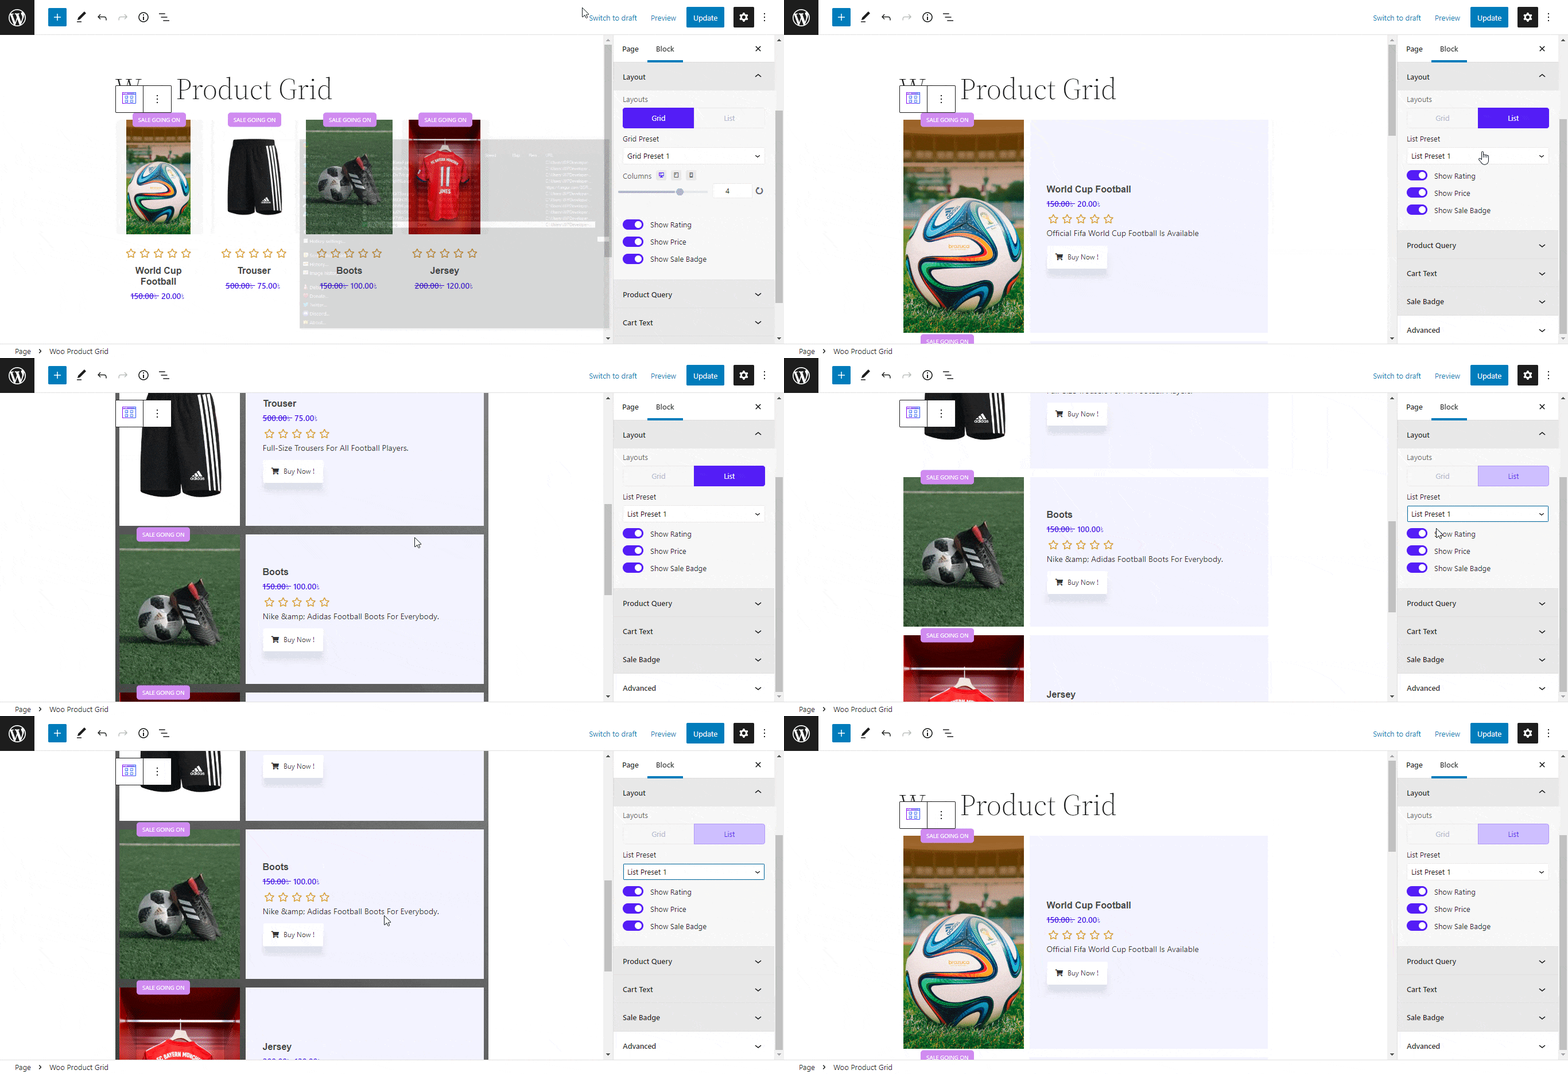
Go to the ‘General’ tab to set the content. Pick your layouts between ‘Grid’ or ‘List’. Choose Woo Product Grid block layout from the available 3 ‘Grid Presets’. You can also enable rating options, pricing, sale badge, etc for your products. Also, properly align your ‘Columns’ placing as you want. You can increase the amount of ‘Columns’ up to 6 columns.
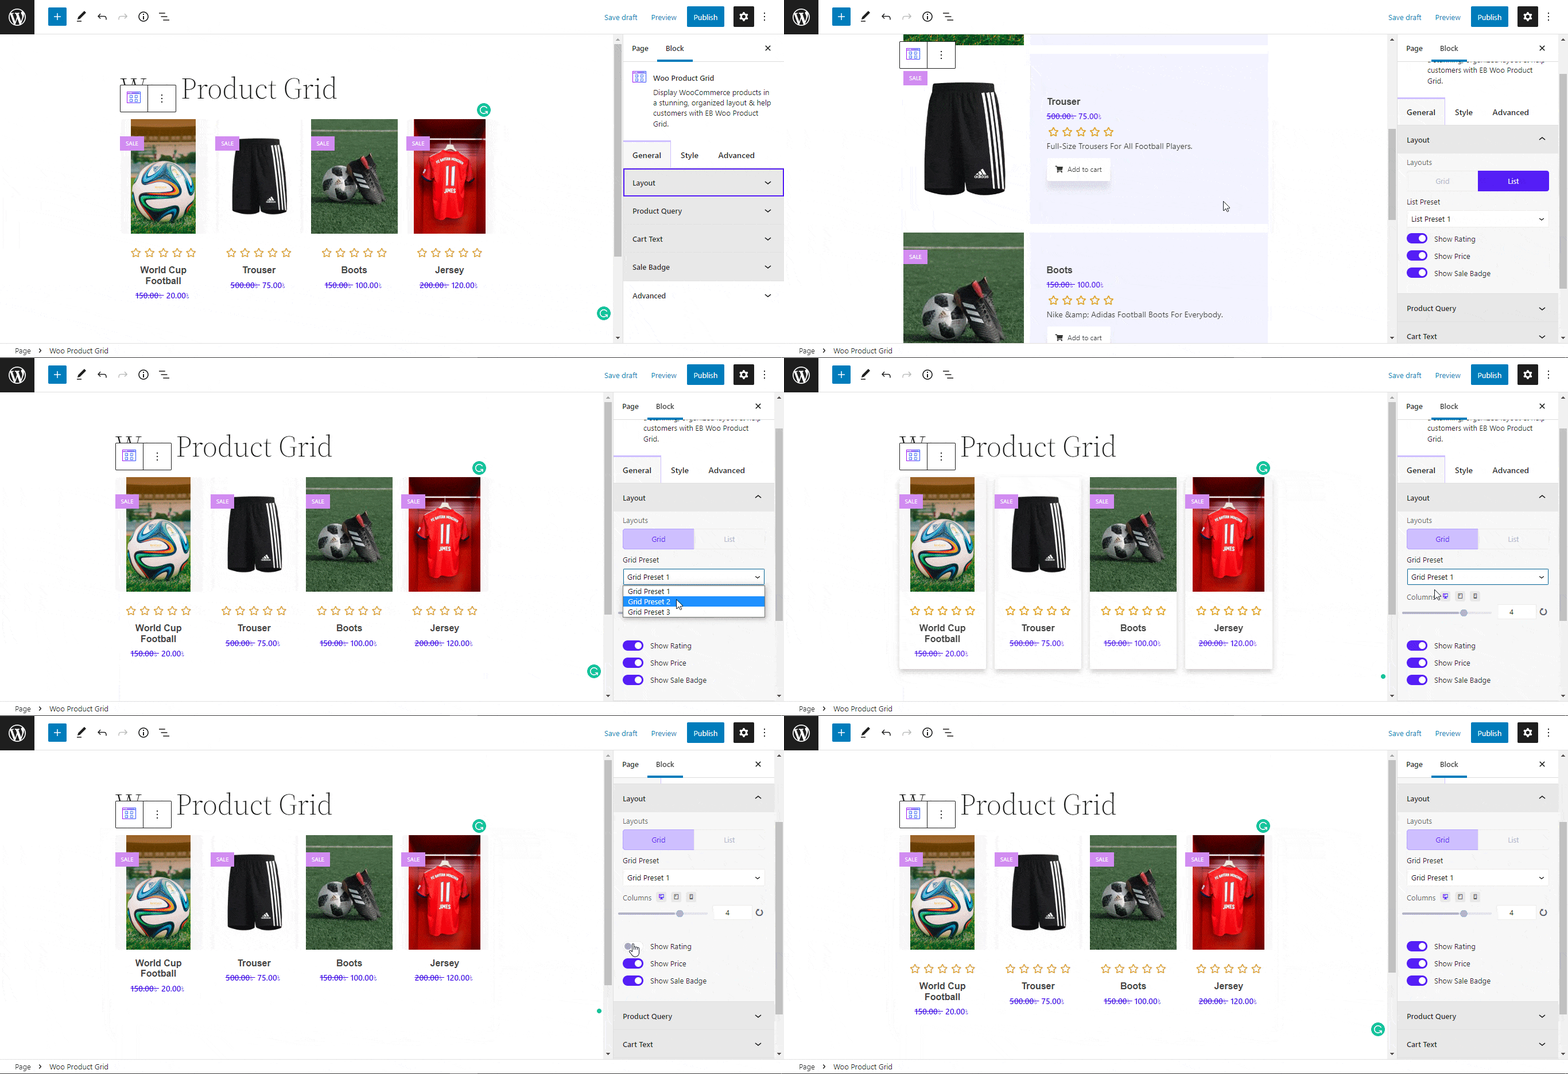
You can also showcase your ‘Woo Product Grid’ block as a ‘List’ layout to make your products more detailed. Also, you will have the option to enable your ‘Product Rating’ & ‘Product Price’. You can put your ongoing ‘Sale’ badge on the list preset very easily.
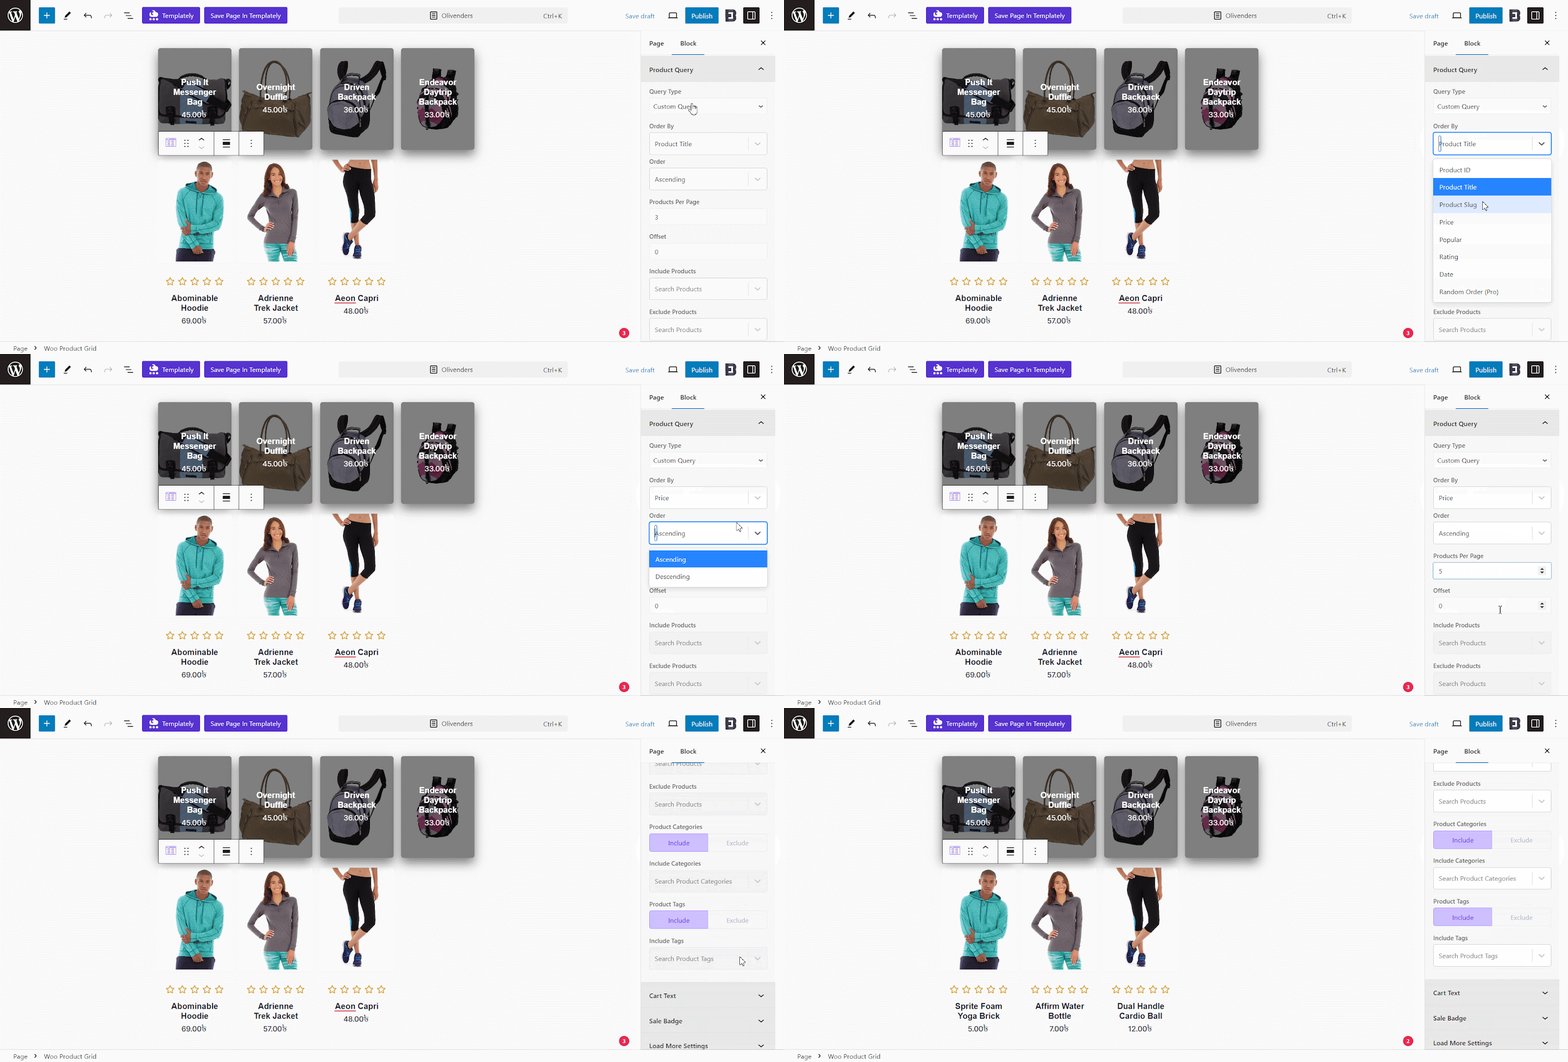
Under the ‘Product Query’ tab, you will get two options ‘Custom Query’ and ‘Related Products’.Choose the ‘Custom Query’ option from the drop-down menu and sort your products by ascending or descending, date, order, categories, tags, etc.
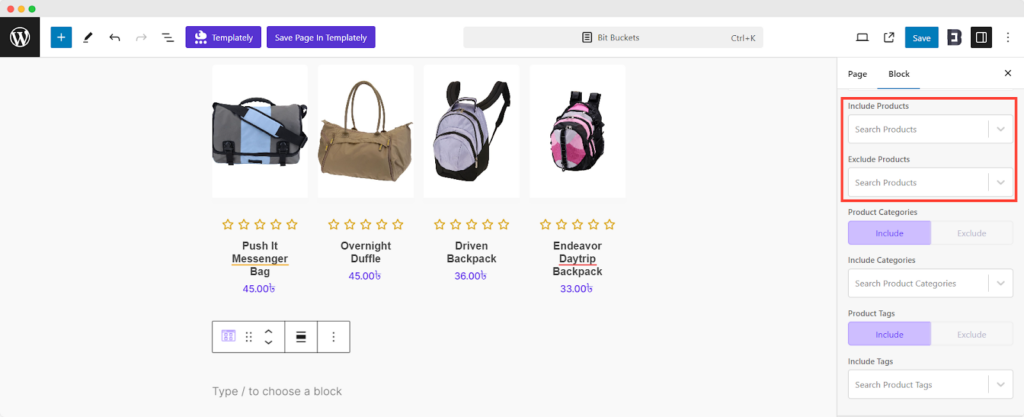
If you want to include any particular product in this list click on the ‘Include Product’ and choose the products and if you want to avoid showcasing any specific products in your list just add them buy clicking on the ‘Exclude Products’.
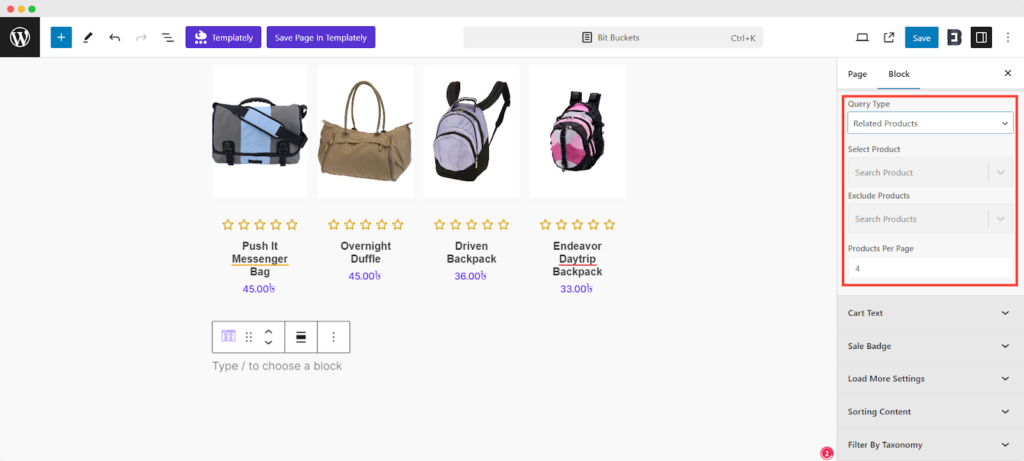
Now choose the ‘Related Products’ option and adjust by choosing the ‘Select Product’, ‘Exclude Products’, and the number of products we want to showcase here.
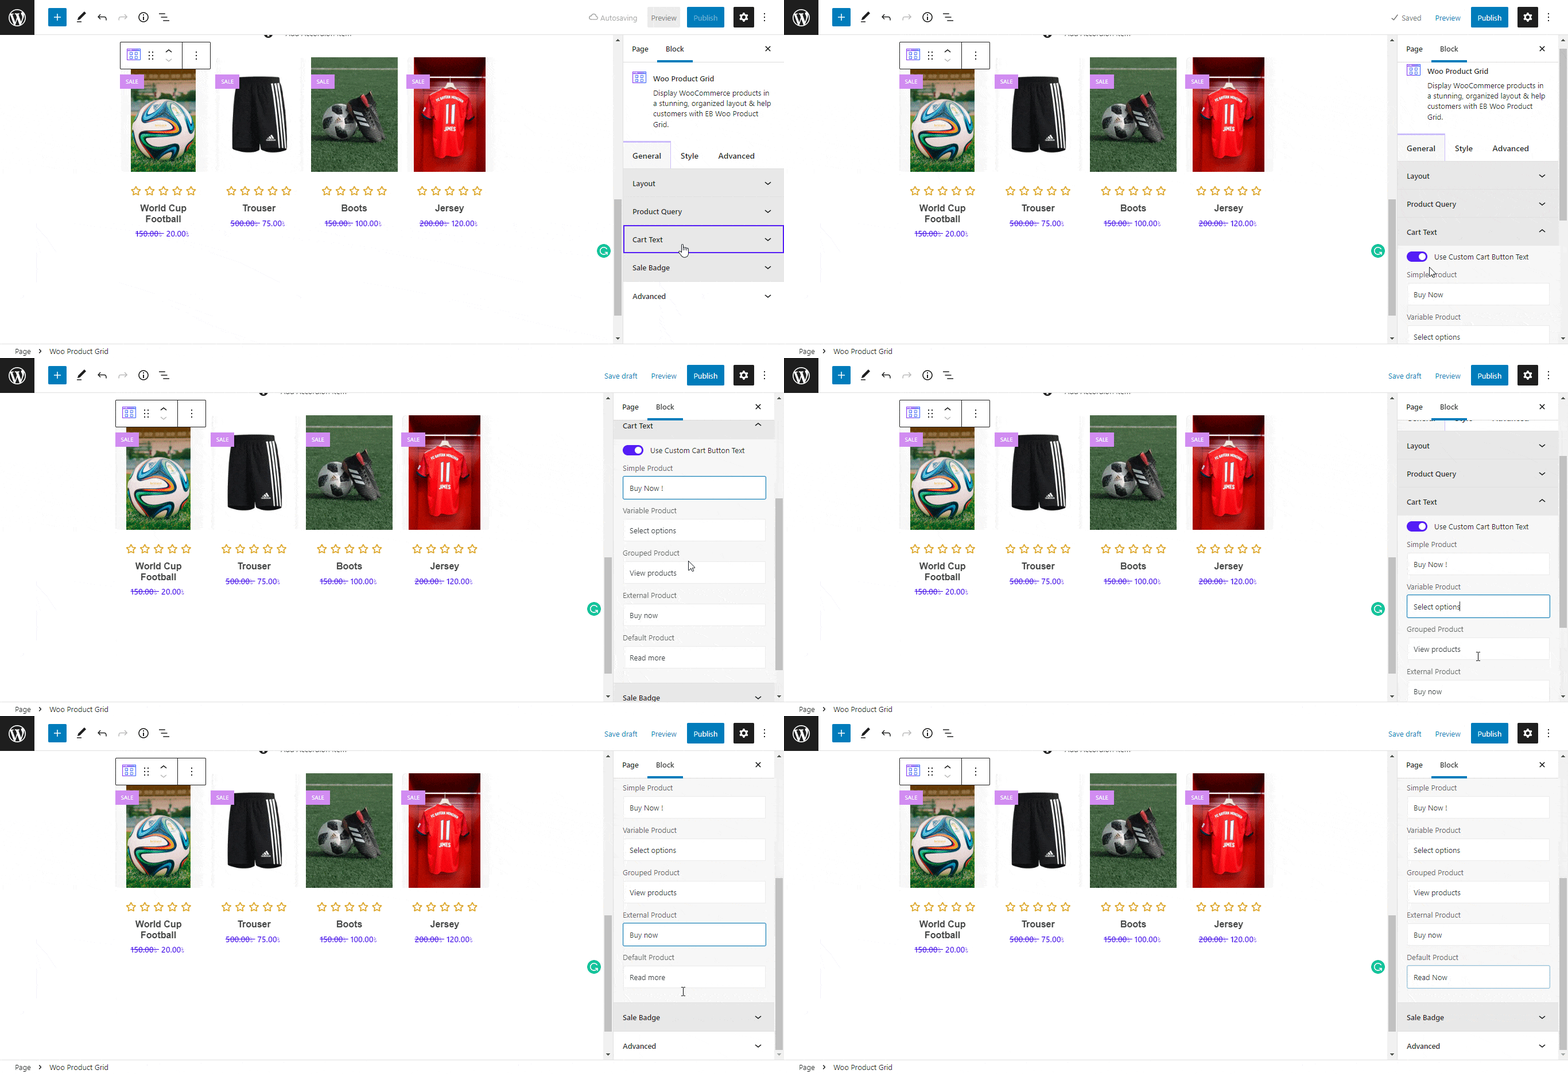
Go to the ‘Cart Text’ tab & enable ‘Use Custom Cart Button Text’ to write any customized text you want.
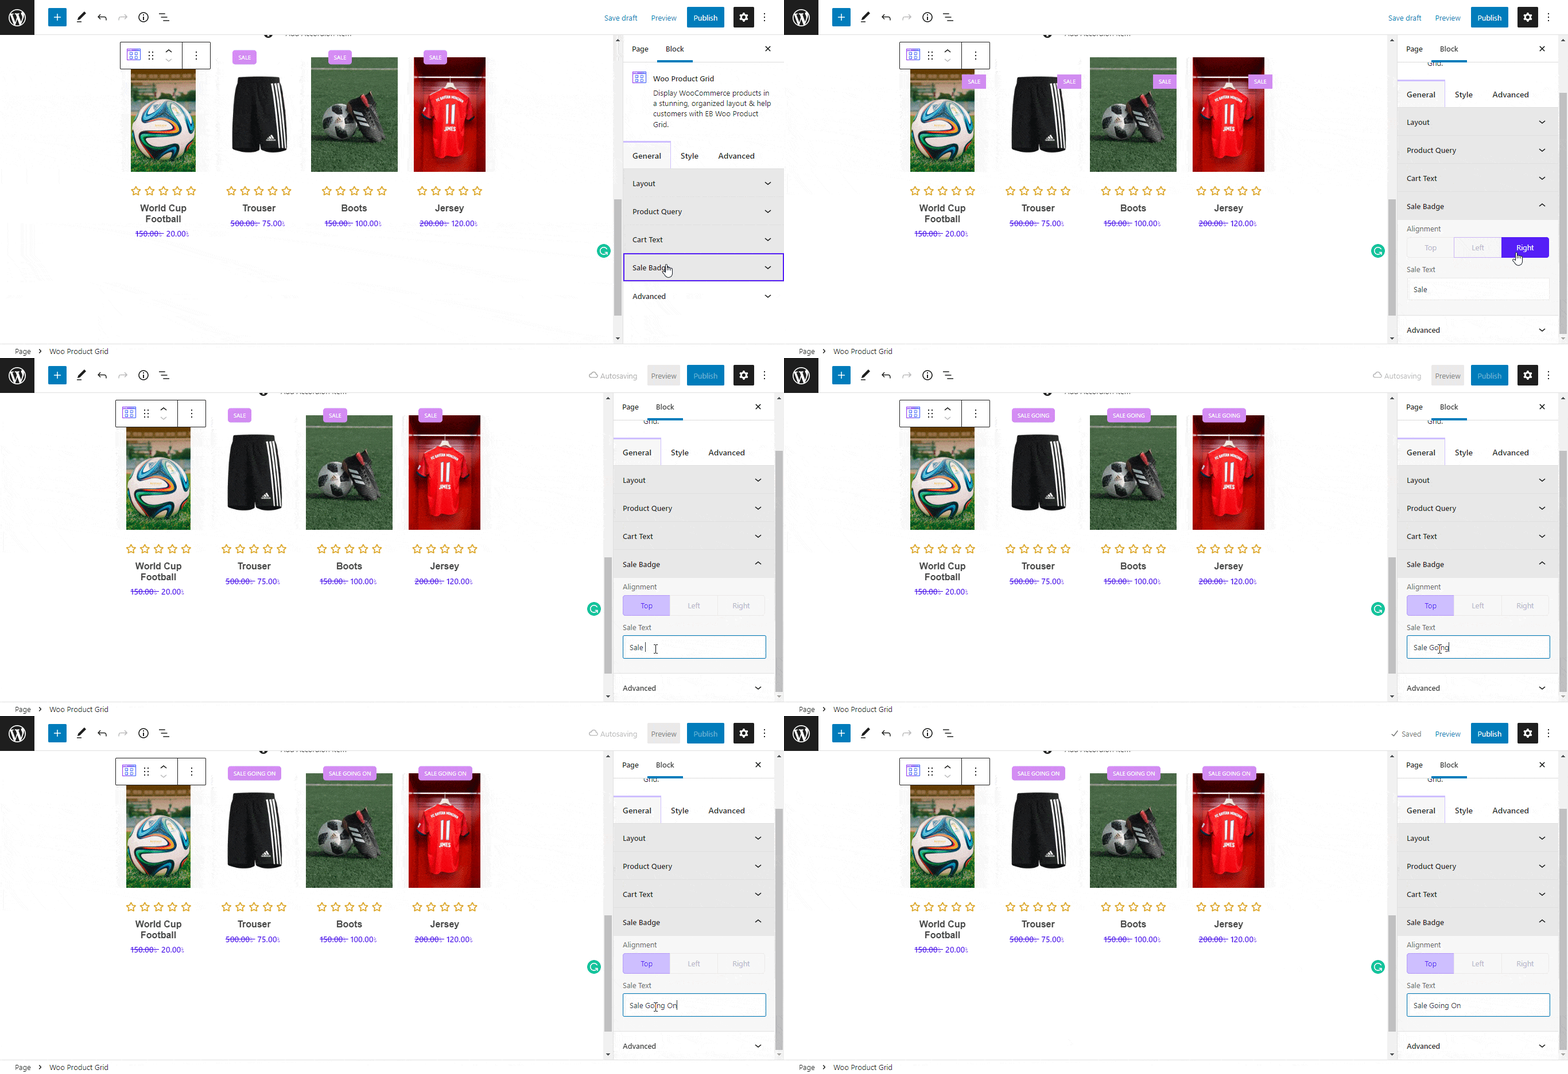
Properly align your ‘Sale Badge’ on the product to make the outlook more interesting. You can also write customized sales-related ‘Sale’ text.
Under the ‘Load More Settings’ you will have multiple options to add more posts. Simply toggle on the ‘Enable Load More Options’, and choose your preferred navigation appearance. You can also change the ‘Button Text’ as well with proper button alignment.

Styles #
From the ‘Styles’ tab, personalize Woo Product Grid block appearance. Content Alignment, and Image Positioning to give your website a gorgeous view.
You can also tweak the Product Title, Price, Rating Color or Spacing, Button, Sale Badge Style, etc to attract more potential customers. Try to keep all these settings similar to your website’s tone and theme.

Advanced #
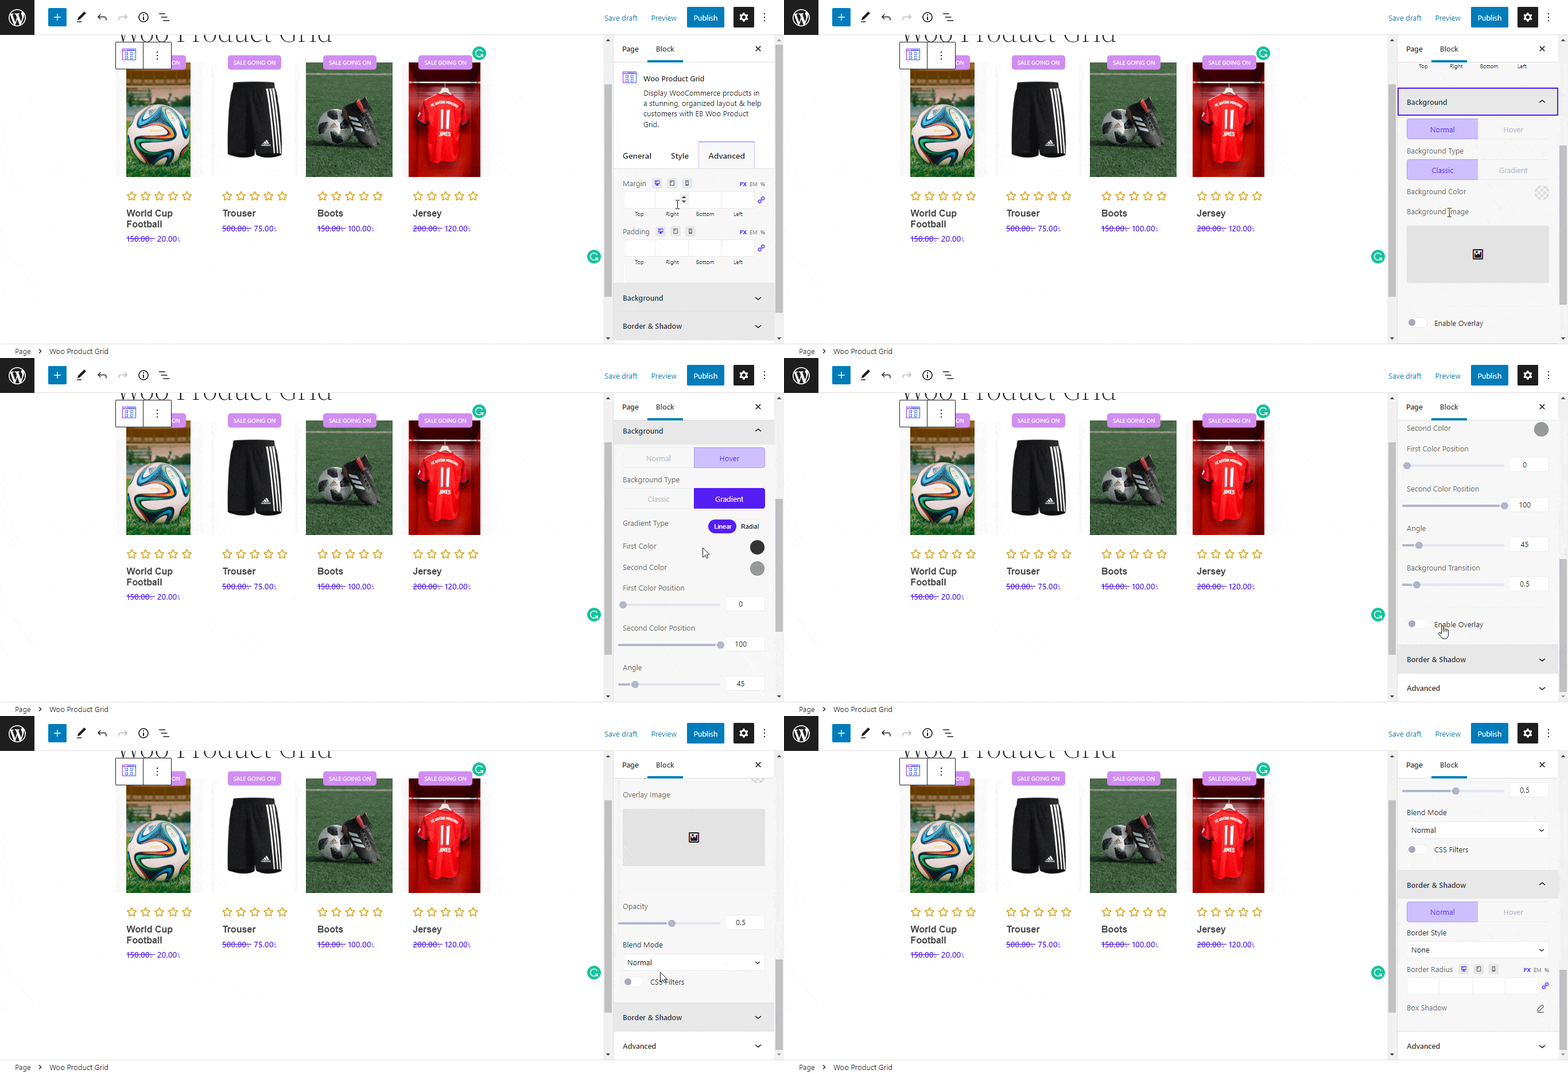
From the ‘Advanced’ tab, you can make the appearance of the tabs more interactive and appealing. Here, you can change Margin, Padding, Background type, color and image, Border & Shadow, etc. Multiple advanced block design customization options are available there.
Final Outcome #
By following the simple and easy steps, you can add the EB Woo Product Grid block and style it in Gutenberg.

Here’s how you can easily set up and design the EB Woo Product Grid in Gutenberg.
Got stuck? Feel free to contact our support for further assistance.


