With Essential Blocks’ AI Image Generator feature, you will get support for creating stunning AI images right inside the Gutenberg block editor. You won’t have to create images with external tools and then upload them to the website. All you have to do is write precise prompts and get ready images in seconds. Generate ready AI images for Essential Blocks image-supported blocks, as well as for default Gutenberg blocks.
How to Connect OpenAI with WordPress & Configure AI Image Generator? #
To use the AI Image Generator for your Gutenberg editor, you have to connect to the OpenAI API on your WordPress website. Follow the step-by-step guide to learn how to configure AI Image Generator in your WordPress website.
To generate an image with AI, you have to integrate an OpenAI API key into Essential Blocks. In Essential Blocks, AI image generation is completely free, but to integrate with the OpenAI API key, you need the OpenAI premium version and collect the key from the platform. There are different pricing options based on the image quality. Check the documentation to learn how to generate pricing-optimized AI images.
Step 1: Enable the ‘Generate AI Images’ Feature #
From the Essential Blocks dashboard, navigate to the ‘AI Suite’ tab. Then, toggle the ‘Generate AI Images’ to enable the feature.
Note: You can set the max tokens for generating an image in the ‘Set Max Tokens’ field. By default, you will get 1500 tokens.

Step 2: Log in to the OpenAI Account And Collect the Key #
To get the API keys, go to the OpenAI platform page. After that, log in to your OpenAI account to get the API key.
After logging in from your account dashboard at the top right side, you will find a button named ‘Create new secret key’. Click the ‘Create new secret key’ button.

Note: To use the OpenAI API, your account must have available credit. You can review billing here.
Type the name that fits your preference and hit the ‘Create secret key’ button. Your secret key will be generated automatically and instantly.

After getting the secret key, you will find a copy button beside the key. Click on that and your key will be copied.

Step 3: Connect OpenAI with Essential Blocks #
Get back to your WordPress dashboard, and then the Essential Blocks AI Suite tab. Just paste your key into the ‘API Key’ field. Then, hit the ‘Save Changes’ button as shown below.

How to Use AI Image Generator And Create New Images with Essential Blocks #
With AI image generator feature of Essential Blocks, you can generate images in image-based blocks such as Advanced Image, Image Comparison or other blocks.
From the WordPress dashboard, open a page or post where you want to generate an image. Here, select the ‘Advanced Image’ block from Essential Blocks. From there, select the ‘Custom Image’ option. There, you can either click on the ‘Generate with AI’ button or the icon in the block.

After that, click on the ‘Generate with AI’ button to get the option to add a prompt and customize the settings. Provide your prompt and all necessary details here.

Here is the breakdown of the options you will get in the Essential Blocks AI Image Generator.
- Prompt: In this where you will write a prompt to generate the image you want. Try to be as descriptive as possible.
- AI Model: Choose which type of model-generated image you want to show in your post. Here, you will find 3 models: DALL-E-2, DALL-E-3, and GPT-Image-1.
- Number of Images: The number of images you want to generate with the prompt. With the model, this number changes accordingly. For DALL-E-2 and GPT-Image-1, you can generate up to 10 images, whereas in the DALL-E-3 model, you can generate only one.
- Image Category: What category of image do you want to generate? To generate the image accurately based on your prompt, you can select a specific category. Currently available categories are: Photographic, Vector, Background, Handmade, Digital Art, Product & 3D.
- Type: Select the type of image you want to display. You can choose Landscape, Macro, Portrait, and Long Exposure types.
- Image Size: Choose your preferred image size. The image generation pricing will differ for different image sizes.
- Image Quality: Select the quality type of image you want to generate. You can choose High, Low and Medium quality images. The pricing will be higher based on the quality of the image.
- Image Style: Choose do you want to add any style to your image. You can add a Vivid or Natural style image.
- Output Format: Choose the format of the image. By default, it will be selected Auto; you can also choose JPEG, PNG, or WEBP format.
- Output Compression: Choose the resolution of the image. You can choose High, Medium or Low resolution image. Your pricing will depend on the resolution you choose.
- Background: Select a specific background for your image. You can choose the default, Transparent or Opaque background image.
To generate the image, add the prompt and choose your preferred settings from the dropdown. Then click on the ‘Generate Now’ button to generate the image.

Based on the number of images you have selected, your images will now be generated. Click ‘Use Image’ to insert it into your post. You can also save the image in the Media Library for later use.
With your AI-generated image, you can also get an auto-generated caption, description, alt text, etc. for the image. From the right bar, enable the ‘Display Caption’ button and you will see that there is an automatically generated caption. You can also use AI to generate a new caption for the image.

How to Use AI Image Generator For Creating Vectors & Logos? #
With AI Image Generator, you can also generate images or icons for individual blocks that have image support. For this, from your blank post, select a specific block that requires an image. Here, we are generating an icon for the Info Box block.

In the right bar, navigate to Media and then select the Image tab. In the image option, you will find the button to Generate with AI. Click on that and by giving a prompt and selecting the preferred option, the image will be generated. You can insert this image into your block.

How to Use AI Background Images for Blocks? #
Apart from generating icons, you can also update a background image with AI. Every block that has background image support can be generated with AI. For example, blocks like Testimonial Slider or Parallax allow you to generate a background image with AI.
To choose an AI-generated background image, select the block and then from the right sidebar, go to the ‘Advanced’ tab. Then select the background menu. From there, click on the ‘Generate with AI’ icon and then give your prompt by selecting different options to get the background image.

How to Generate AI Images for Default Gutenberg Image Blocks? #
You can also create an AI-generated image in the Gutenberg default image blocks, such as Image or Image Gallery.
First, select the default image from Gutenberg blocks. Then, in the block, you will find the button to create ‘AI Image Generation’. After clicking there, you can add a prompt and image settings to generate the image.

How to Regenerate AI Images or Edit Them with AI? #
With Essential Blocks “AI Image Generator”, you can also edit or regenerate images with AI. You can either edit the AI-generated image or upload an image and edit it with AI. You will find four options to edit the image after clicking on the ‘AI Image Generator’ icon on the image block.
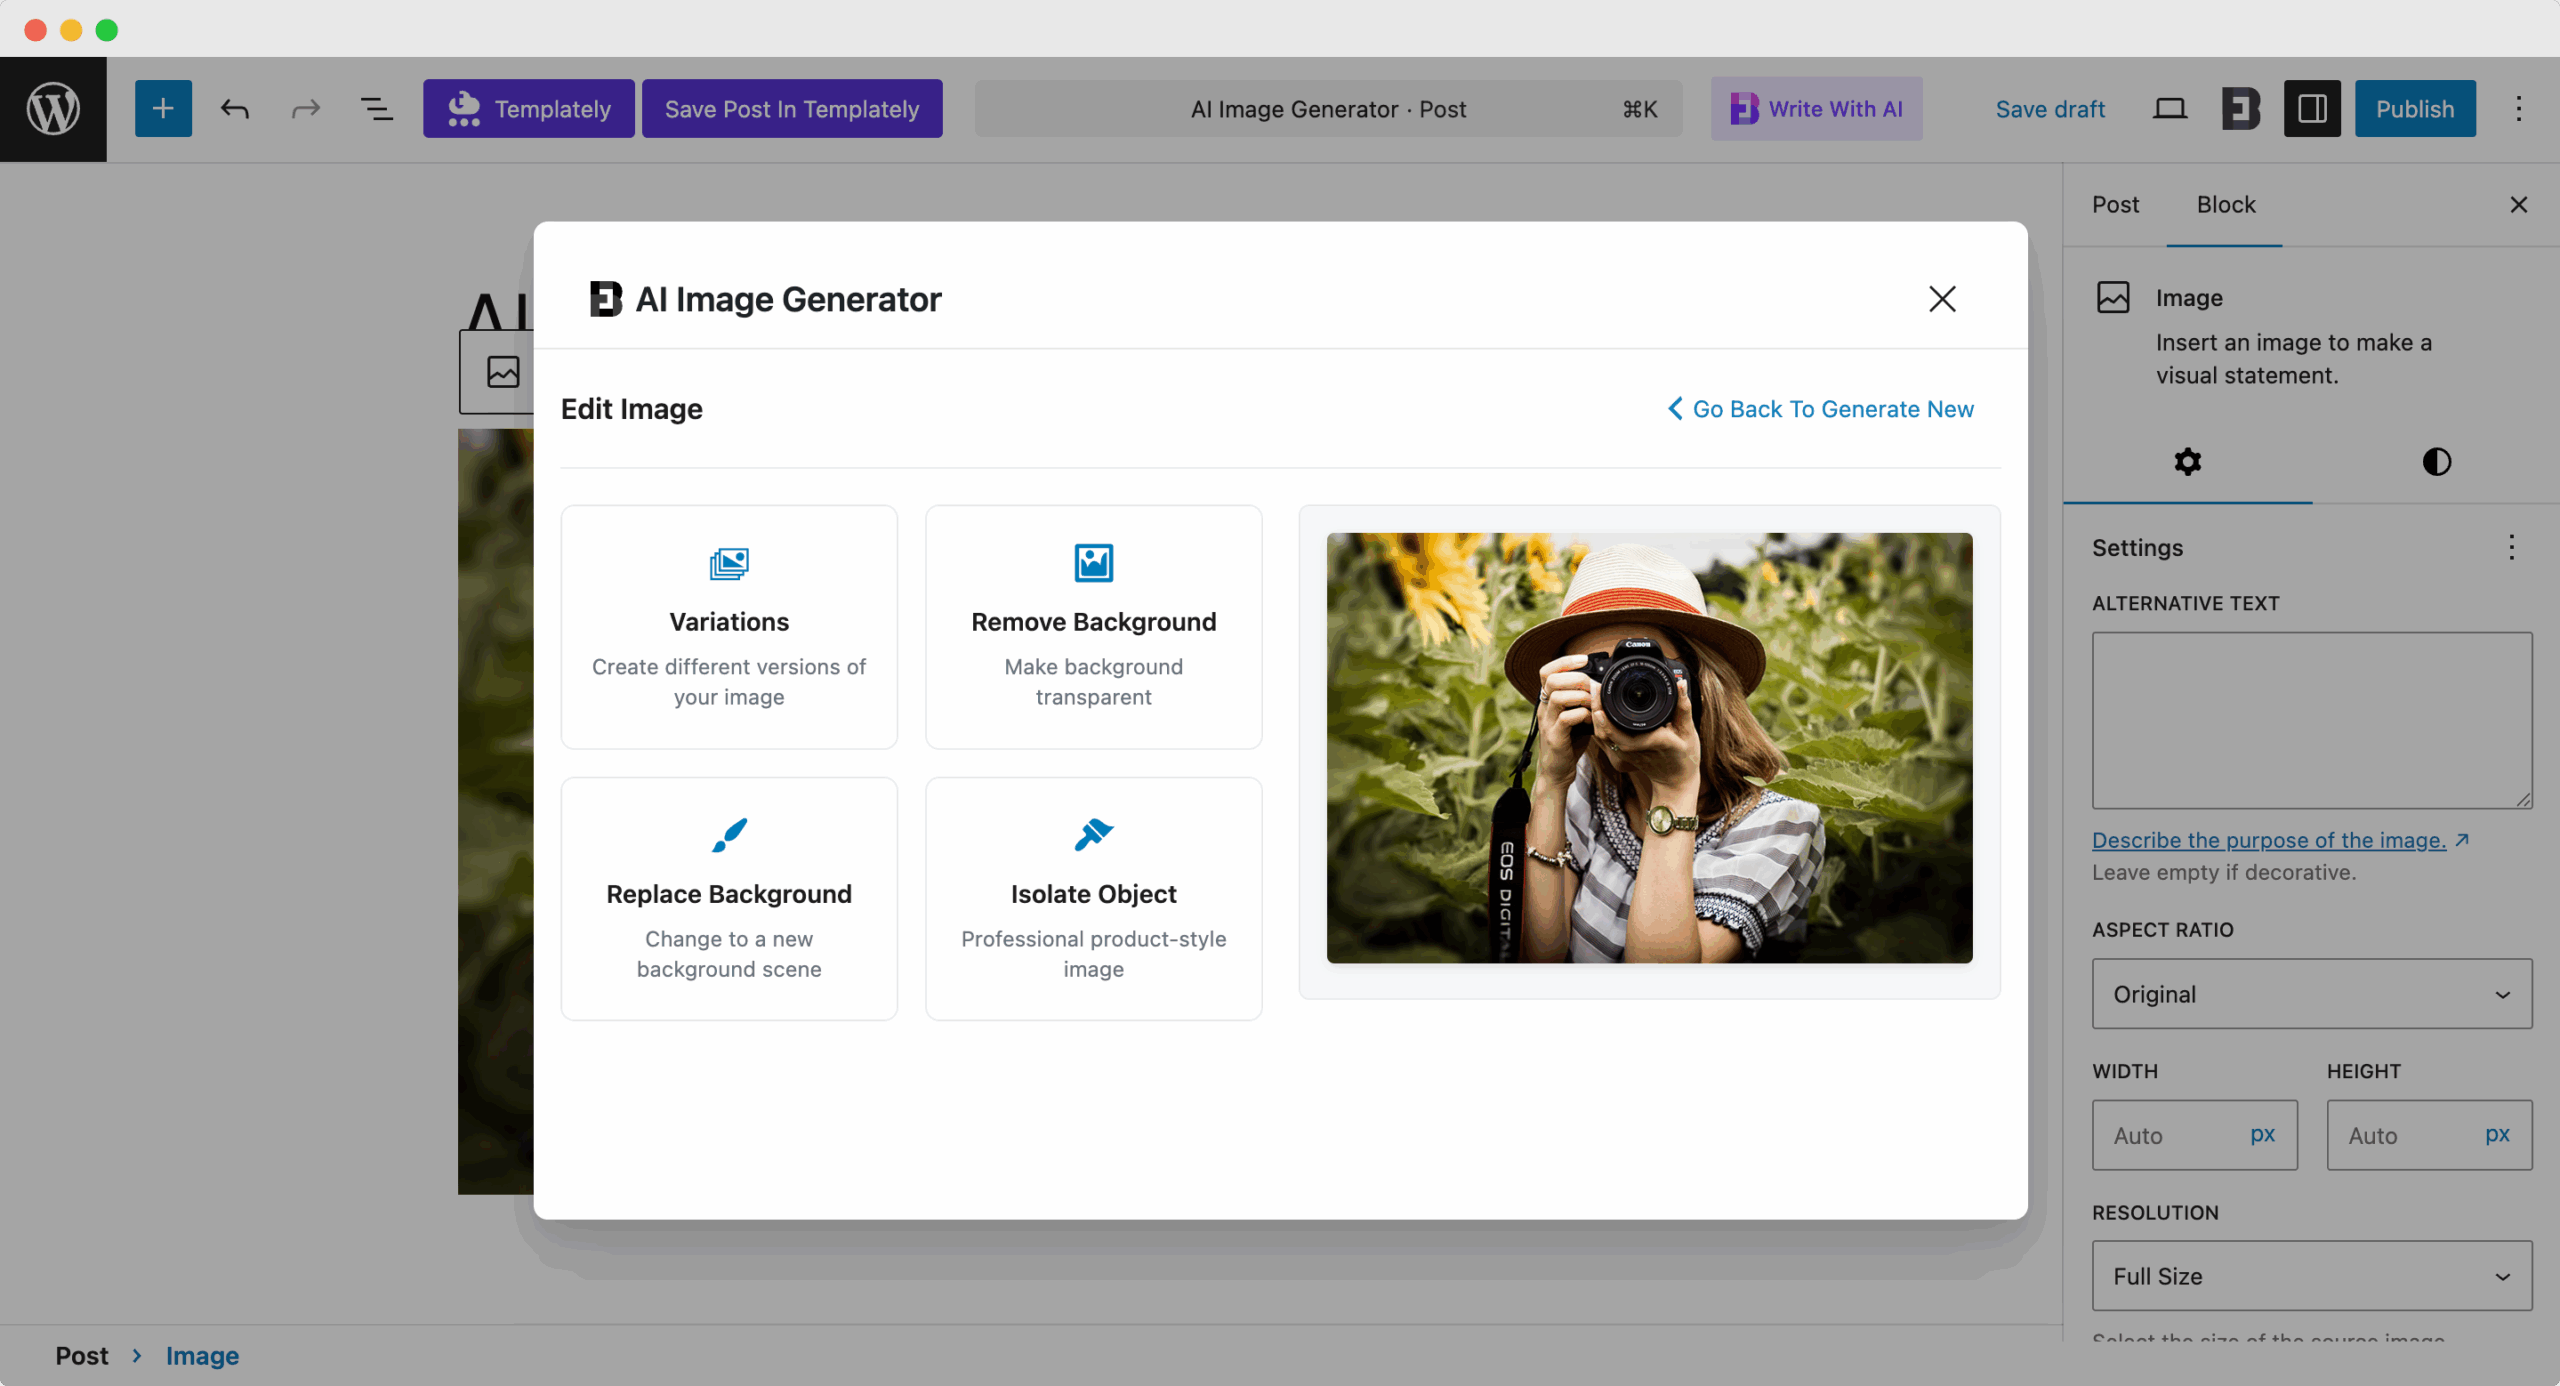
Let’s see now how each of these options works.
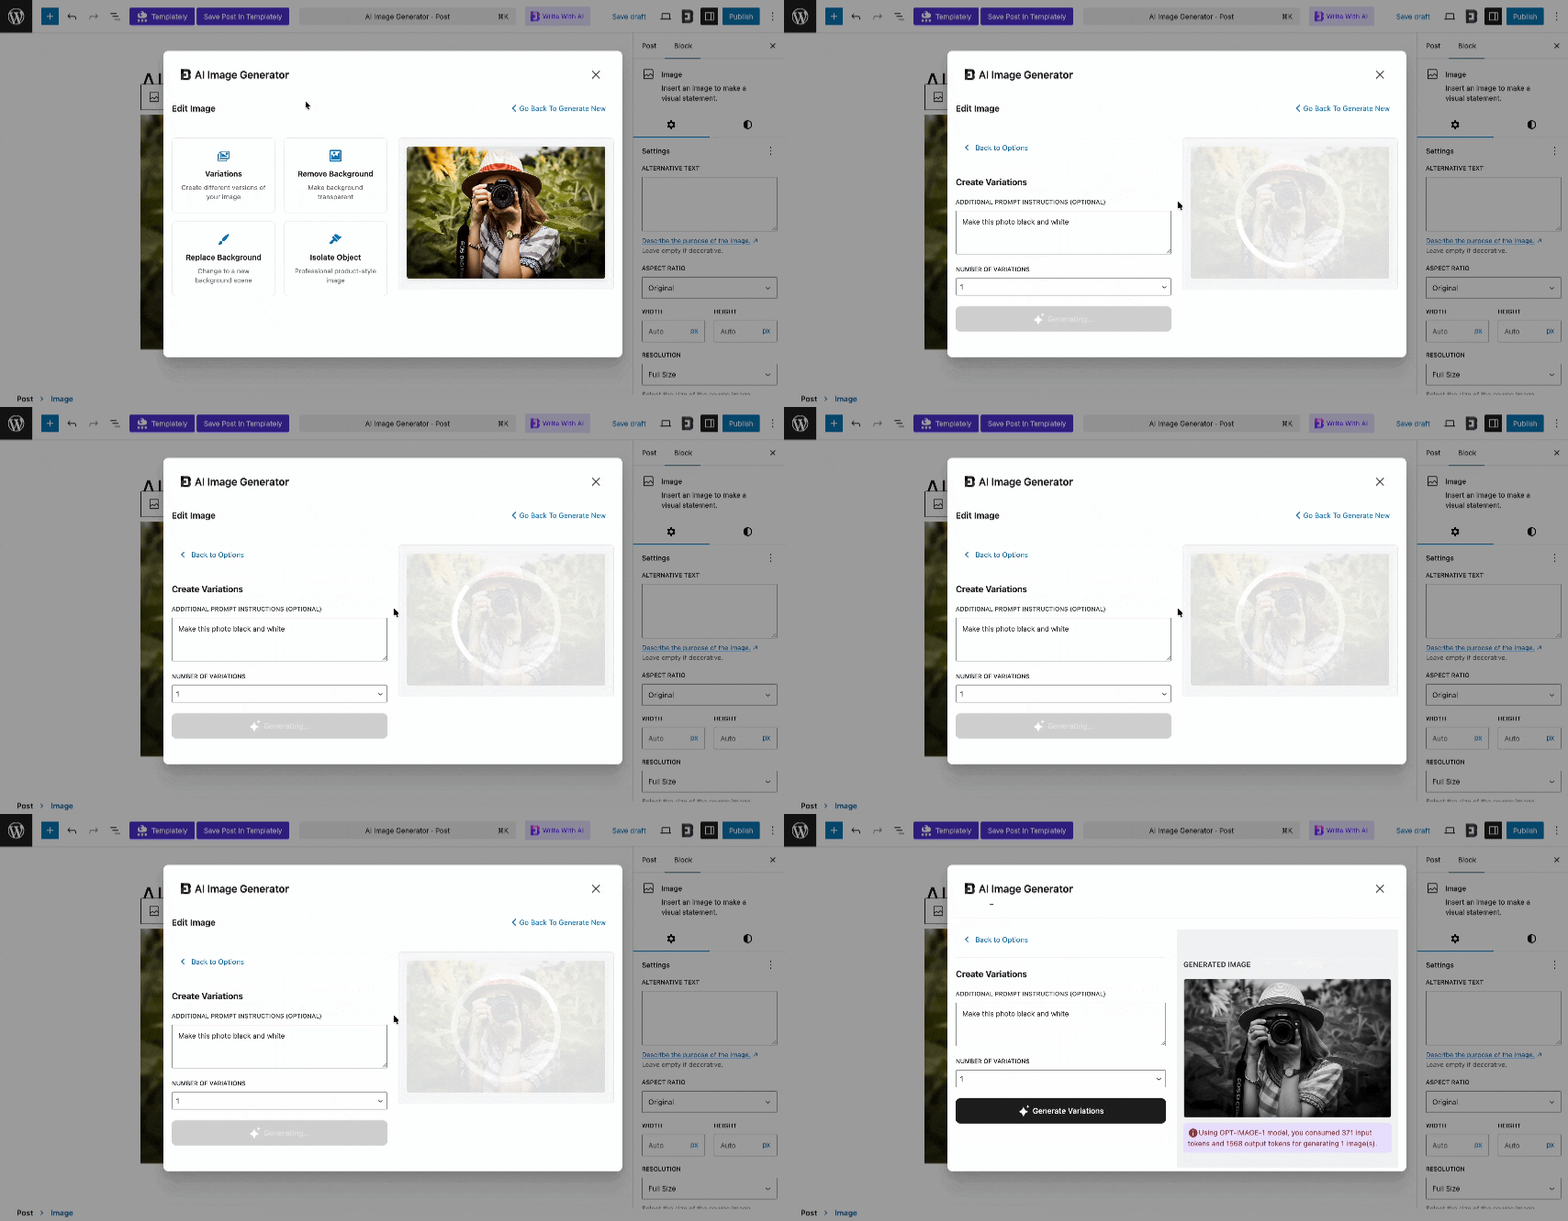
Variation #
With this option, you can create different variations based on the prompt you are giving. To do that, first click on ‘Variations’, then a window will open where you can add a prompt of the variation you want to show and select how many variations you want to create.
Remove AI Image Background #
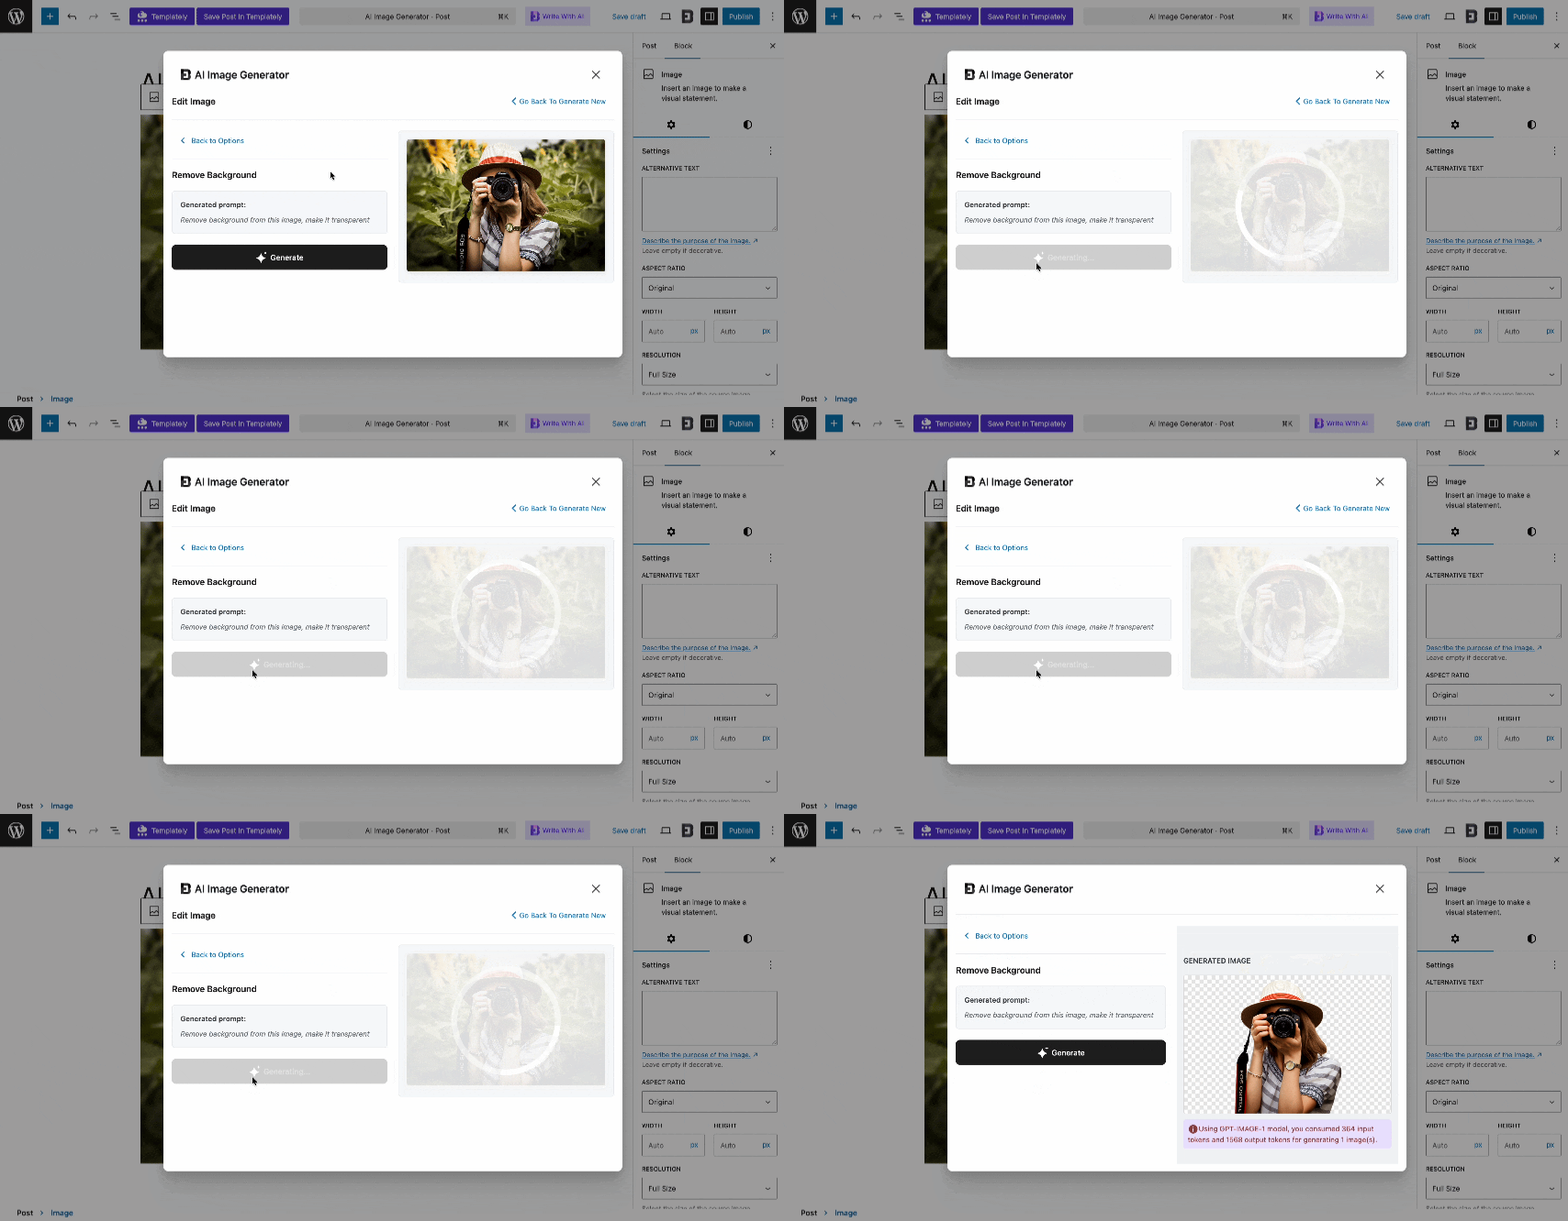
The second option is to remove the background. You can remove the background of any image you want. Click on ‘Remove Background’ and then click on the ‘Generate’ button.
Replace Image Background #
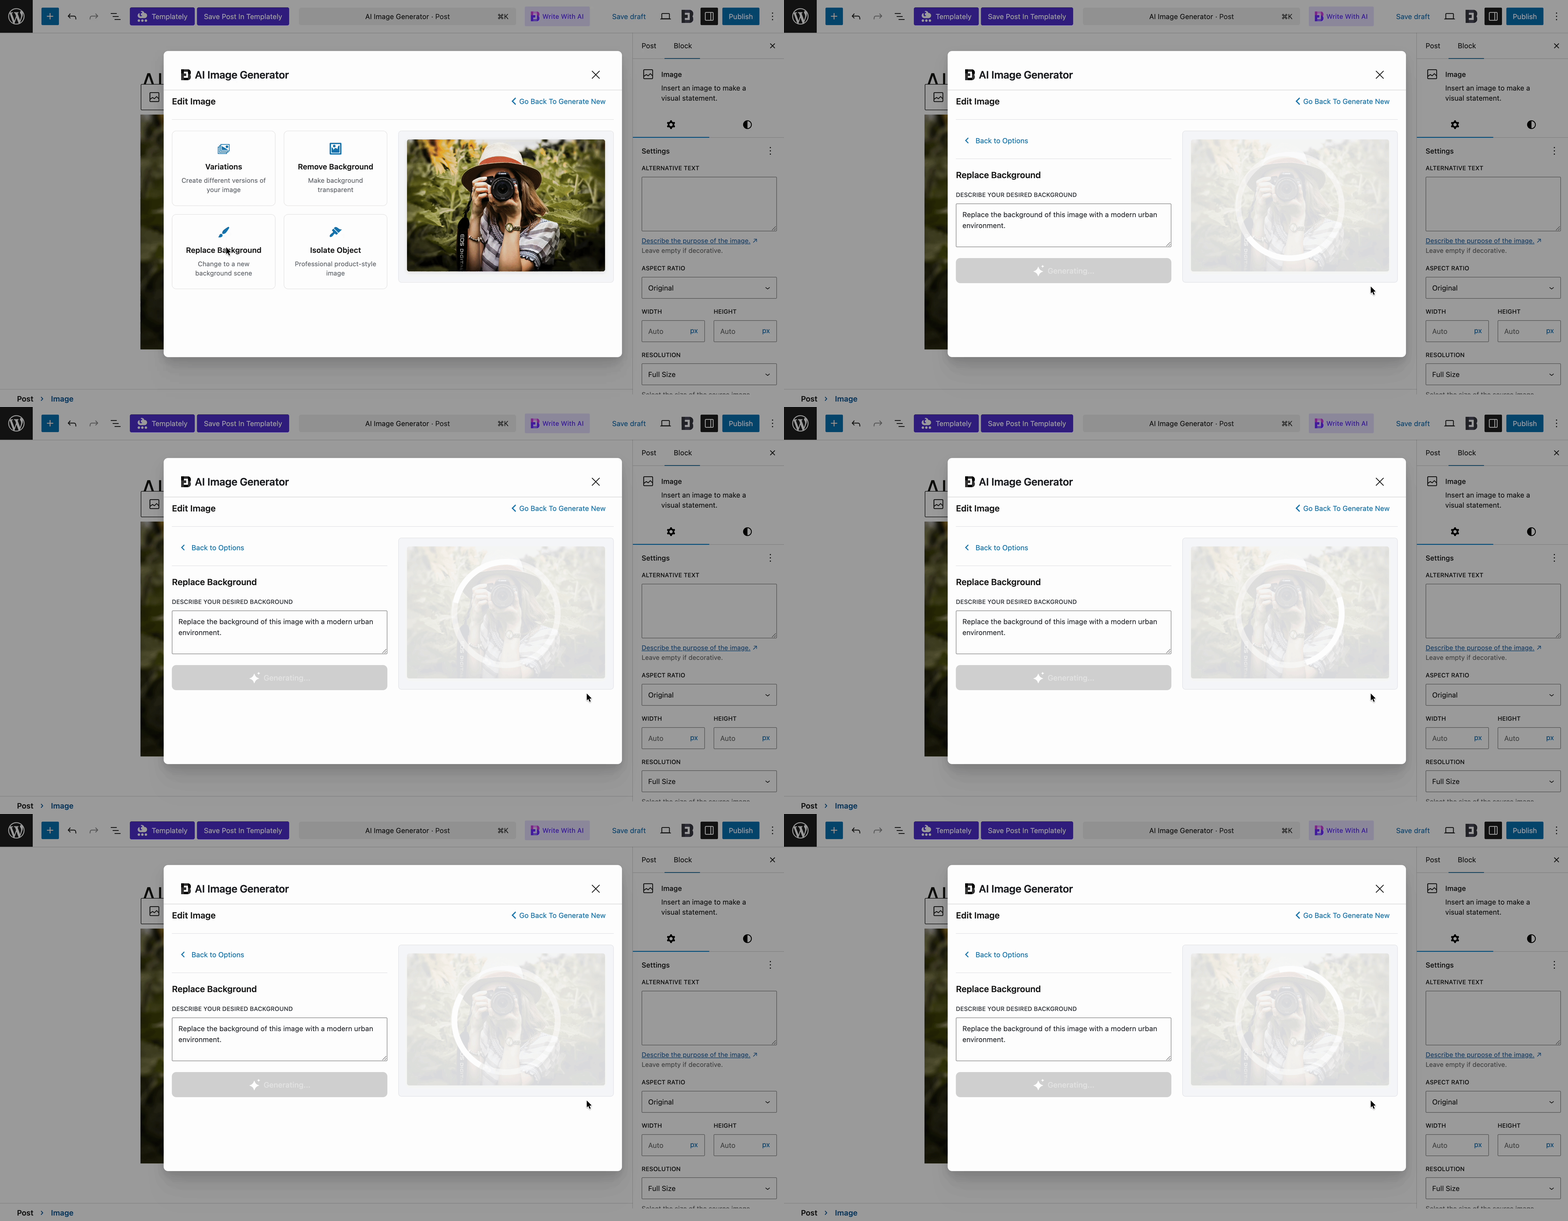
The next option is to replace the image background. You can replace the background of any image you want. Click on ‘Replace Background’ and then in the blank field, write which type of background you want to see on the image.
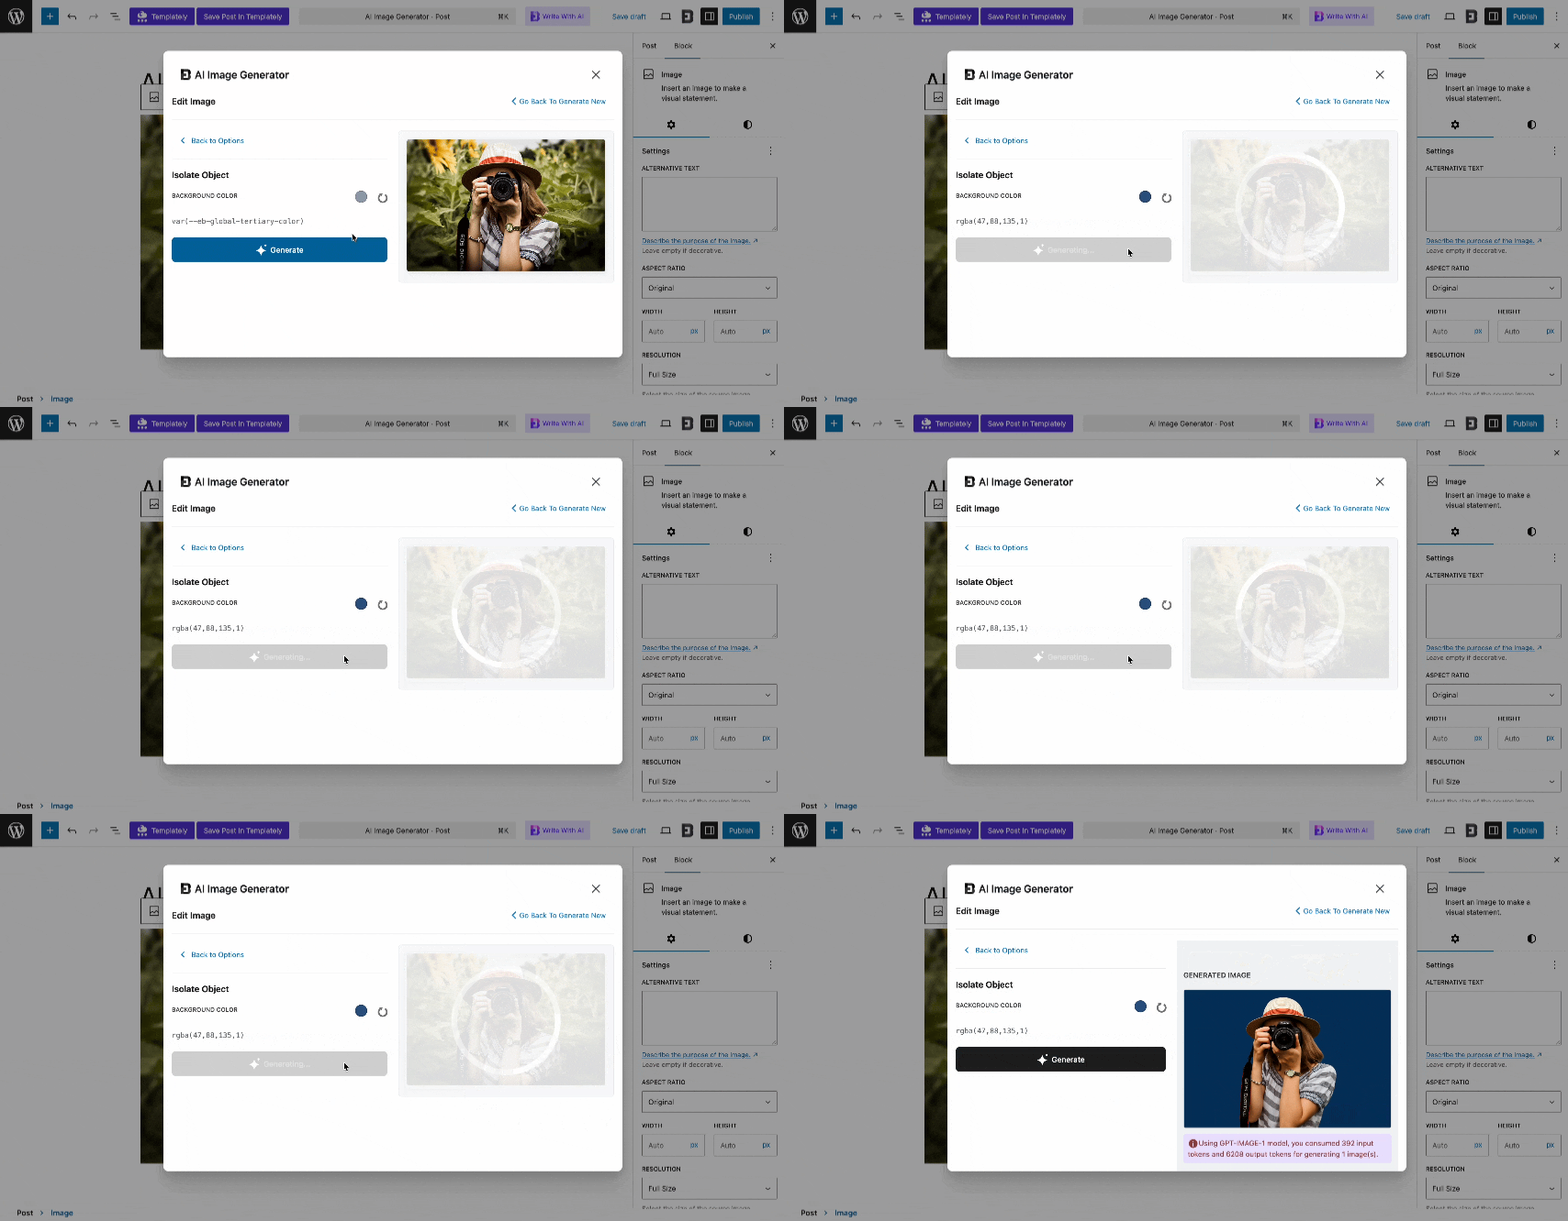
Isolate Object #
Finally, with ‘Isolate Object’, you can generate a background based on the preferred color. This is better for adding different product image colors.
That’s how simply you can configure this ‘Generate and Edit Image with AI’ feature with Essential Blocks with a few clicks and start creating amazing images in one click.
Getting stuck? Feel free to Contact Our Support for further assistance.


