With this EB Advanced Heading block, you can create stunning headings for your website and grab your reader’s attention. It offers the ultimate customization facility with ready presets to design amazing headings for your website.
Follow this step-by-step guide to designing your headings by using EB Advanced Heading in Gutenberg.
How To Activate EB Advanced Heading? #
Make sure you have installed and activated Essential Blocks for Gutenberg on your WordPress site. Essential Blocks comes with a modular control that can give you the freedom to enable or disable any block.
To activate EB Advanced Heading, navigate to Essential Blocks → ‘Blocks’. Then, toggle to enable this ‘Advanced Heading’ block. After that, click on the ‘Save’ button.

How To Configure EB Advanced Heading In Gutenberg? #
Now, open the page where you want to insert the ‘Advanced Heading’ block then click on the ‘+’ icon and find ‘Advanced Heading’ from the search option. Simply just click on the block and it will be activated.
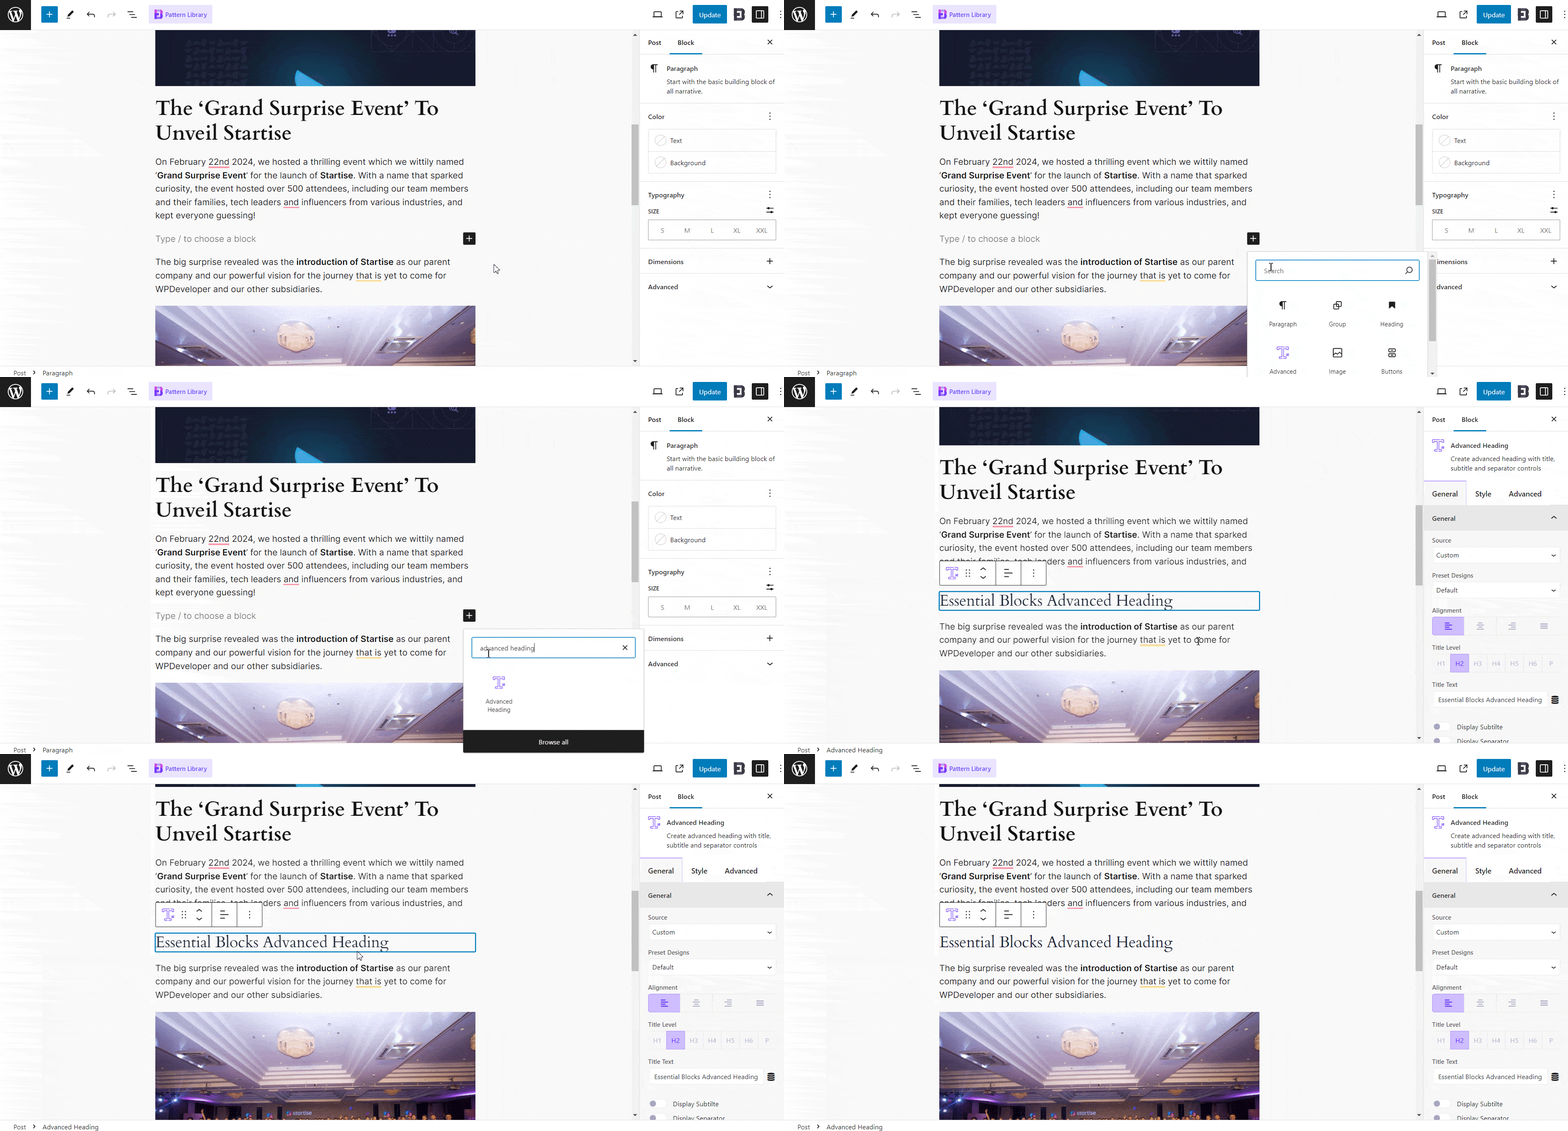
General #
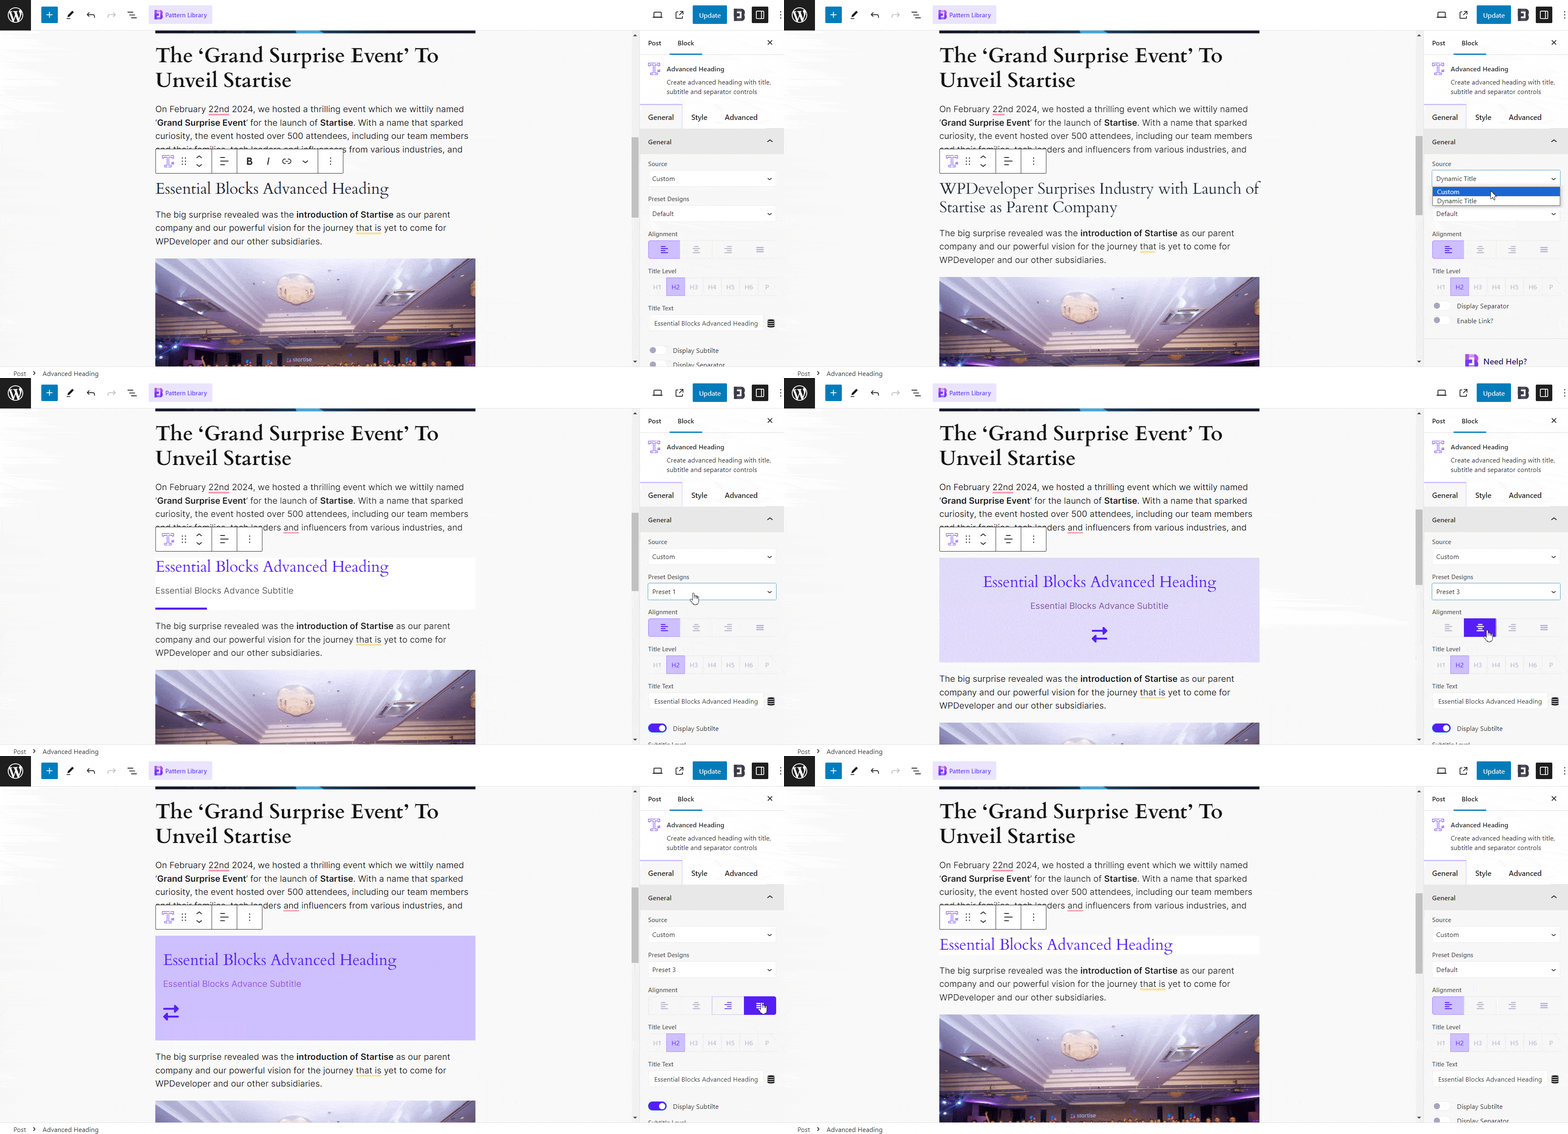
Next, navigate to the ‘Settings’ option from the top and click on the Block → ‘General’ tab. There, you can choose to pick a Custom or Dynamic Title from the ‘Source’ options. Then, choose any ‘Preset Designs’ you like and adjust the alignments.
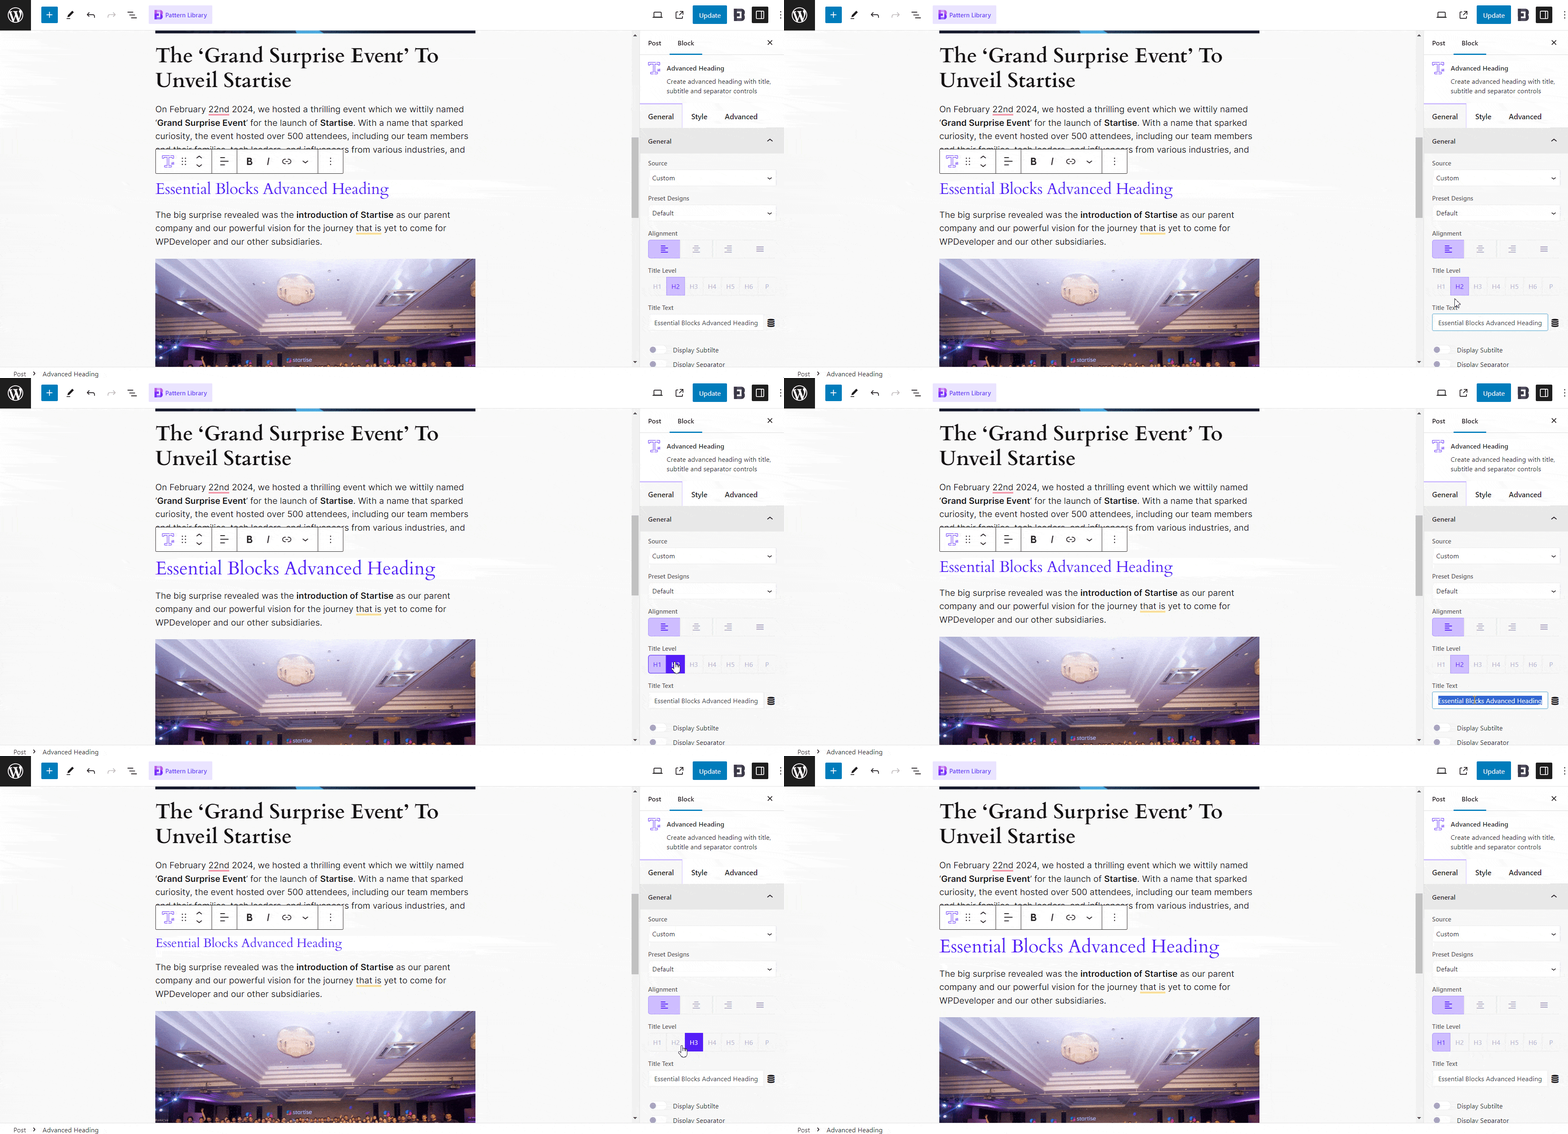
Afterward, select any heading tag from ‘Title Level’ and add your content to the ‘Title Text’ option.
Moreover, you can add subtitles with headings simply by enabling the ‘Display Subtitle’ option and writing subtitle text there. By enabling the ‘Display Separator’ option, you can separate headings from the texts.
Besides, by enabling the ‘Display Separator’ option, you can separate headings from the texts.
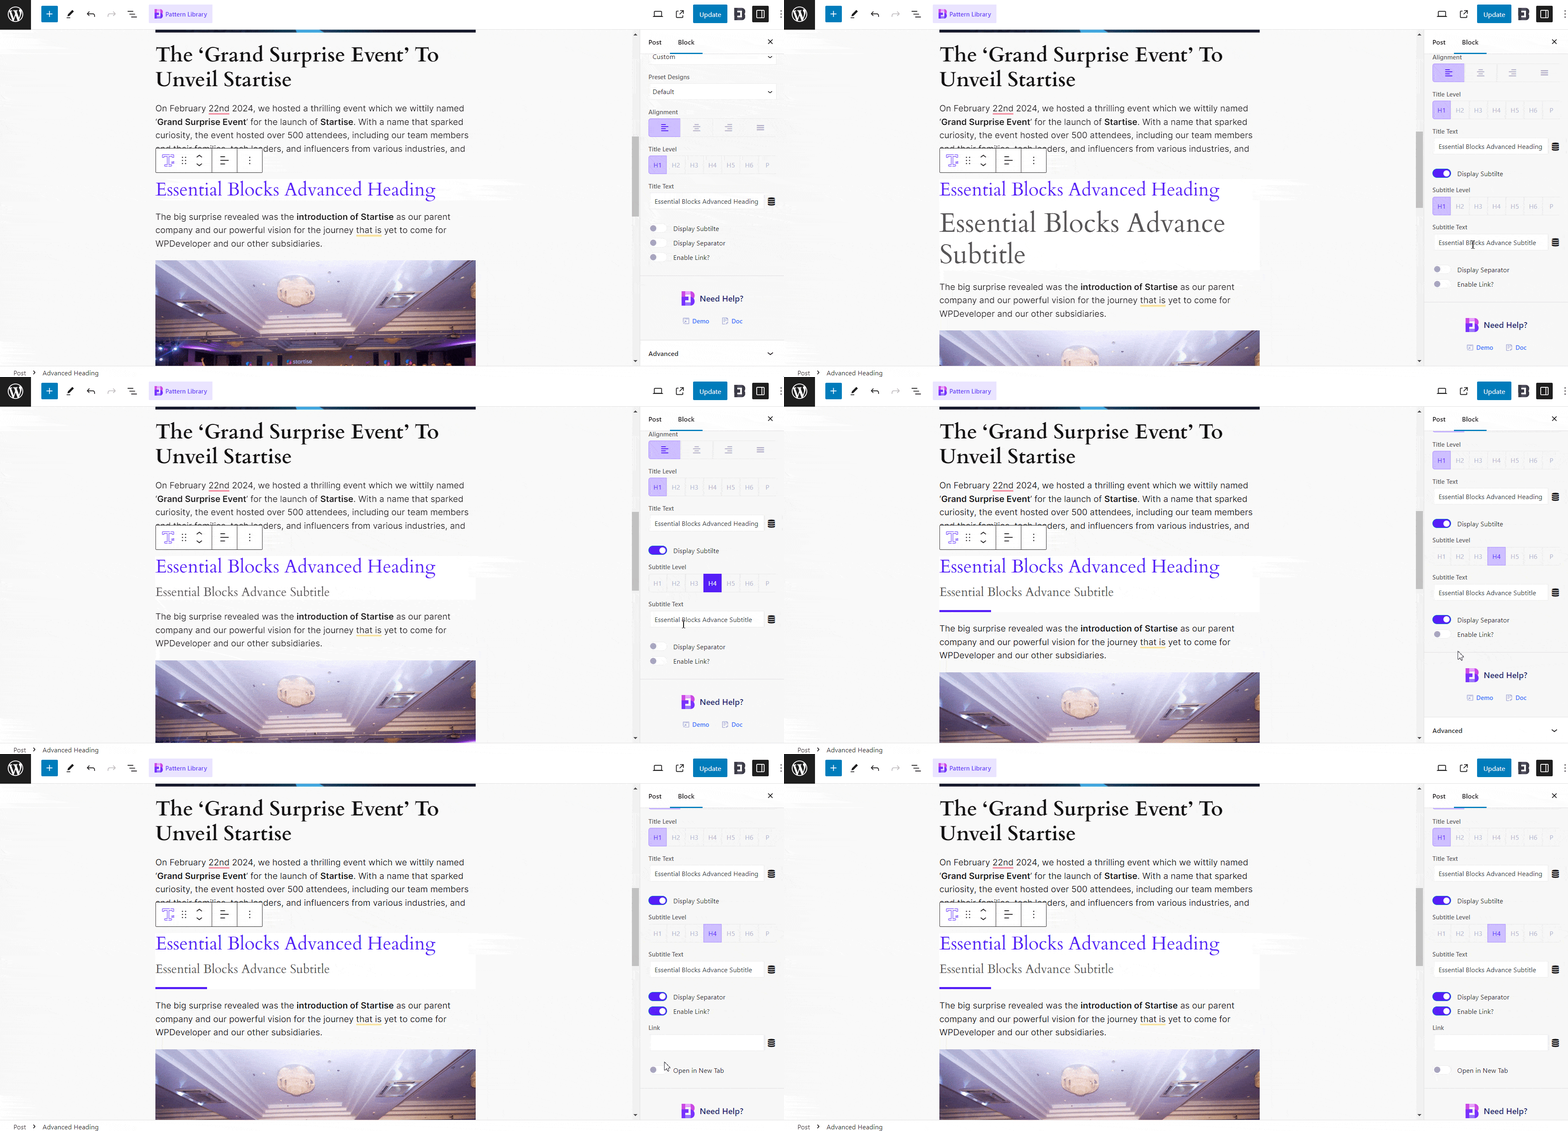
From the ‘Advanced’ option, you can add an HTML anchor and Additional CSS class(es) as well.

Style #
In EB Advanced Heading, you can change the color, and typography, or even add hover effects on your headings title from the ‘Title’ tab. You can also tweak the margin from there.

From the ‘Sub Title’ option, you can also change the color and typography at ease. Also, can add hover effects, adjust the margin, etc from there.

Now, from the separator option, you can change the separator position and type easily. By default, you will see ‘Line’ is selected as the separator type. You can change the separator type, style, height, width, etc from the Separator section.

You can also add an icon as the separator. To do this, simply go to the icon tab from the ‘Separator Type’ option. You can customize the icon size and width as well.

After that, you can customize the separator color and hover effects on it as well. This Gutenberg block offers the option to adjust the margin of the separator
Advanced #
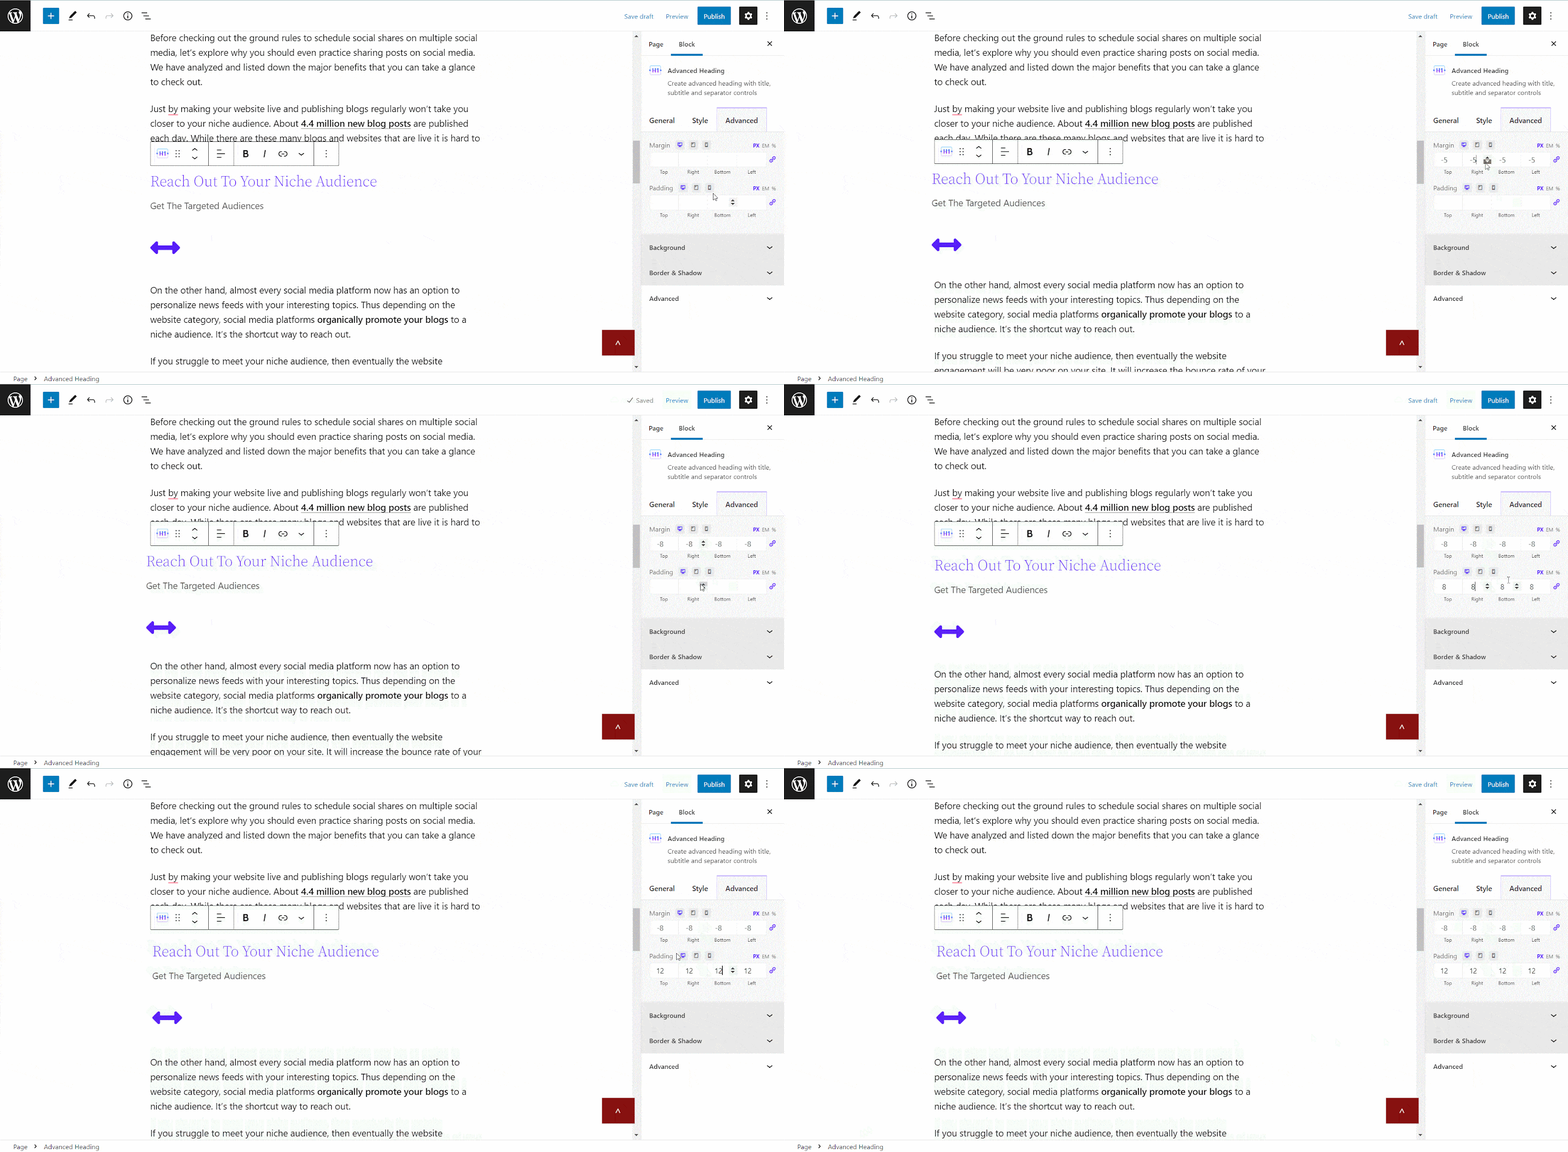
From the ‘Advanced’ tab, you can personalize the margin and paddings for the whole block and adjust it with your web page.
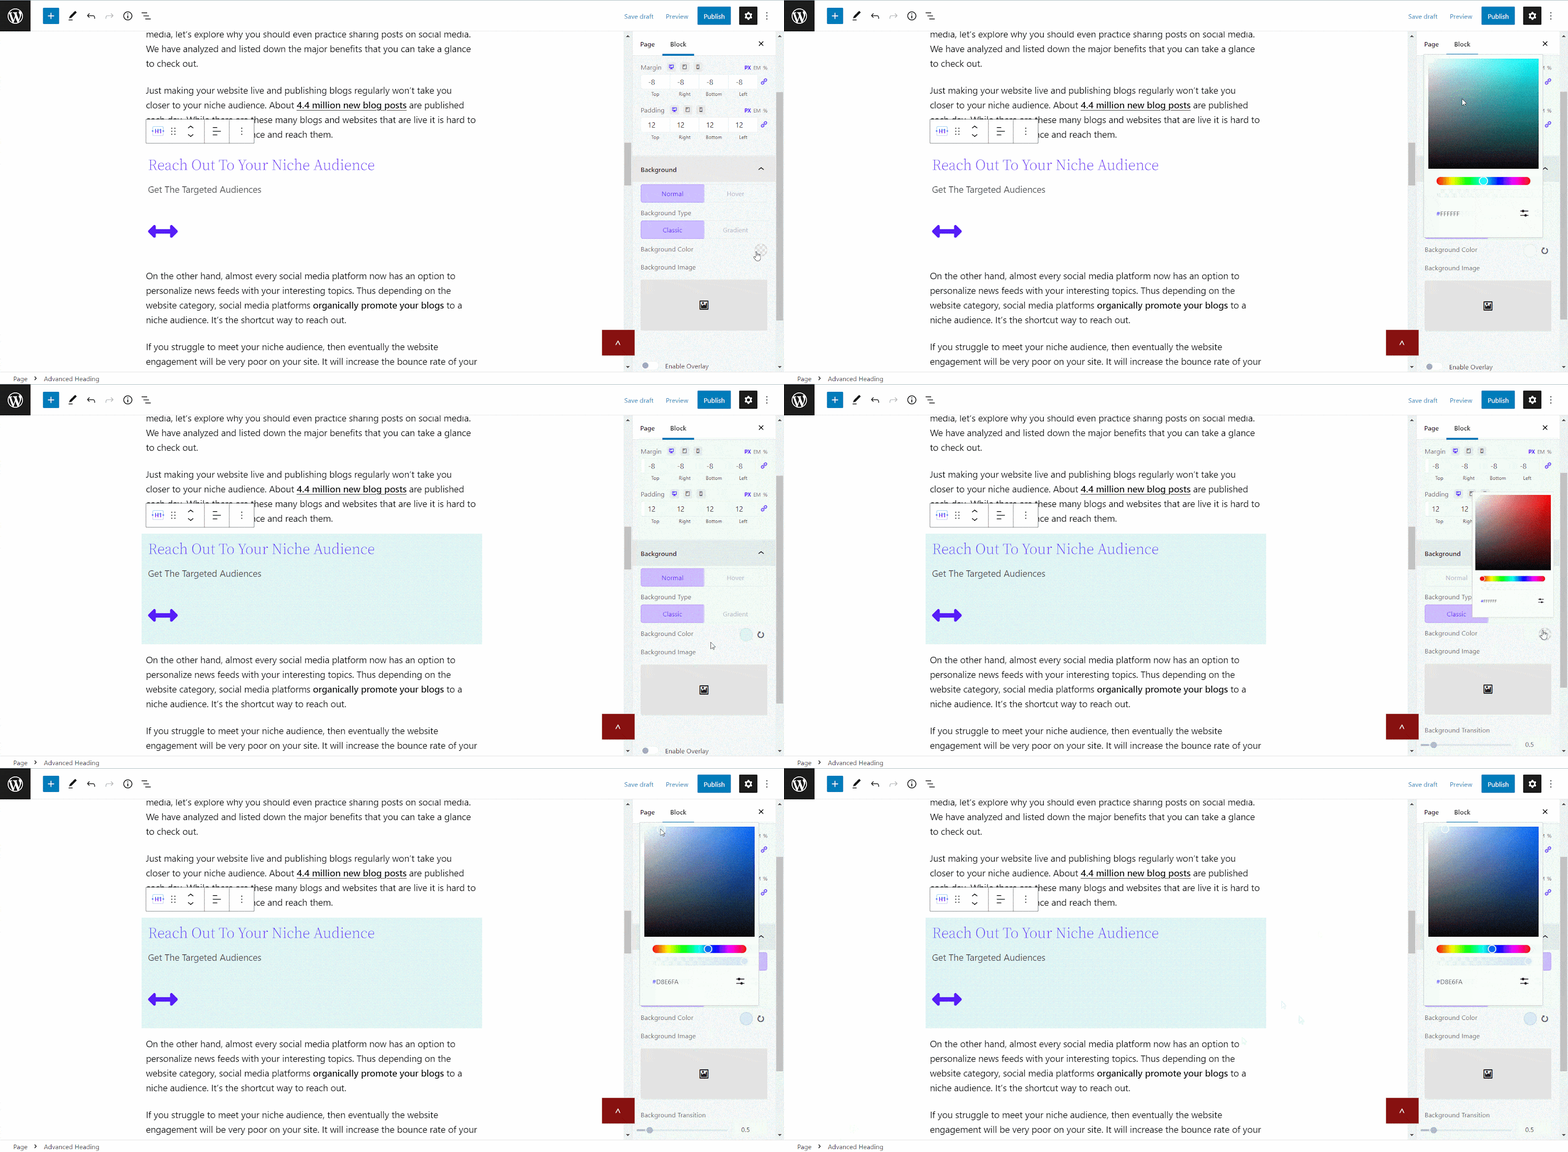
Update the background of your heading, apply hover effects, etc from the ‘Background’ option. You can also use gradient colors from the ‘Background Type’ option.
Besides, you can add an image to the background as well from the ‘Background Image’ option. You will also get the option to personalize the background image from the options below.

Style your background border and add shadows to it from the Border & Shadow section. From the same section, you can apply a border radius and make it more attractive.

Final Outcome #
After making all the changes, click on the ‘Publish’ button to make your page live. Check out how this ‘EB Advanced Heading’ will appear on your website.
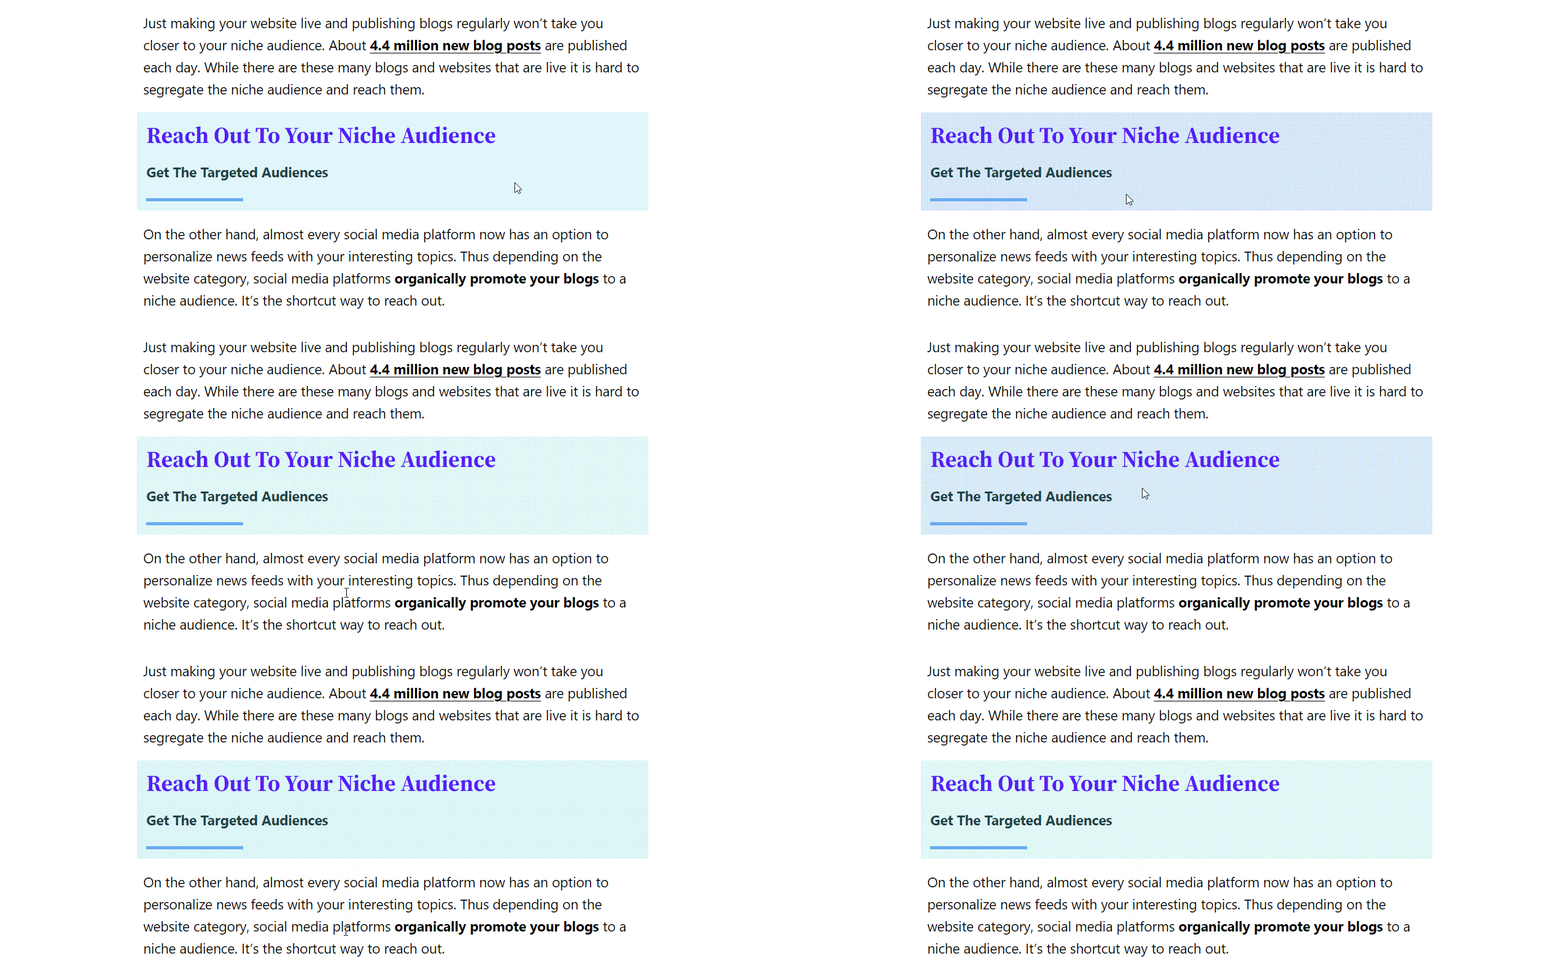
This is how to design an EB Advanced Heading block in Gutenberg easily.
Getting stuck? Feel free to Contact Our Support for further assistance.


