Your portfolio is often the first real proof of your skills. A visitor lands on it, scans a few projects, and decides within seconds whether you are the right fit. If 40 projects sit in one long scroll, most of them never get seen. A Filterable Portfolio Gallery fixes this by letting visitors sort your work by category, such as Branding, Web Design or Photography, with a single click. They see only what they care about, and your best work gets the attention it deserves.
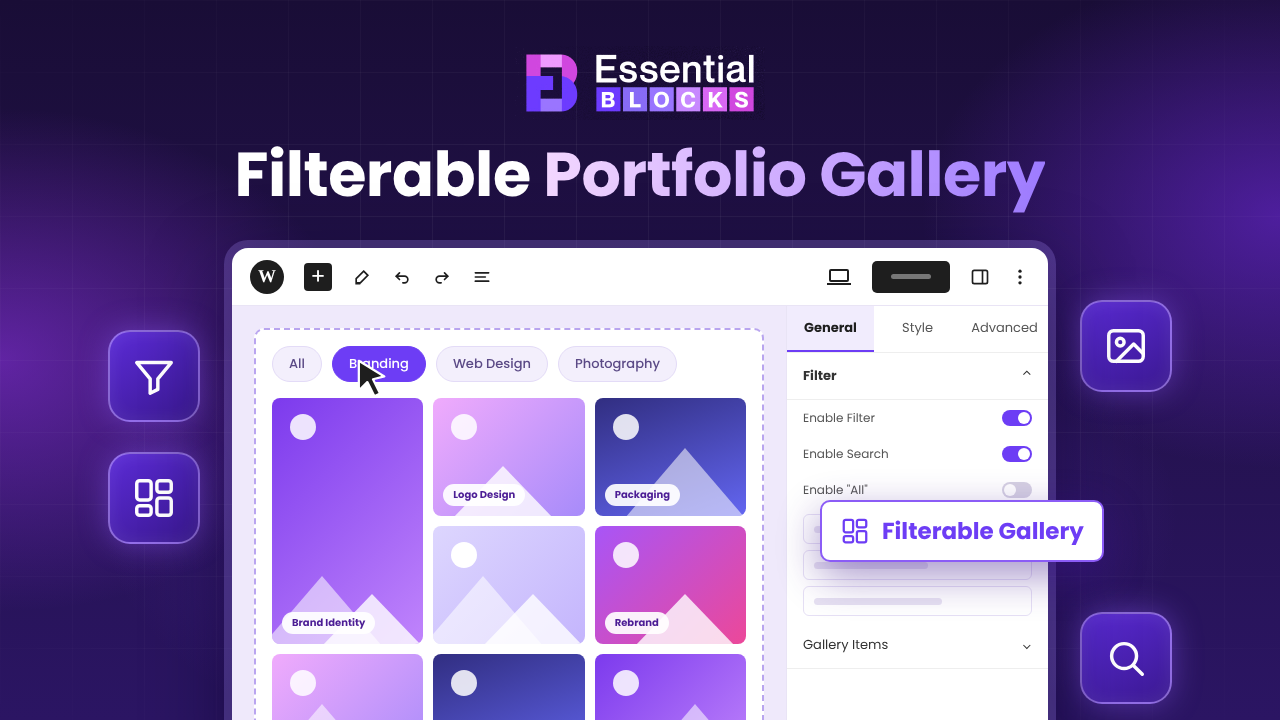
The good news is that you do not need to write a single line of JavaScript or CSS to build one. With the Essential Blocks Filterable Gallery block, you can create a fully interactive, category-based portfolio right inside the WordPress block editor. In this guide, we will walk you through everything step by step: planning your categories, choosing a layout preset, adding filters, styling the gallery and making it work beautifully on every device.
What Is a Filterable Portfolio Gallery and Why Does Your Website Need One?
A filterable portfolio gallery is an image gallery with clickable filter buttons above it. Each image is tagged with one or more categories. When a visitor clicks a filter, say “Logo Design”, the gallery instantly hides everything else and shows only the matching projects, usually with a smooth animation. There is also an “All” button that brings the full collection back. It feels like an app, yet it lives on a normal WordPress page.
For designers, photographers, agencies, architects and freelancers, this format solves a real problem. Most creatives work across several types of projects, and clients usually only care about one of them. A restaurant owner looking for a menu designer does not want to scroll past your SaaS dashboards. A filterable layout respects their time, keeps them on the page longer and makes your portfolio look organised and professional at first glance.
Better User Experience for Visitors
Filtering reduces the effort a visitor needs to find relevant work. Instead of scanning dozens of thumbnails, they click one button and get a focused, curated view. This can help lower bounce rates and make it more likely they will open individual projects or contact you.
For example, a wedding photographer can split their gallery into “Ceremonies”, “Portraits”, “Receptions” and “Destination”. A couple planning a beach wedding can jump straight to “Destination” and see exactly the kind of shots they want.
Stronger Positioning for Your Services
Your filter categories quietly double as a service list. When visitors see buttons like “Branding”, “UI/UX” and “Packaging”, they immediately understand what you offer without reading a single paragraph. That makes your portfolio do some of the selling for you.
Agencies can take this further by naming filters after industries instead of services, such as “Healthcare”, “eCommerce” or “Education”. This helps prospects in a specific industry find proof that you have solved problems like theirs before.
Why Build It in Gutenberg Instead of Using a Page Builder?
Gutenberg, the default WordPress block editor, has grown into a capable design tool. Building your portfolio there means you are not adding a heavy page builder on top of WordPress, and your content stays in native blocks that work with most modern themes. Depending on your setup, this can mean lighter pages that are easier to maintain. Essential Blocks is itself a third-party plugin, but it adds extra blocks to Gutenberg instead of replacing the editor, so your content stays in the native block format.
The catch is that core Gutenberg does not include a filterable gallery. The default Gallery block can show images in a grid, but it has no category filters, no search and no Load More button. That is where a block library like Essential Blocks comes in. It adds 70+ Gutenberg blocks, including a dedicated Filterable Gallery block, so you can add richer layouts and interactive features without leaving the block editor.
Meet the Essential Blocks Filterable Gallery Block
The Filterable Gallery block lets you create and display customisable, interactive image galleries with filters and search options in WordPress. You add your images, assign each one a filter category, and the block handles the sorting, animation and layout on the front end. Everything is controlled through the block settings panel with toggles, dropdowns and sliders.
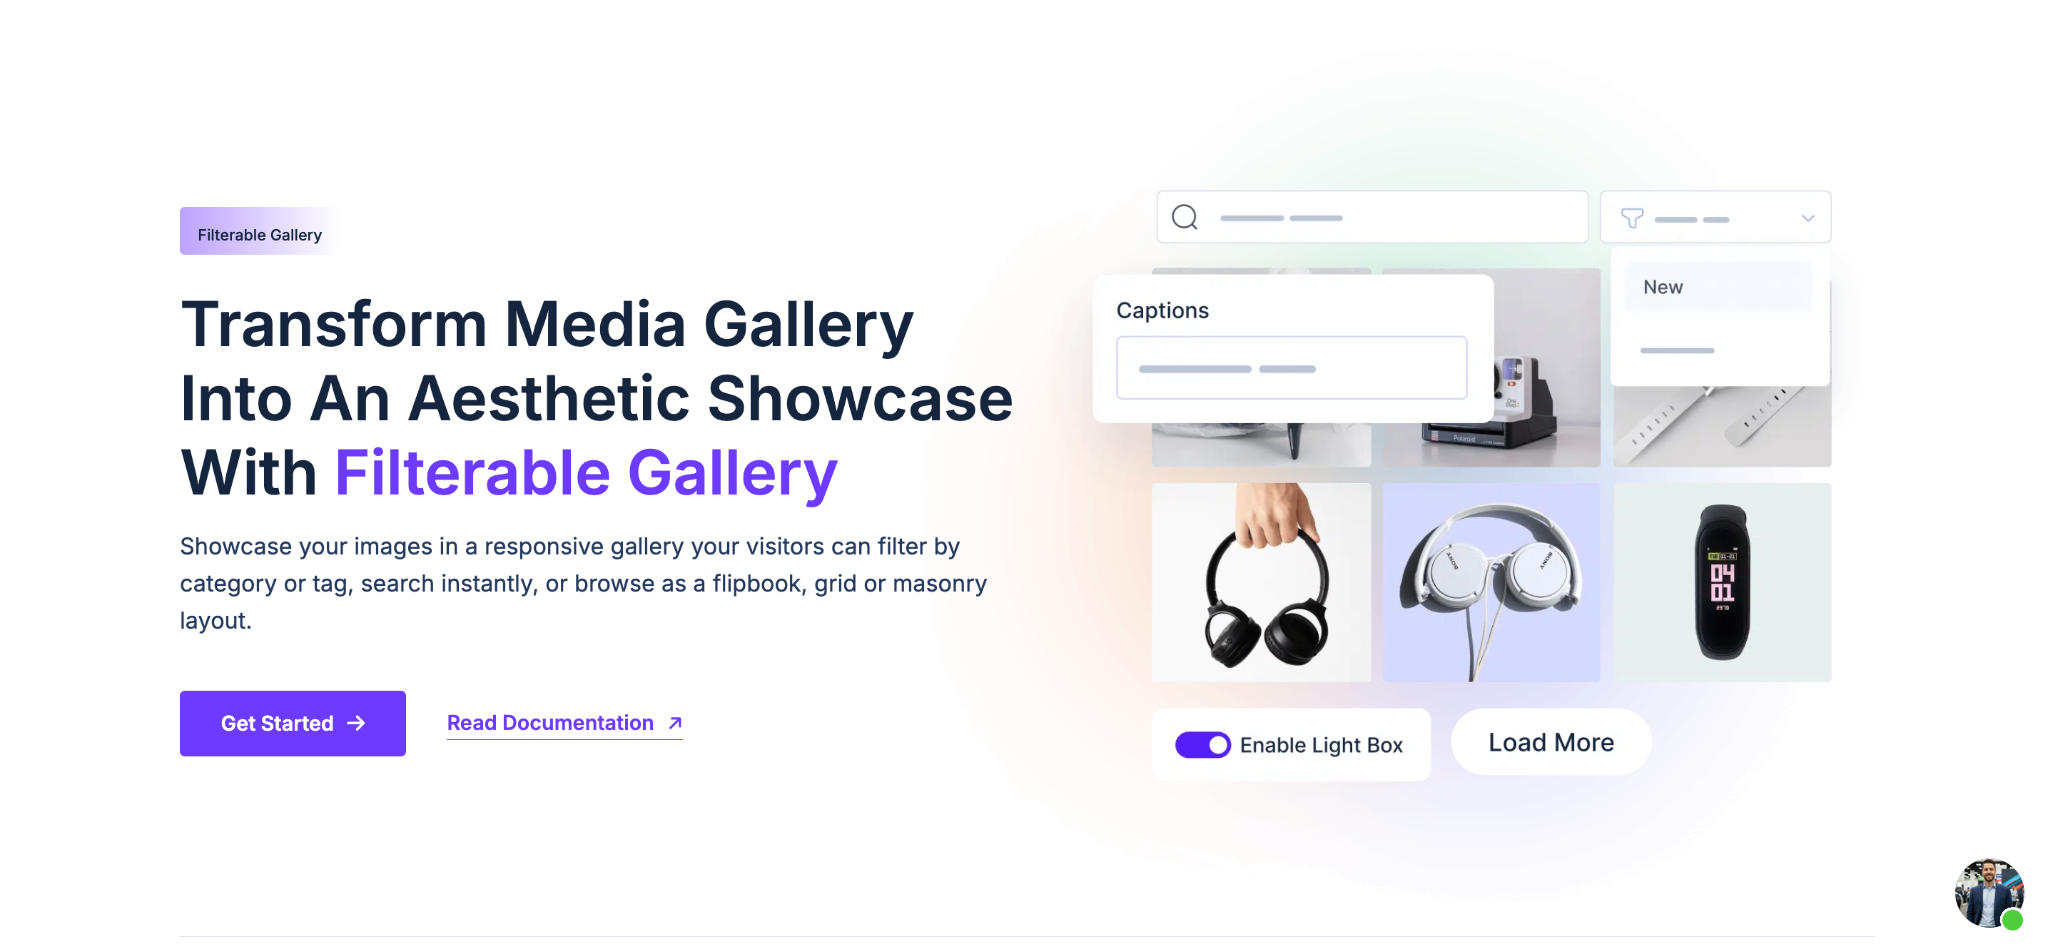
Here is a quick look at what the block gives you out of the box:
- 6 ready presets to start from, so you are not designing from a blank canvas
- Custom filter items with an optional “All” button and a built-in search option
- Per-item settings for image, filter category, caption, description and link
- Drag-and-drop reordering of gallery items
- Lightbox support so visitors can view projects in full size
- Load More button to keep long portfolios fast and tidy
- Full styling controls for images, filters, content, actions and the “Not Found” message
The 6 Gallery Presets at a Glance
When you insert the block, you can start with a Blank default layout or choose from six presets. Bento, Flipbook and Mosaic are available to start with, while Classic, Harmonic and Gridflow are premium presets that come with Essential Blocks PRO.
- Bento Gallery: A modular tile layout with subtitles. Great for showing a mixed range of projects in a clean, organised grid.
- Flipbook Gallery: An interactive, page-flipping format that feels like a real photo album. Ideal for storytelling portfolios or case studies.
- Mosaic Gallery: A puzzle-like grid that automatically adjusts image sizes, giving your portfolio a modern, artistic feel.
- Classic Gallery (PRO): Neat rows and columns combined with dynamic filtering. Perfect for a professional, no-fuss portfolio.
- Harmonic Gallery (PRO): Balanced sizes and proportions that flow together for an elegant, rhythmic presentation.
- Gridflow Gallery (PRO): A GSAP-powered, masonry-style layout with smooth transitions and filter effects, made for large collections.
Which Preset Fits Your Portfolio?
Pick a preset based on the type of work you show, not just how it looks. If your images have different aspect ratios, such as vertical posters mixed with wide website mockups, Mosaic or Gridflow will handle that variety without awkward cropping. If all your images share the same ratio, Classic or Bento will give you a sharper, more uniform grid.
For example, a UI designer with uniform 16:9 screenshots would suit Classic Gallery. An illustrator with tall and wide artwork would get better results with Gridflow. A photographer who wants to tell the story of a single shoot could use Flipbook to make the experience feel like flipping through a printed album.
Before You Start: Plan Your Portfolio Structure
Jumping straight into the editor is tempting, but five minutes of planning will save you a lot of rework. A filterable portfolio gallery is only as good as its categories. Too few, and filtering feels pointless. Too many, and visitors get overwhelmed by a wall of buttons. Most portfolios work best with four to seven filters.
Start by listing every project you want to show, then group them. Look for natural clusters by service type, industry, medium or client type. Name each category in words your clients would actually use. “Visual Identity” may sound nice to you, but “Logo Design” is often what a client is searching for.
Prepare and Optimise Your Images
Large images are the most common reason portfolio pages load slowly. Before uploading, resize your images to a sensible width (around 1200–1600px is usually enough for a gallery with a lightbox) and compress them. Use WebP where your setup allows it, since it keeps quality high while reducing file size.
Keep a consistent naming habit too. A file named “acme-coffee-logo-design.webp” is far more useful than “IMG_4821.jpg”, both for your own organisation and for image search. Add descriptive alt text in the Media Library so your gallery stays accessible and readable by search engines.
Write Short Captions and Descriptions
Each gallery item can show a caption and description. Use the caption for the project name and the description for a short line of context, such as the client, the result or the tools used. Keep it brief. The image should do most of the talking.
For example: Caption: “Acme Coffee Rebrand” and Description: “Logo, packaging and menu design for a local café chain.” That is enough to spark interest and invite a click.
How to Build a Filterable Portfolio Gallery in Gutenberg: Step-by-Step
Now let us build it. This walkthrough assumes you already have a WordPress site using the block editor. If you are new to the plugin, you can follow the guide on how to install Essential Blocks first. The whole process takes about 15–20 minutes once your images are ready.
Step 1: Activate the Filterable Gallery Block
From your WordPress dashboard, go to “Essential Blocks → Blocks”. Find “Filterable Gallery” and toggle it on. The setting saves automatically. Essential Blocks lets you enable only the blocks you need through its modular control, which helps keep your site lean.
If you plan to use the Classic, Harmonic or Gridflow presets, make sure Essential Blocks PRO is installed and activated as well.
Step 2: Add the Block to Your Portfolio Page
Go to “Pages → Add New”, or open your existing Portfolio page. Click the “+” icon, search for “Filterable Gallery” and click the block to insert it. You can also drag and drop it from the block inserter into any spot on your page.
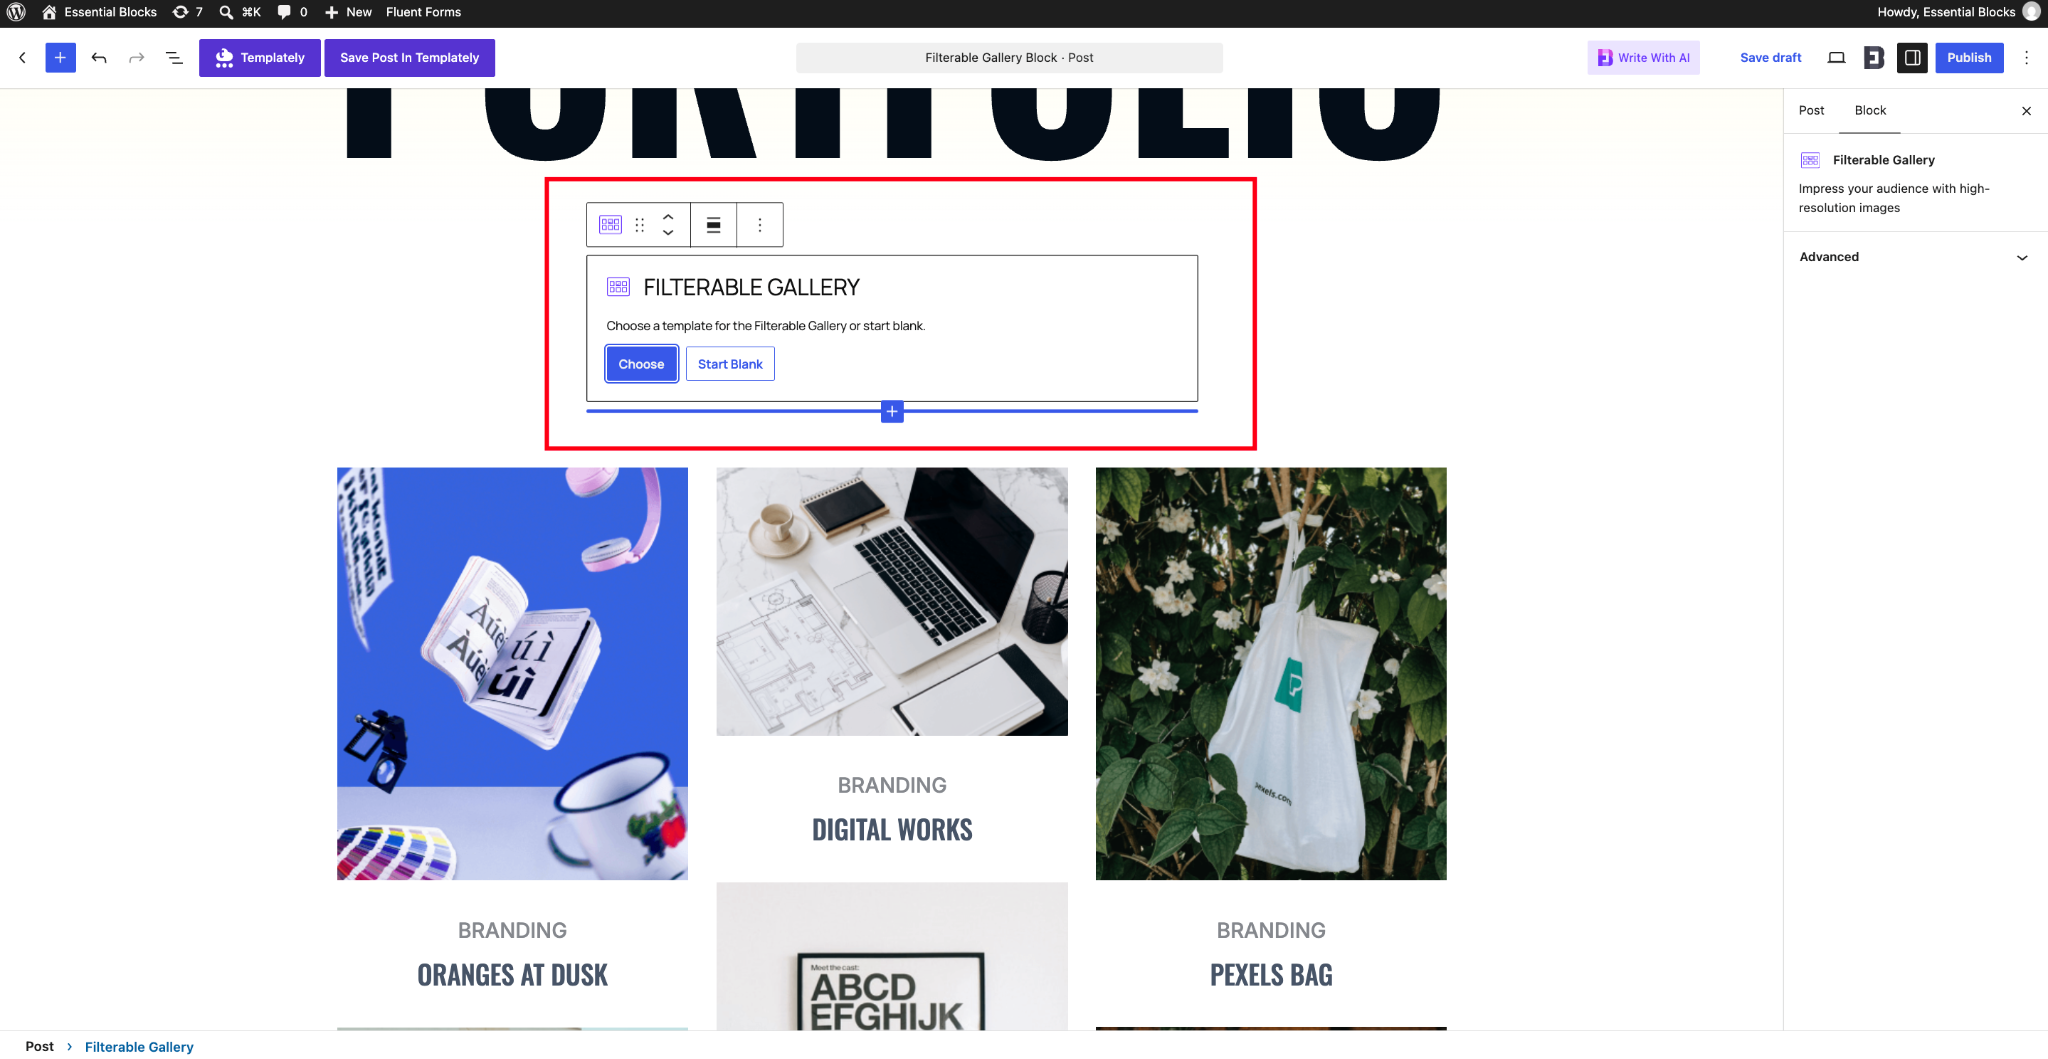
A good page structure is a short heading and intro at the top, the gallery in the middle and a call to action at the bottom. You can use the EB Advanced Heading block for a styled title above your gallery.
Step 3: Choose a Preset or Start Blank
Once the block is on the page, you will see two options: “Blank” to start with the default layout, or “Choose” to pick one of the six presets. If you are not sure, start with Bento or Mosaic. You can always change the layout and preset later from the “General” tab without losing your images.
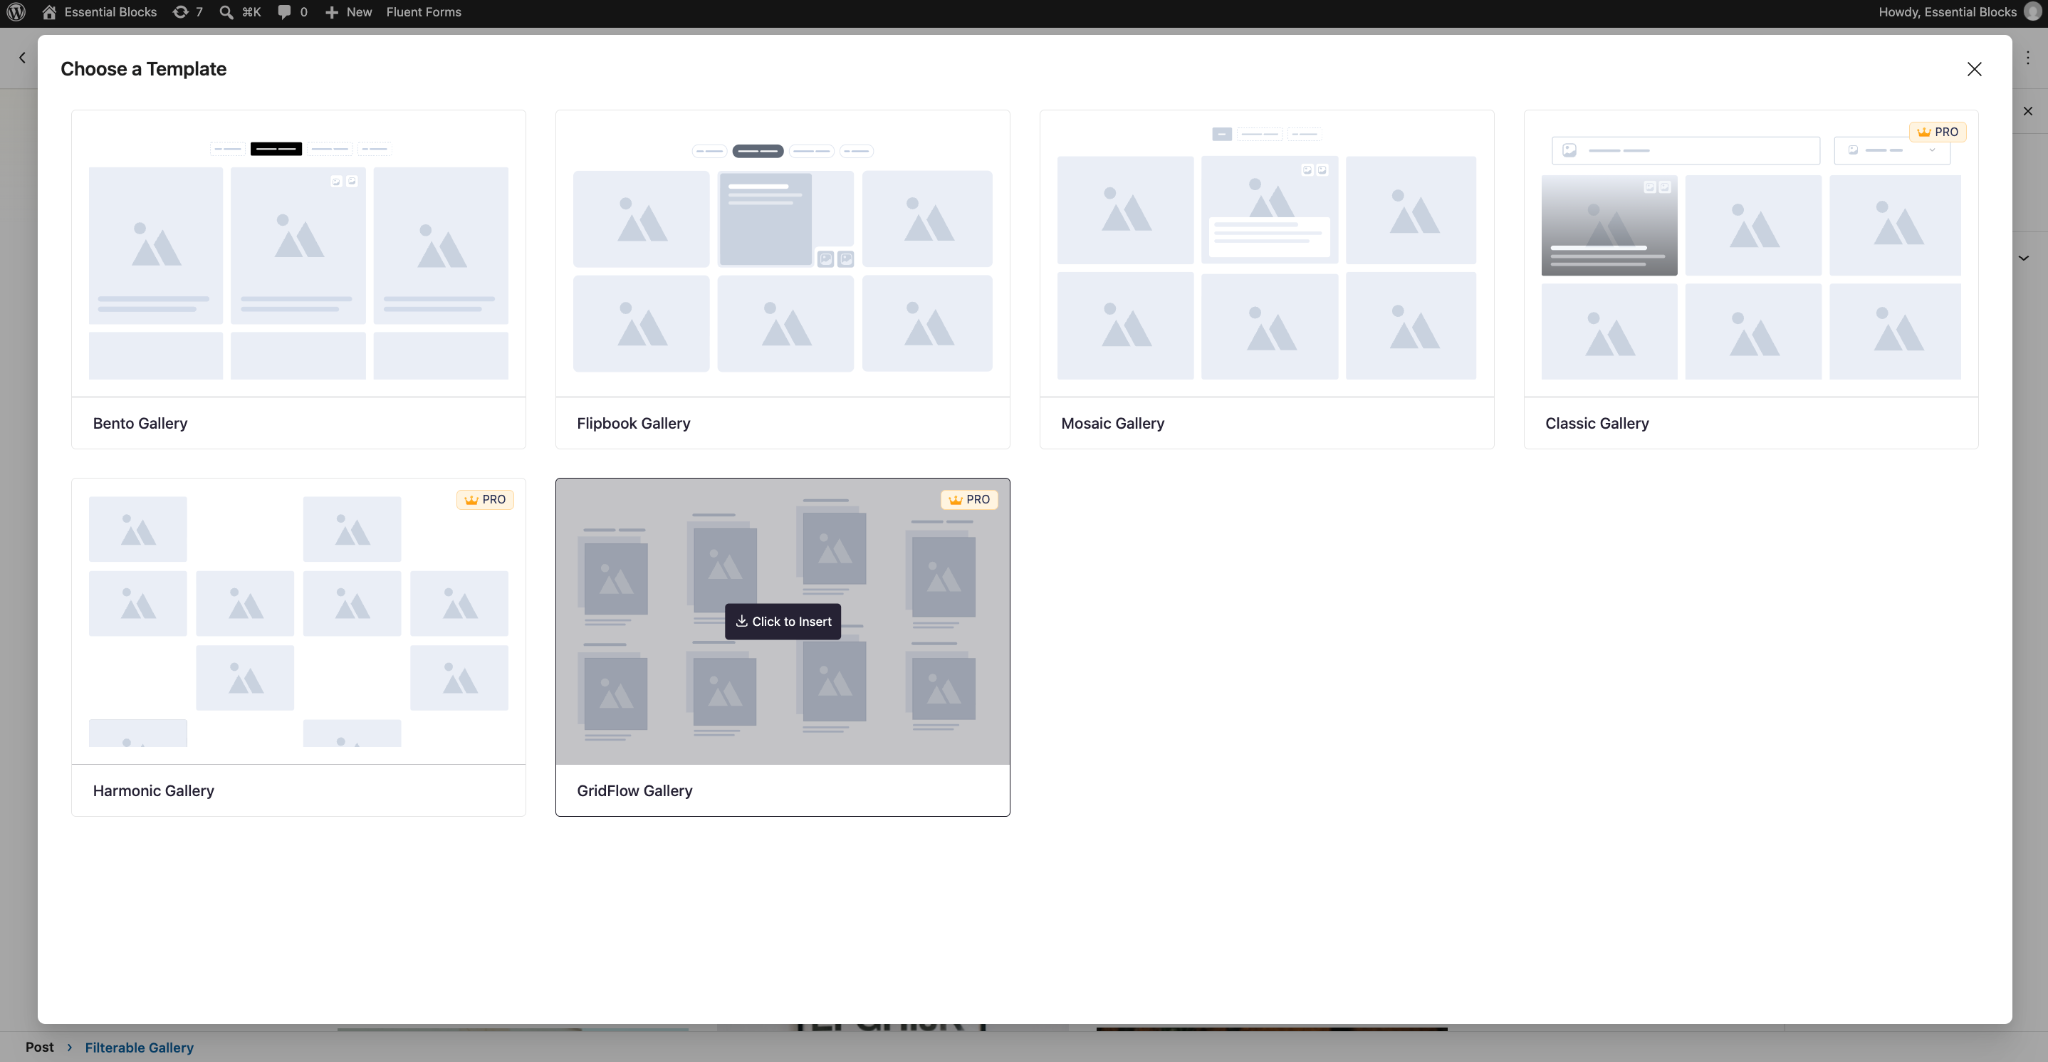
Choosing a preset first gives you a strong visual base. You then only need to swap in your own images and tweak a few styles, rather than designing every detail from scratch.
Step 4: Create Your Filter Categories
Open the block settings and go to the “General” tab, then expand the “Filter” dropdown. Here you can toggle the filter on or off, enable the search option and enable the “All” option. Add your filter items one by one using the categories you planned earlier, for example: Branding, Web Design, Illustration, Packaging and Photography.
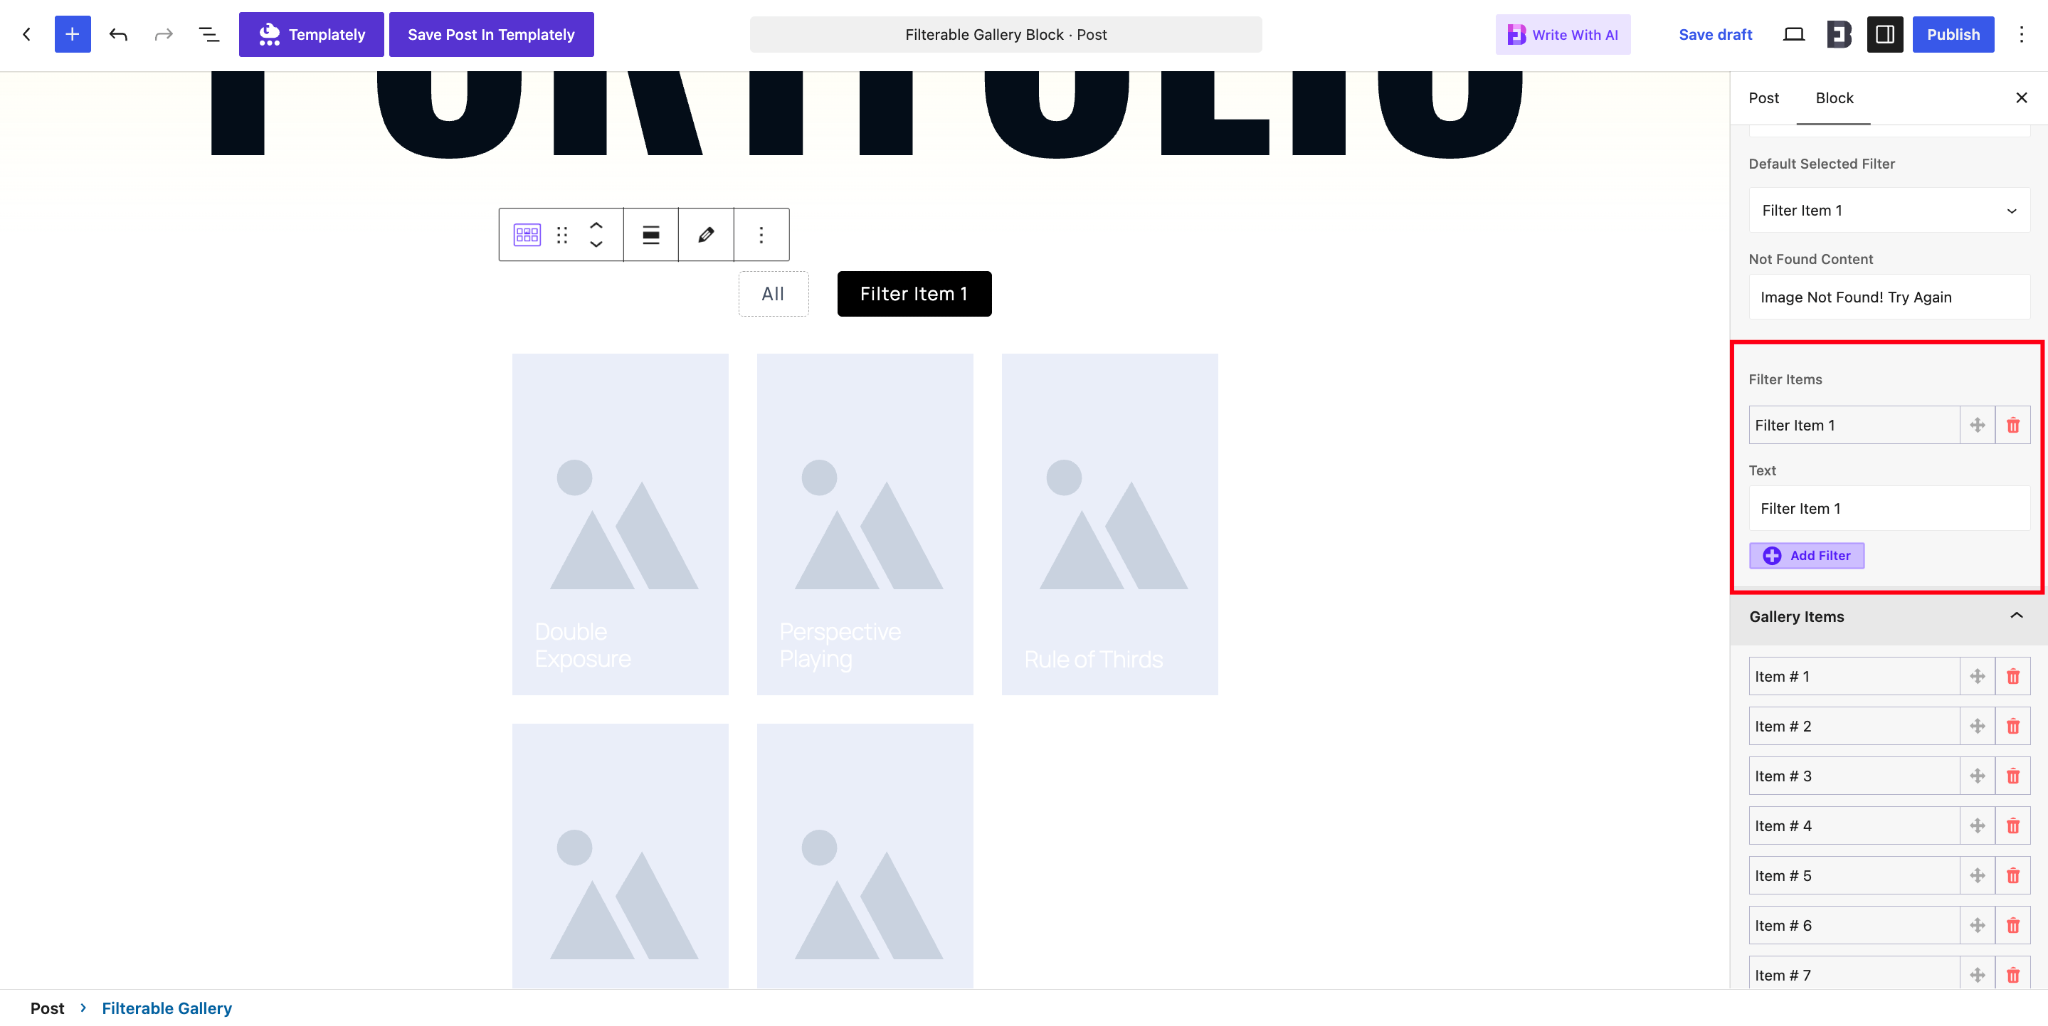
You can also rename the “All” button. Something like “All Work” or “Everything” can feel more on-brand than the default text. If your portfolio is large, turning on the search option lets visitors type a keyword and find a specific project even faster.
Step 5: Add Your Gallery Items
Next, open “Gallery Items”. For each item, upload or select an image, assign its filter category, and add a caption, description and link if you want one. The link is useful if each project has its own case study page, so visitors can click through for the full story.
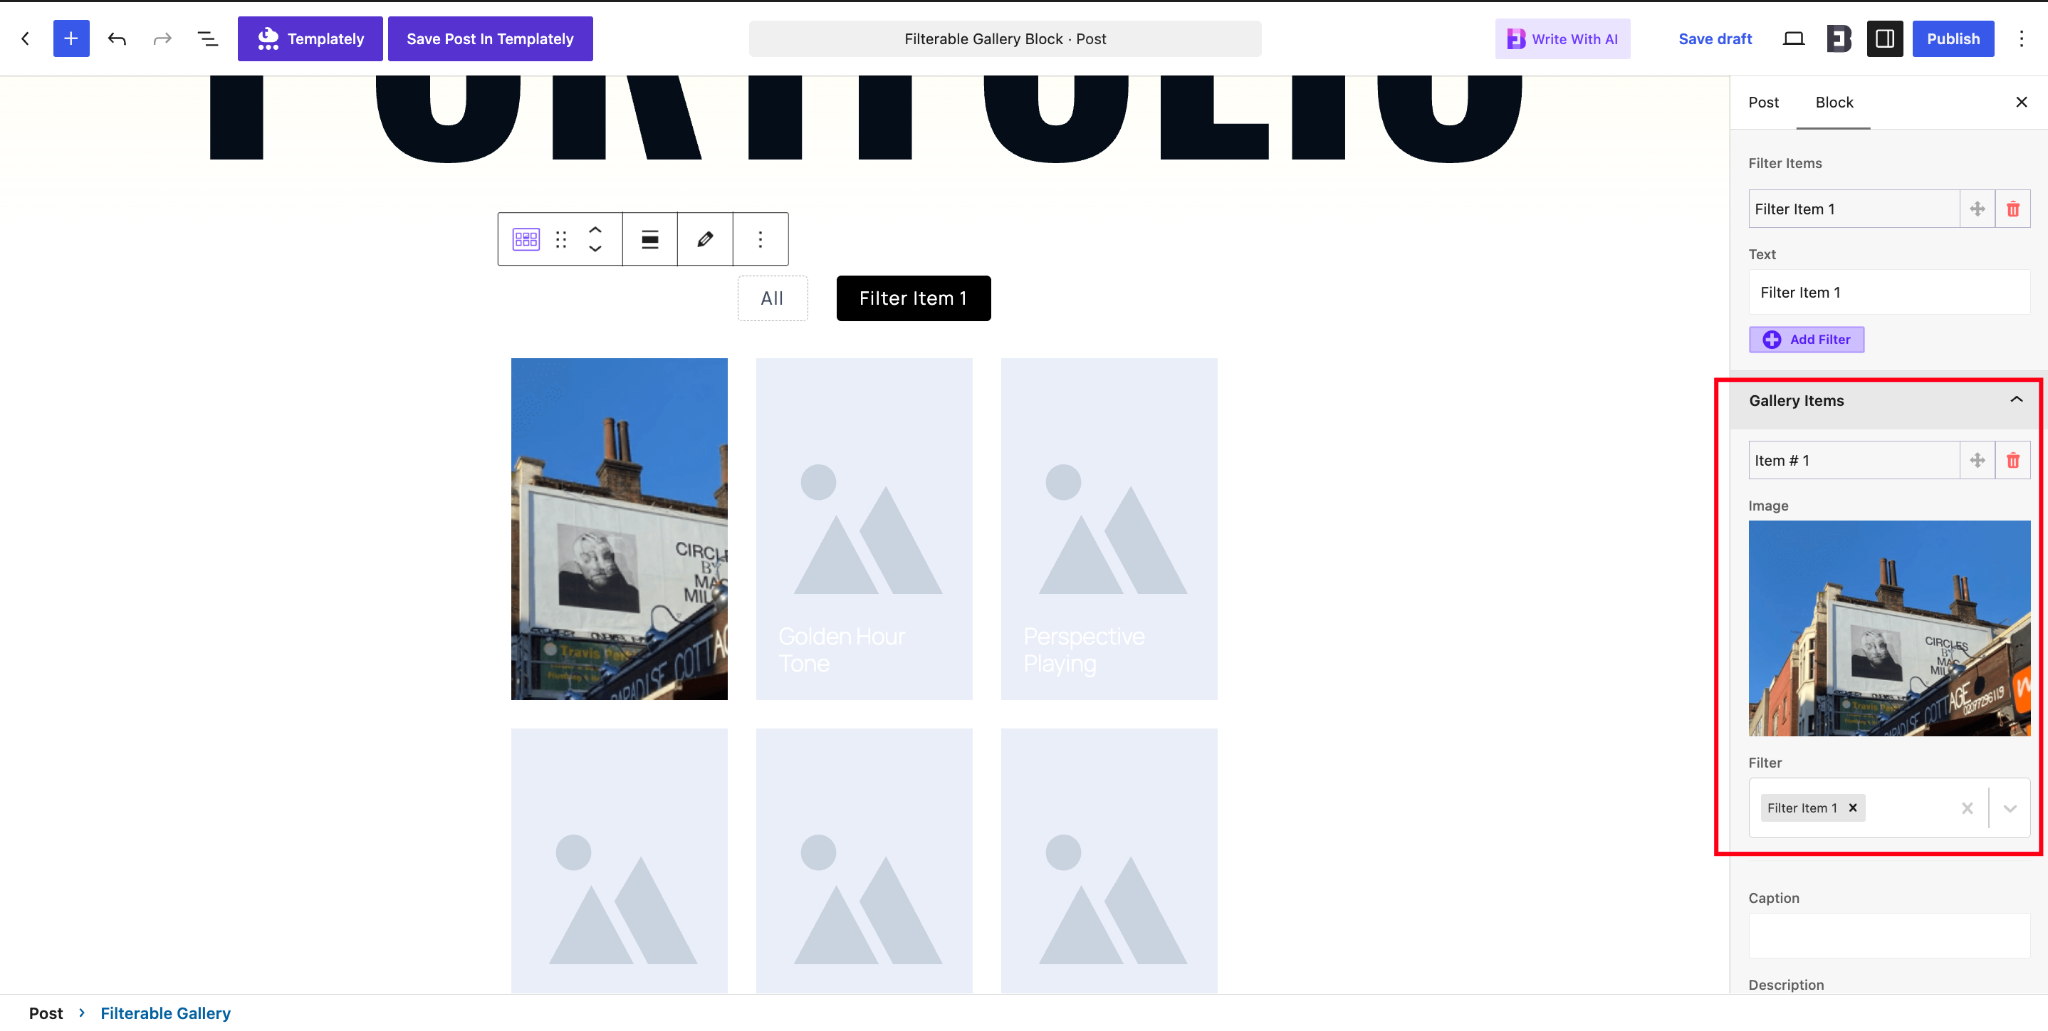
Use drag and drop to reorder items. Put your strongest, most recent projects first, since the “All” view is what most visitors see before they touch a filter. If a project fits two categories, think about which one a client is more likely to click and assign it there.
Step 6: Configure Layout, Columns and Lightbox
Still in the “General” tab, adjust the “Image Size”, “Number of Columns” and “Image Gap”. Three columns usually works well on desktop for portfolios, while two or even one column keeps images large and readable on mobile. Toggle “Caption” and “Description” on or off depending on how clean you want the grid to look.
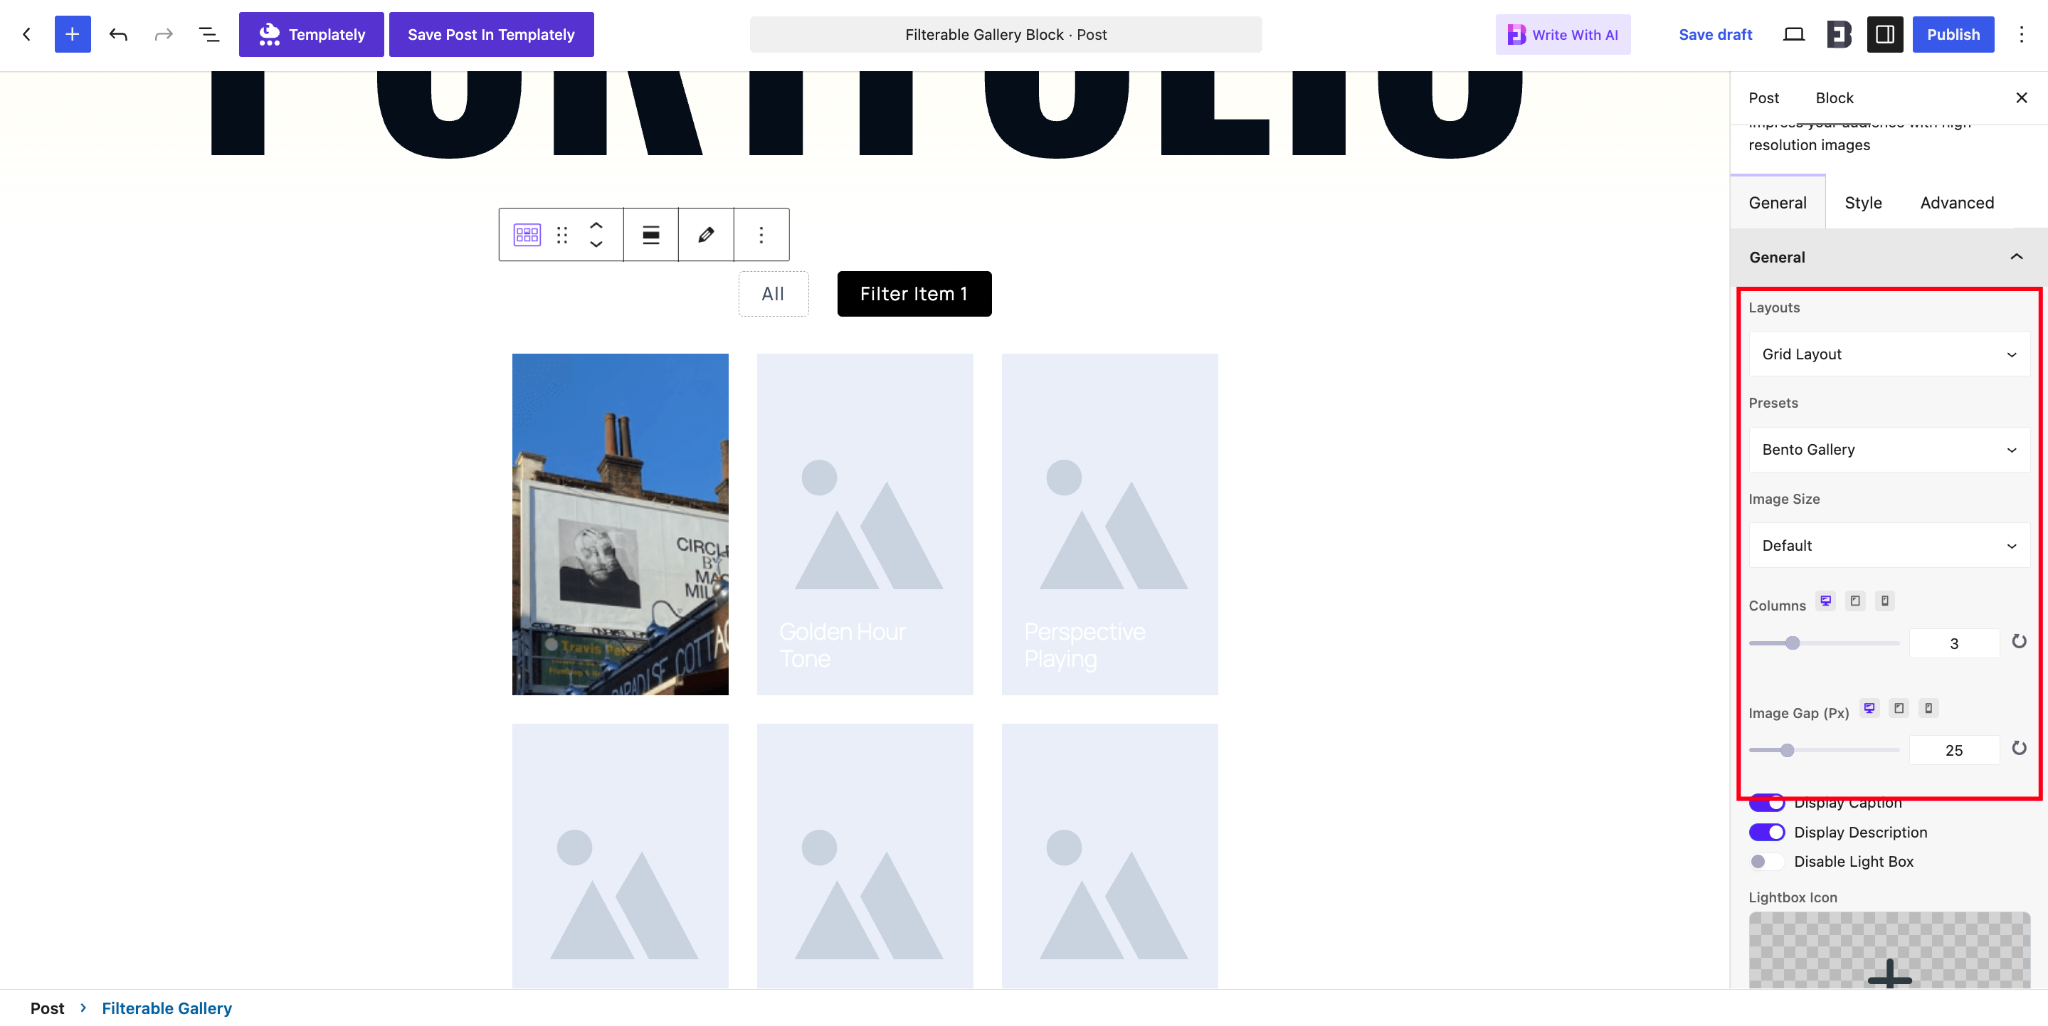
Turn on the “Lightbox” so visitors can open any image in full size without leaving the page. You can also choose a lightbox icon and enable links. This combination lets visitors preview quickly in the lightbox and dive deeper through the project link if they are interested.
Step 7: Enable the Load More Button
If you have more than 12–15 projects, enable “Load More”. This shows a set number of items first and loads the rest only when the visitor asks for them. Your page stays faster and less overwhelming, especially on mobile.
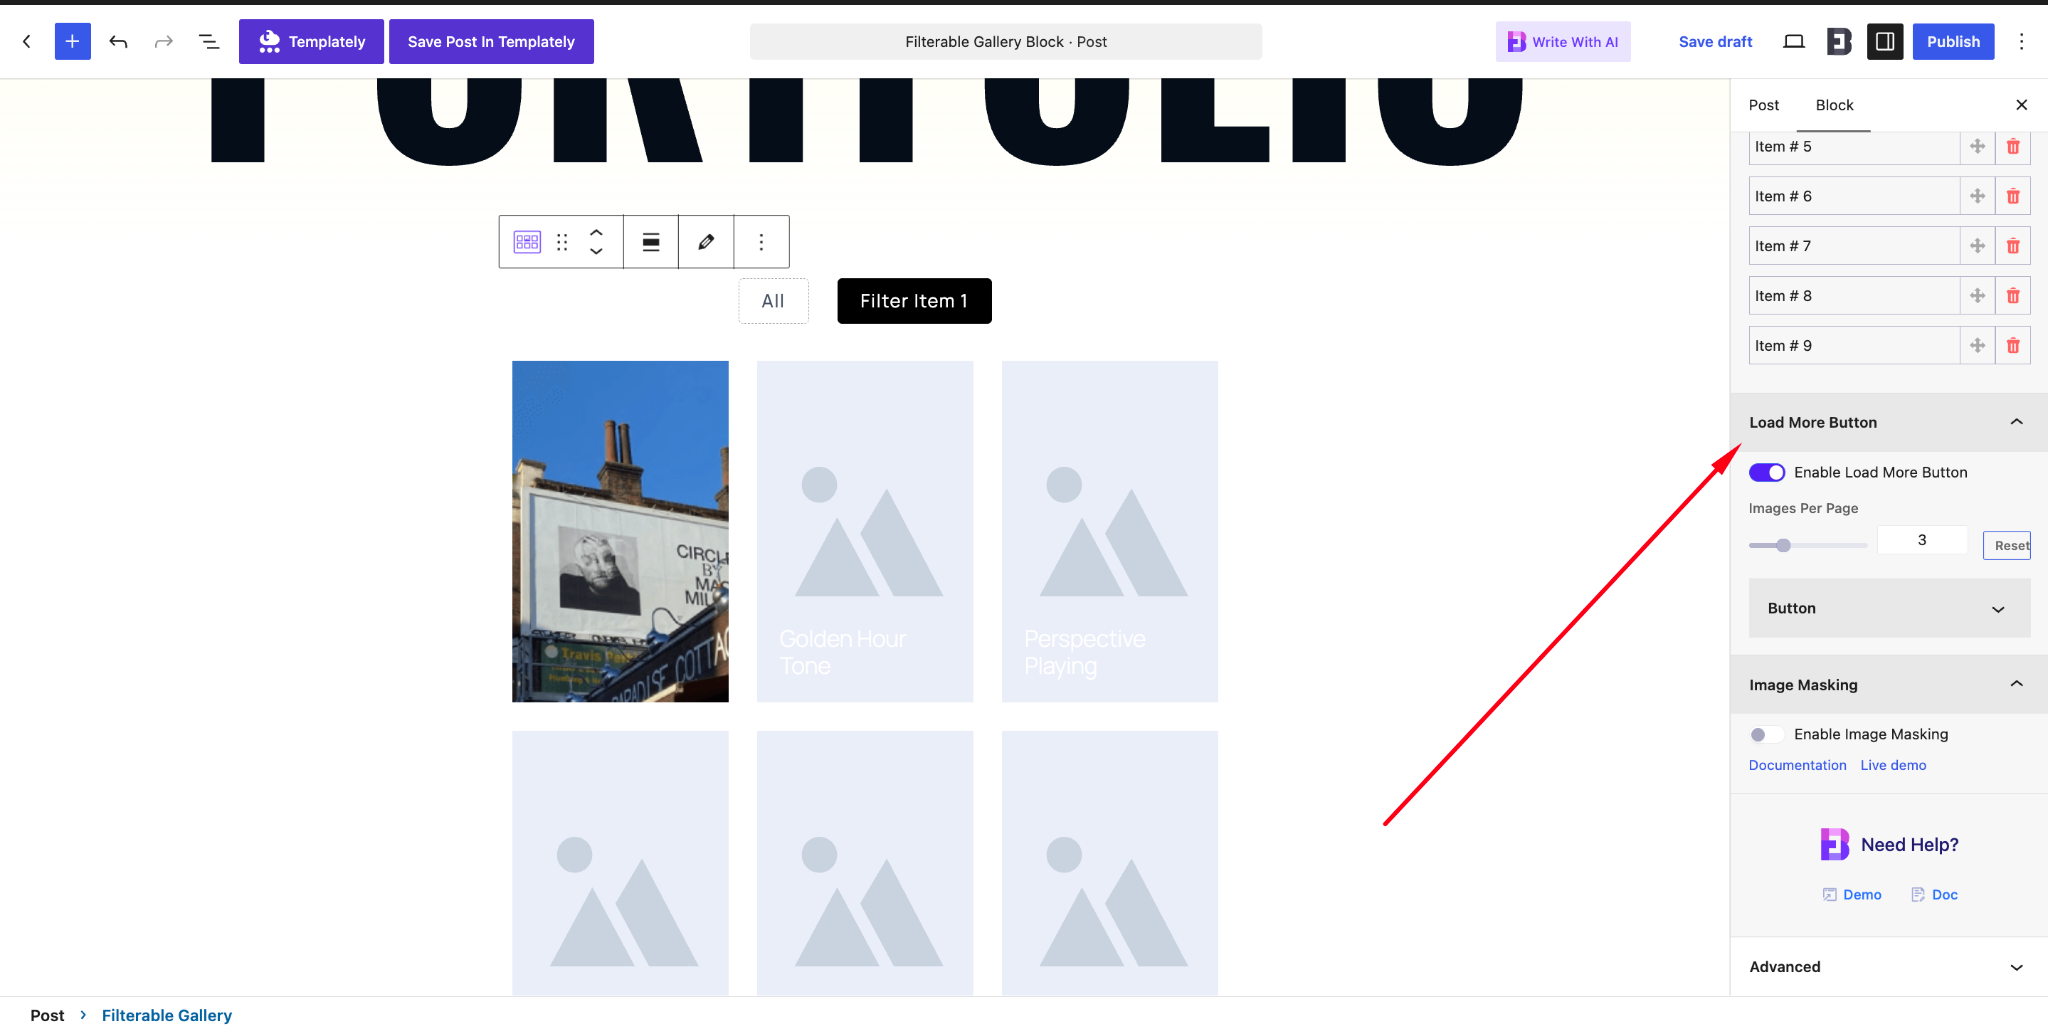
Customise the button text and typography to match your brand. Instead of a generic “Load More”, try something like “See More Projects” or “Show Me More Work” for a friendlier touch.
Step 8: Style Your Gallery
Switch to the “Style” tab. Here you can customize “Image Settings”, “Action Style”, “Content Style”, Filter styles and the “Not Found” message. Adjust typography, icon styles, colours and backgrounds so the gallery matches the rest of your website.
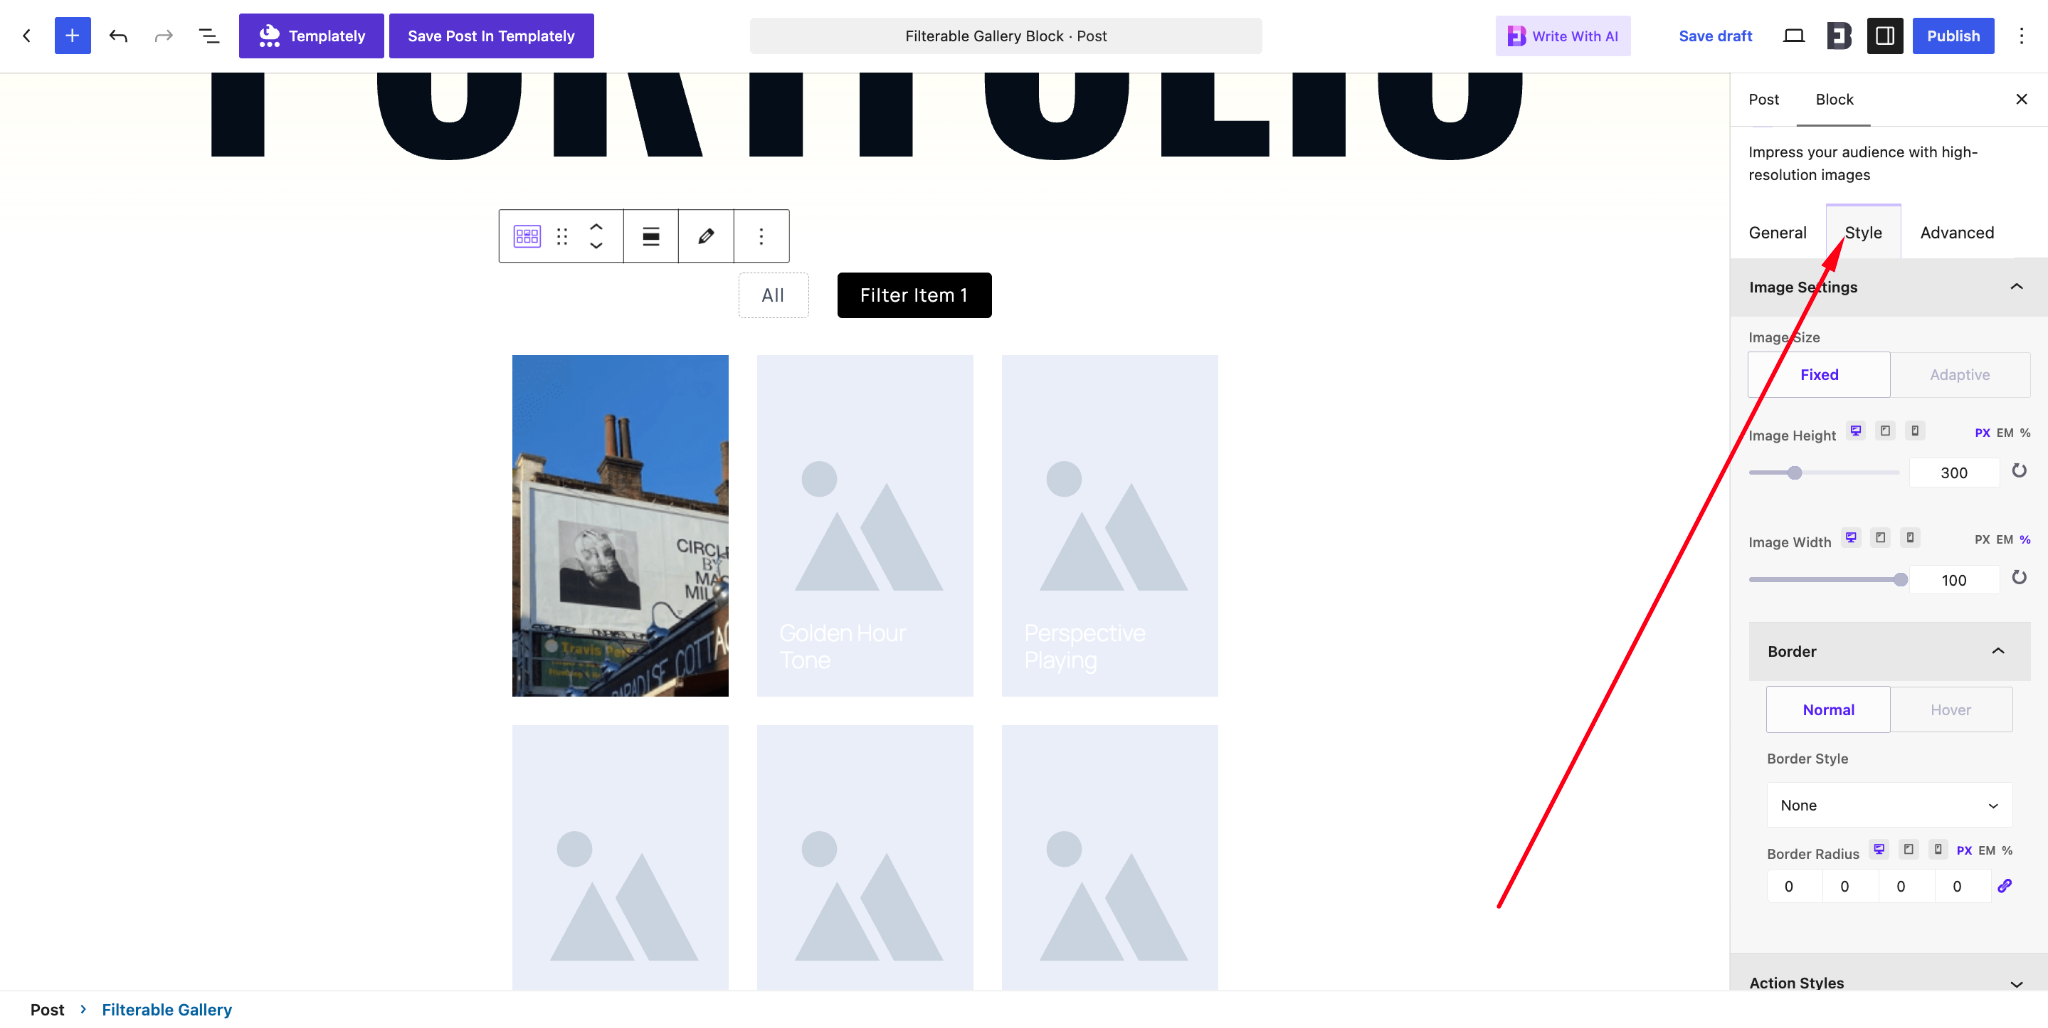
Pay special attention to the filter buttons. Give the active filter a clear, contrasting colour so visitors always know which category they are viewing. If you use Global Controls with global colours and typography, your gallery will stay consistent with your other blocks automatically.
Step 9: Fine-Tune Advanced Settings and Preview
Finally, open the “Advanced” tab to adjust margin, padding, background and visibility options. Preview your page on desktop, tablet and mobile. Click every filter, test the search and open a few images in the lightbox to make sure everything behaves as expected.
If something looks off on a particular screen size, Essential Blocks lets you customize responsive breakpoints so your portfolio fits the devices your visitors actually use. When you are happy, hit “Publish”.
Real-World Examples: Filterable Portfolio Ideas You Can Copy
Seeing how others might use a filterable layout makes it easier to plan your own. The same block can power very different portfolios depending on your categories, preset and styling. Here are a few ideas you can adapt in minutes.
Each of these examples uses the same core steps above. The only real differences are the filter names, the preset and how much text you show on each item. That flexibility is exactly why a no-code filterable gallery is so useful.
Freelance Graphic Designer
Filters: Logo Design, Brand Identity, Social Media, Print, Packaging
Preset: Bento Gallery with captions on and descriptions off
Why it works: The tile layout gives each piece room to breathe, while short captions name the client. Each item links to a case study page.
Photography Studio
Filters: Weddings, Portraits, Events, Products, Travel
Preset: Gridflow Gallery (PRO) with lightbox enabled and captions off
Why it works: The masonry layout handles mixed vertical and horizontal shots, and the lightbox lets couples or clients view every image in full detail.
Web Design Agency
Filters: eCommerce, SaaS, Healthcare, Education, Nonprofit
Preset: Classic Gallery (PRO) with captions, descriptions and Load More enabled
Why it works: Industry-based filters help prospects find relevant proof fast, and the clean grid keeps a large set of website screenshots tidy.
Tips to Make Your Filterable Portfolio Gallery Stand Out
A working gallery is a great start, but a few small touches can turn it into a real lead generator. Think about what happens before and after a visitor uses your filters. What makes them trust you, and what tells them what to do next?
Combine the gallery with other Essential Blocks features to build a complete portfolio page. You can add depth with effects, guide visitors with clear calls to action and save time with reusable designs. Here are some practical ideas.
Add a Strong Call to Action Below the Gallery
Never let your portfolio be a dead end. Right after the gallery, add an EB Call To Action block with a simple message like “Like what you see? Let’s work together.” and a button to your contact page. You can also add a contact form directly on the page so visitors can reach you without clicking away.
Use Creative Effects Sparingly
Essential Blocks offers features like Image Masking and Morphing, Interactive Animation (PRO) and the Liquid Glass Effect. These work brilliantly for your hero section or page header to set the tone before the gallery. Keep the gallery itself clean, though, so your work stays the focus.
Save Time with Templates and Copy-Paste Styles
If you manage several portfolio pages, for example one per service, use the free Copy Paste Design Styles feature to reuse your gallery styling across them. You can also start from ready Gutenberg patterns or Templately templates built with Essential Blocks to build the full page around your gallery faster.
Keep Your Portfolio Fresh
Review your gallery every few months. Remove older or weaker projects, add new ones at the top and check that your filter categories still match the services you want to sell. A smaller, sharper portfolio almost always performs better than a huge, outdated one.
Common Mistakes to Avoid
Even a beautifully designed gallery can underperform if a few basics are missed. Most of these mistakes are easy to avoid once you know about them. Run through this list before you publish and again whenever you update your portfolio.
- Too many filters: More than seven or eight buttons makes the gallery feel cluttered. Merge similar categories.
- Empty categories: Every filter should show at least three or four projects. One lonely item makes that category, and your portfolio, look thin.
- Uncompressed images: Heavy images slow the page down and hurt both user experience and SEO.
- Missing alt text: Alt text helps screen reader users and gives search engines context about your work.
- No next step: Without a call to action, interested visitors leave without contacting you.
- Skipping the mobile check: Many clients will first see your portfolio on their phone, so always test the mobile layout.
Start Building Your Filterable Portfolio Gallery Today
A filterable portfolio gallery helps visitors find the work that matters to them, makes your services clear at a glance and gives your website a polished, professional feel. With the Essential Blocks Filterable Gallery block, you can build one in Gutenberg in minutes, choosing from six presets, custom filters, search, lightbox, Load More and full styling controls, all without touching code.
Ready to show off your best work? Get Essential Blocks and follow the steps above to launch your portfolio today. Want the Classic, Harmonic and Gridflow presets too? They come with Essential Blocks PRO.
If you would like to explore more, check out the Essential Blocks blog for inspiration. Got stuck? Our support team is always happy to help.