Are you looking to create an online marketplace that empowers multiple vendors and drives sales growth? A WordPress eCommerce multivendor website is the perfect solution for it. Today, we will talk about how to create a WordPress eCommerce multivendor website with Gutenberg and achieve success in the fast-paced eCommerce world.
Traditional eCommerce Websites vs Multivendor Websites: 5 Key Differences
When it comes to creating an online store, there are many options available. Two popular choices are traditional eCommerce websites and multivendor websites. While both types of websites serve the purpose of selling products online, there are some key differences between them. Here are 5 major differences to consider when choosing between a traditional eCommerce website and a multivendor website.
Single Owner vs Multiple Vendors
The most obvious difference is that traditional eCommerce websites are owned and operated by a single entity, while multivendor websites allow multiple vendors to sell their products on a single platform. This means that customers can browse and purchase products from multiple sellers in one place.
Commission-based Model vs Direct Sales
Multivendor websites typically operate on a commission-based model, where the website owner takes a percentage of each sale made on the platform. On the other hand, a traditional eCommerce website sells its own products directly to customers.
Flexibility vs. Control
Multivendor websites tend to be more flexible than traditional eCommerce websites. With a multivendor platform, you can choose which vendors you want to work with, set your own commission rates, and create your own website template. This level of customization allows you to build a multi-vendor marketplace that aligns with your specific business goals and needs. In contrast, eCommerce websites those are traditional offers more control over your brand and the products you sell.
Greater Product Selection
Because multivendor websites allow for multiple vendors to sell their products, the selection of products available to customers is typically much greater than what you would find on a traditional eCommerce website. This can be a major selling point for customers who are looking for a wide variety of products to choose from.
Customer Experience
A multivendor website offers customers a more diverse shopping experience by allowing multiple vendors to sell their products on the same platform. This means customers can browse through a variety of products, compare prices, and enjoy more personalized shopping experiences. In contrast, a traditional eCommerce website typically offers a more standardized shopping experience with fewer options for customization and personalization.
Ultimately, the decision between a traditional eCommerce website and a multivendor website comes down to your specific business goals and needs. By understanding the key differences between these two options, you can make an informed decision about which one is right for you.
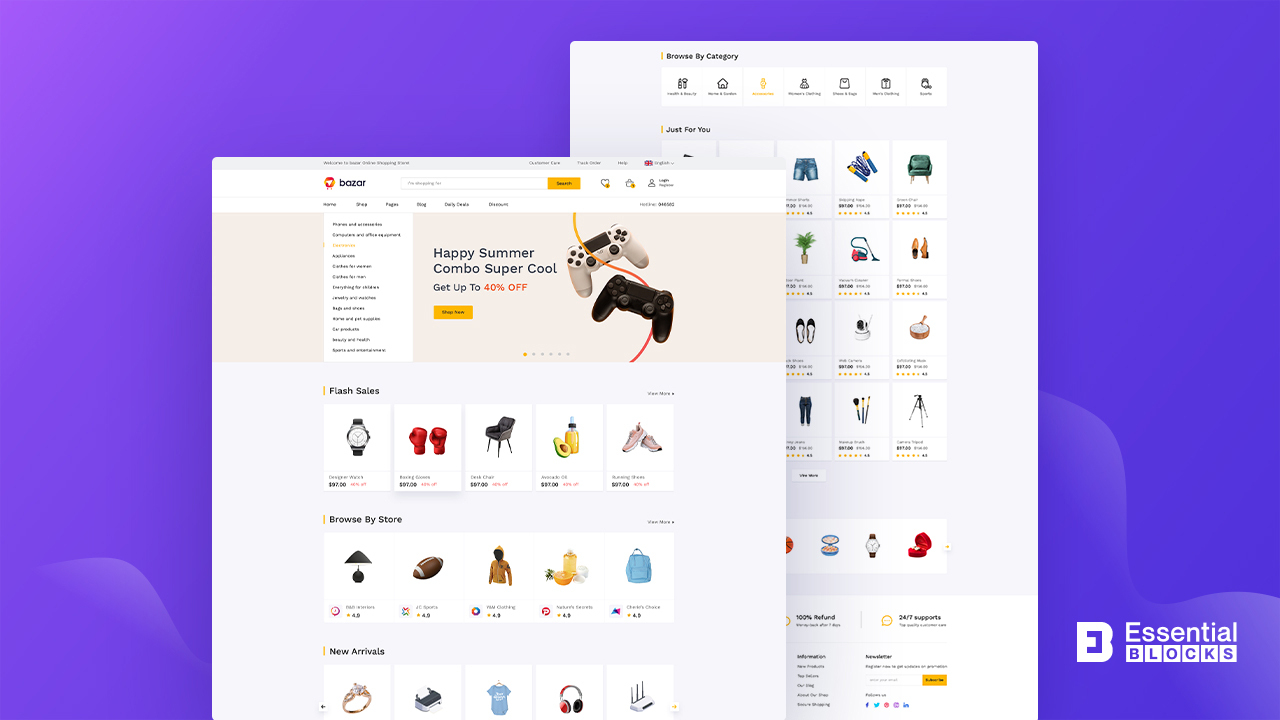
Say Hello To Bazar: Multivendor Marketplace Template For Gutenberg
Looking to create a stunning eCommerce multivendor website without the complexities of coding? Look no further than Bazar!
This versatile Gutenberg template pack is designed with seamless compatibility for both Gutenberg and WooCommerce. And this makes it the perfect solution to build multi vendor marketplace websites like Etsy or Amazon.
With its professional design and attention to detail, Bazar is sure to attract potential customers and keep them engaged with your products. Its minimalist design and interactive layouts are carefully crafted to showcase your products in the best possible light, helping you build a strong online presence and grow your business.
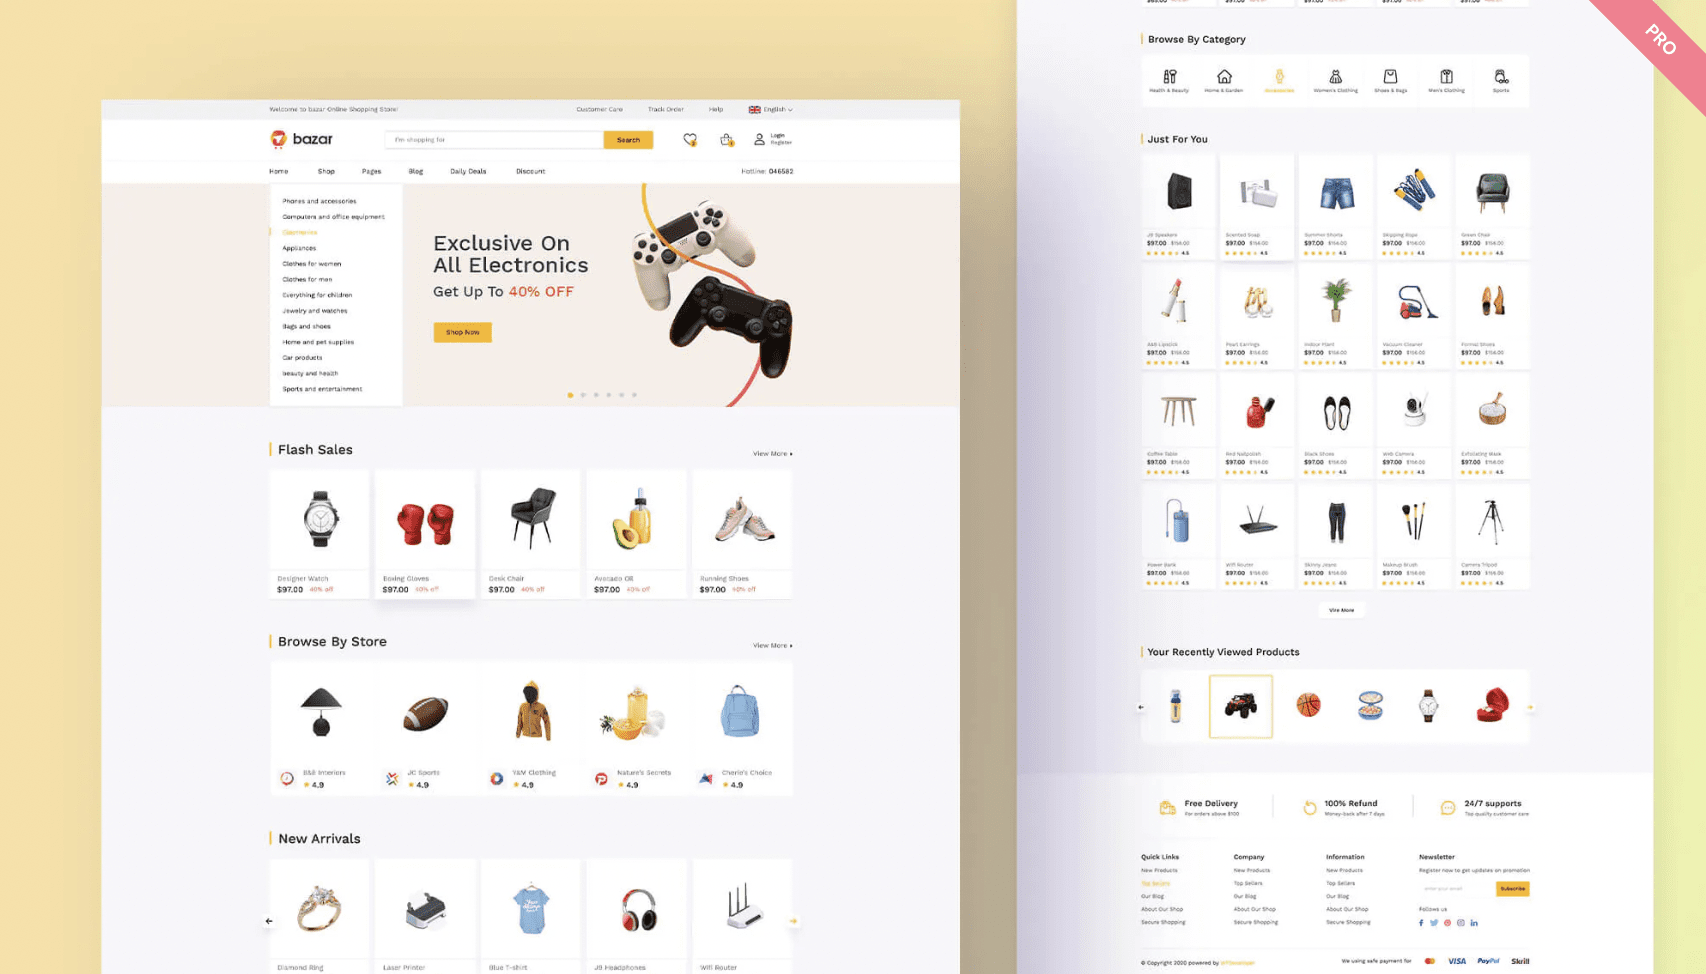
What makes Bazar truly unique is its use of Essential Blocks For Gutenberg, the most popular block library for Gutenberg. It has 53+ advanced blocks more with more than 100K+ happy users. These blocks are designed to expand on the existing features of Gutenberg, giving you greater flexibility and control over your page-building experience.
Whether you are just starting out or looking to take your existing business to new heights, Bazar is the ideal choice for building a multi-vendor marketplace website. With 10+ different ready-to-use pages included, you can create your entire website without any coding, giving you complete control over your online business. Let’s take a look at some of them.
Effective Home Page Design for eCommerce

Bazar’s template pack offers well-organized and visually appealing home page designs for your eCommerce multivendor website. The navigation menu is easy to use, and there are distinct sections for displaying various product categories with key details. The templates also include engaging visuals to enhance the user experience and drive sales.
Captivating Vendor Pages for Sellers

Your vendors are the backbone of your eCommerce multivendor website. With Bazar’s ready-made Vendor Page, you can provide your sellers with a versatile and visually stunning platform to showcase their products. With this template, your vendors can create a unique store experience that attracts customers and boosts sales for your eCommerce multivendor website.
Blog page

If you are looking to incorporate a blog into your eCommerce multivendor website, you will love Bazar’s Blog Page template that features a built-in blogging platform. With this template, you can easily create and publish blog posts that will help you connect with your customers and drive traffic to your online marketplace.
So why wait? Give Bazar a try today and start building your dream eCommerce multivendor website with ease!
How to Set Up Multivendor Marketplace With Bazar?
You can setup a multivendor website with Templately’s amazing template. Follow the easy steps below and create a marketplace with Bazar:
Step 1: Pick A Domain Name And Hosting
When setting up an eCommerce multi-vendor website, the first crucial step is to select a domain name and website hosting provider. A domain name is like your website’s address on the internet. It is a unique identifier that provides credibility to your website and makes it easily accessible to anyone on the internet.
Choosing a domain name that reflects your eCommerce multi-vendor website’s nature and purpose is essential. It should be short, memorable, and relevant to your niche. A domain name can impact the brand image and directly influence the traffic to your website.

As important as your domain name is, choosing the right website hosting provider is equally crucial. A managed hosting provider takes care of all the technical aspects of running your eCommerce multivendor website. This means you won’t have to worry about site maintenance, security issues, or even updates, allowing you to focus on creating a seamless and enjoyable user experience for your customers and vendors.
Step 2: Set Up Your WooCommerce Online Store
After securing your domain name and website hosting provider for your eCommerce multivendor website, the next crucial step is to install WooCommerce on your WordPress website. With WooCommerce, you can easily set up your online store, add products, and manage payments, shipping, and taxes with ease.

To install WooCommerce, you can find it in the WordPress plugin directory or download it from the WooCommerce website. Once installed, follow the intuitive on-screen instructions to configure your online store settings.
Step 3: Transform Your Shop Into A Multi-Vendor Marketplace
Once you have set up your online store with WooCommerce, the next step is to transform it into a multi vendor marketplace using marketplace plugins. One solution is WC Vendors Marketplace, which seamlessly integrates with WooCommerce.

Simply install the plugin on your website, and head to the ‘Settings’ page where you can enable others to become vendors on your site, set commissions, and more. With this plugin, you can easily manage multiple vendors and create a thriving online marketplace.

How to Create an eCommerce Multivendor Website in Gutenberg
Congratulations on successfully setting up your online multi-vendor marketplace on WordPress! Now that your marketplace is up and running, it is time to make sure it looks as good as it functions.
A visually appealing and user-friendly website is crucial for attracting and retaining customers. Luckily, you do not need to be a coding expert or hire a professional designer to create a stunning website. You can do it by following some simple steps mentioned below.
Before getting into the steps of creating an eCommerce multivendor website, make sure you have already installed the below plugins to your WordPress site:
✅ Essential Blocks for Gutenberg: a robust collection of over 53+ Advanced blocks designed to enhance your Gutenberg editing experience.
✅ WooCommerce: Efficiently manage and add products to your WordPress site with the powerful eCommerce plugin, WooCommerce.
✅ Fluent Form: Create custom forms and surveys with ease using this versatile plugin to collect valuable customer feedback and insights
✅ Templately: Ready-to-use template pack for creating stunning pages and designs for your eCommerce multivendor website.
Step 1: Insert The Bazar Template Into Your Gutenberg Editor
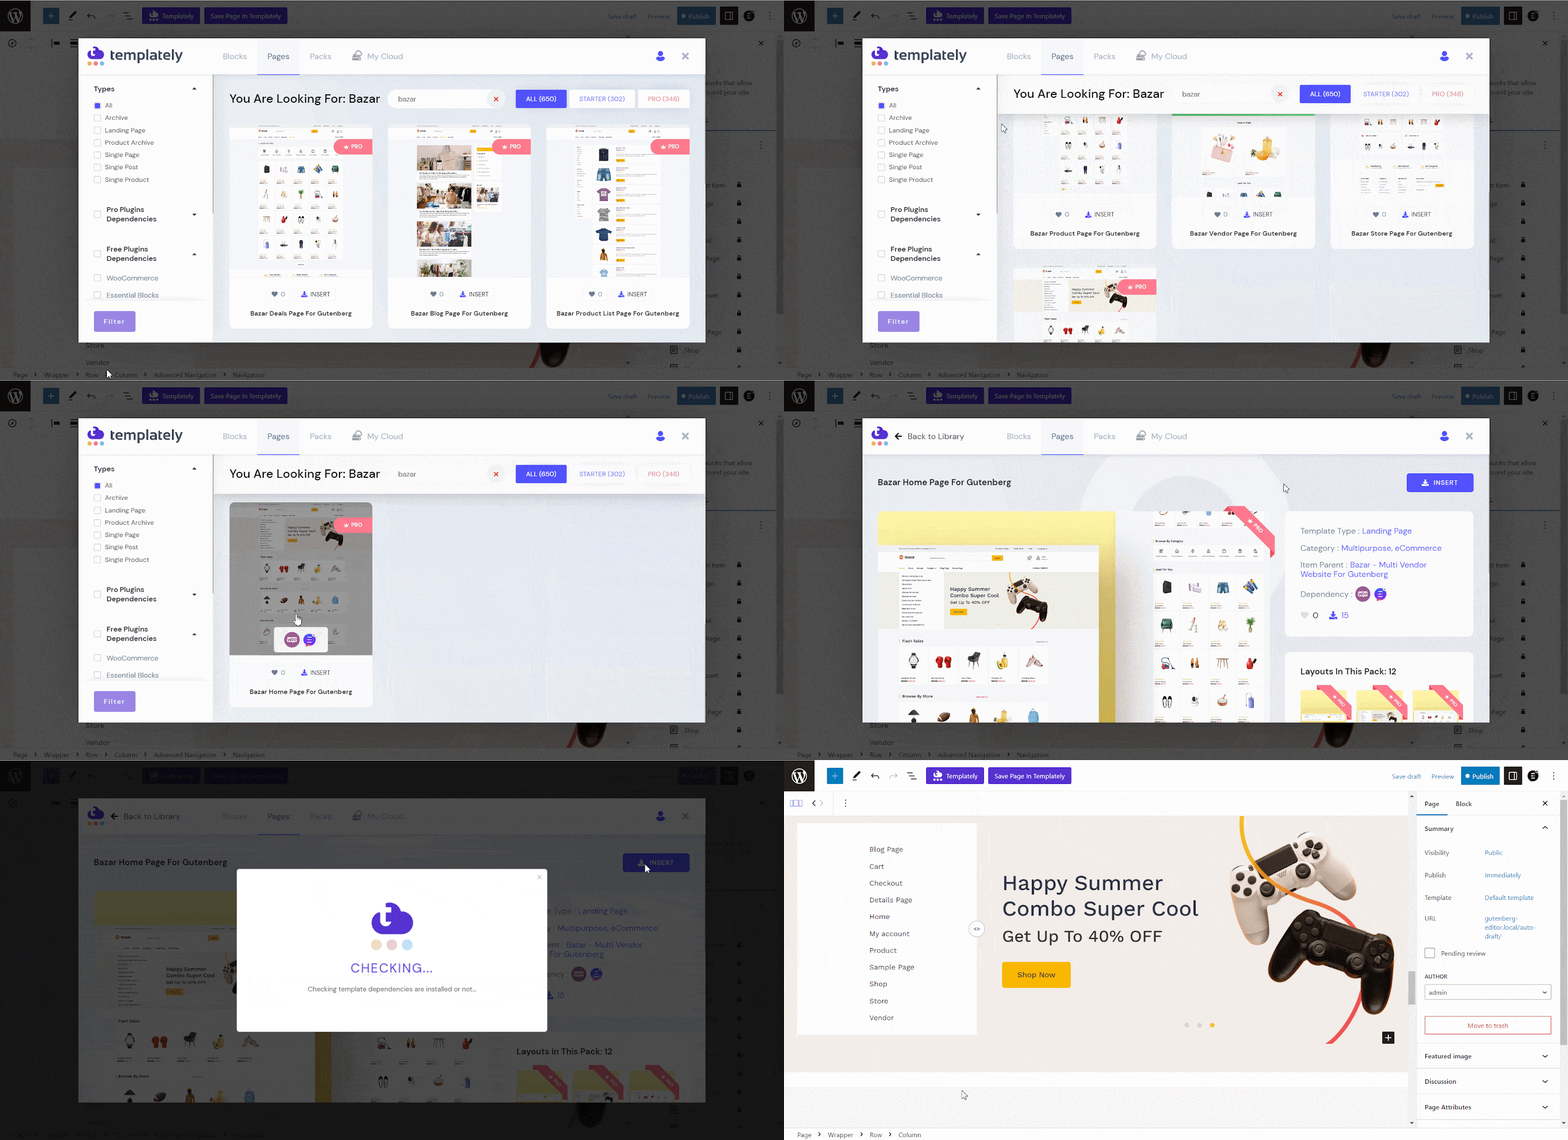
With Templately, accessing the ready-to-use templates is simple. Just click on the Templately icon located at the top of your Gutenberg editor to view all available templates in a visually appealing popup window.
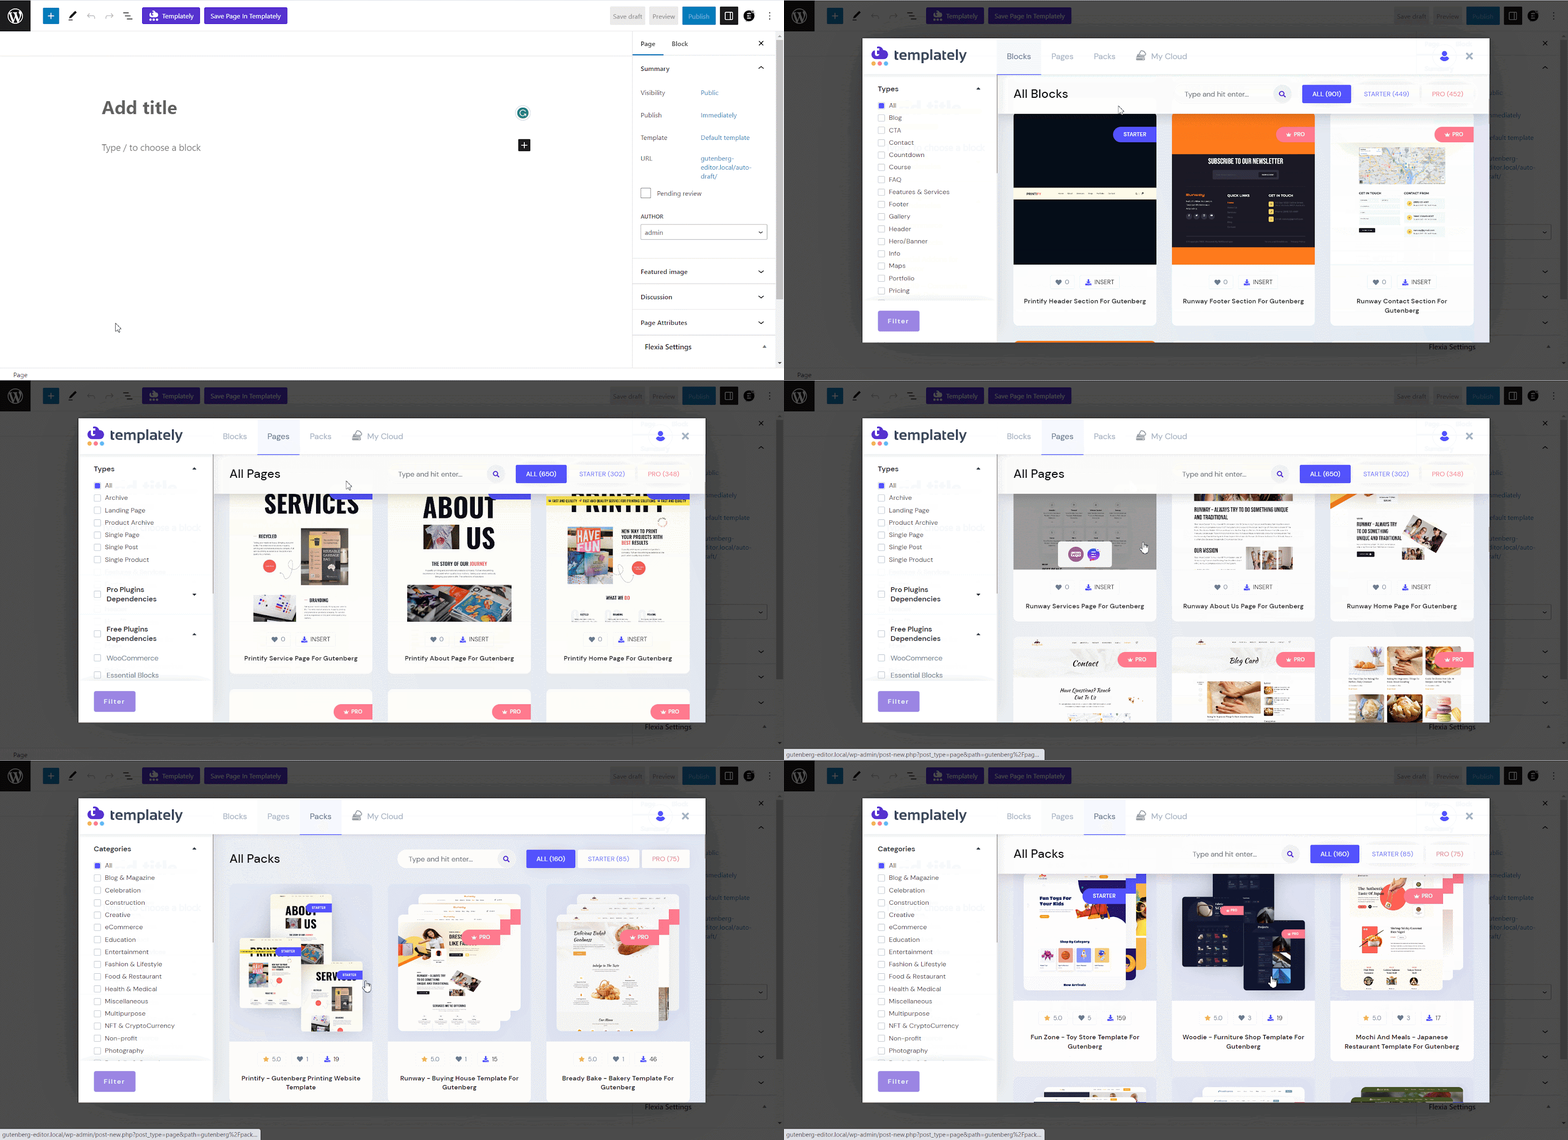
Next, navigate to the search panel and enter either ‘Bazar’ to find the relevant templates. This will bring up all the related pages and blocks associated with your search terms.
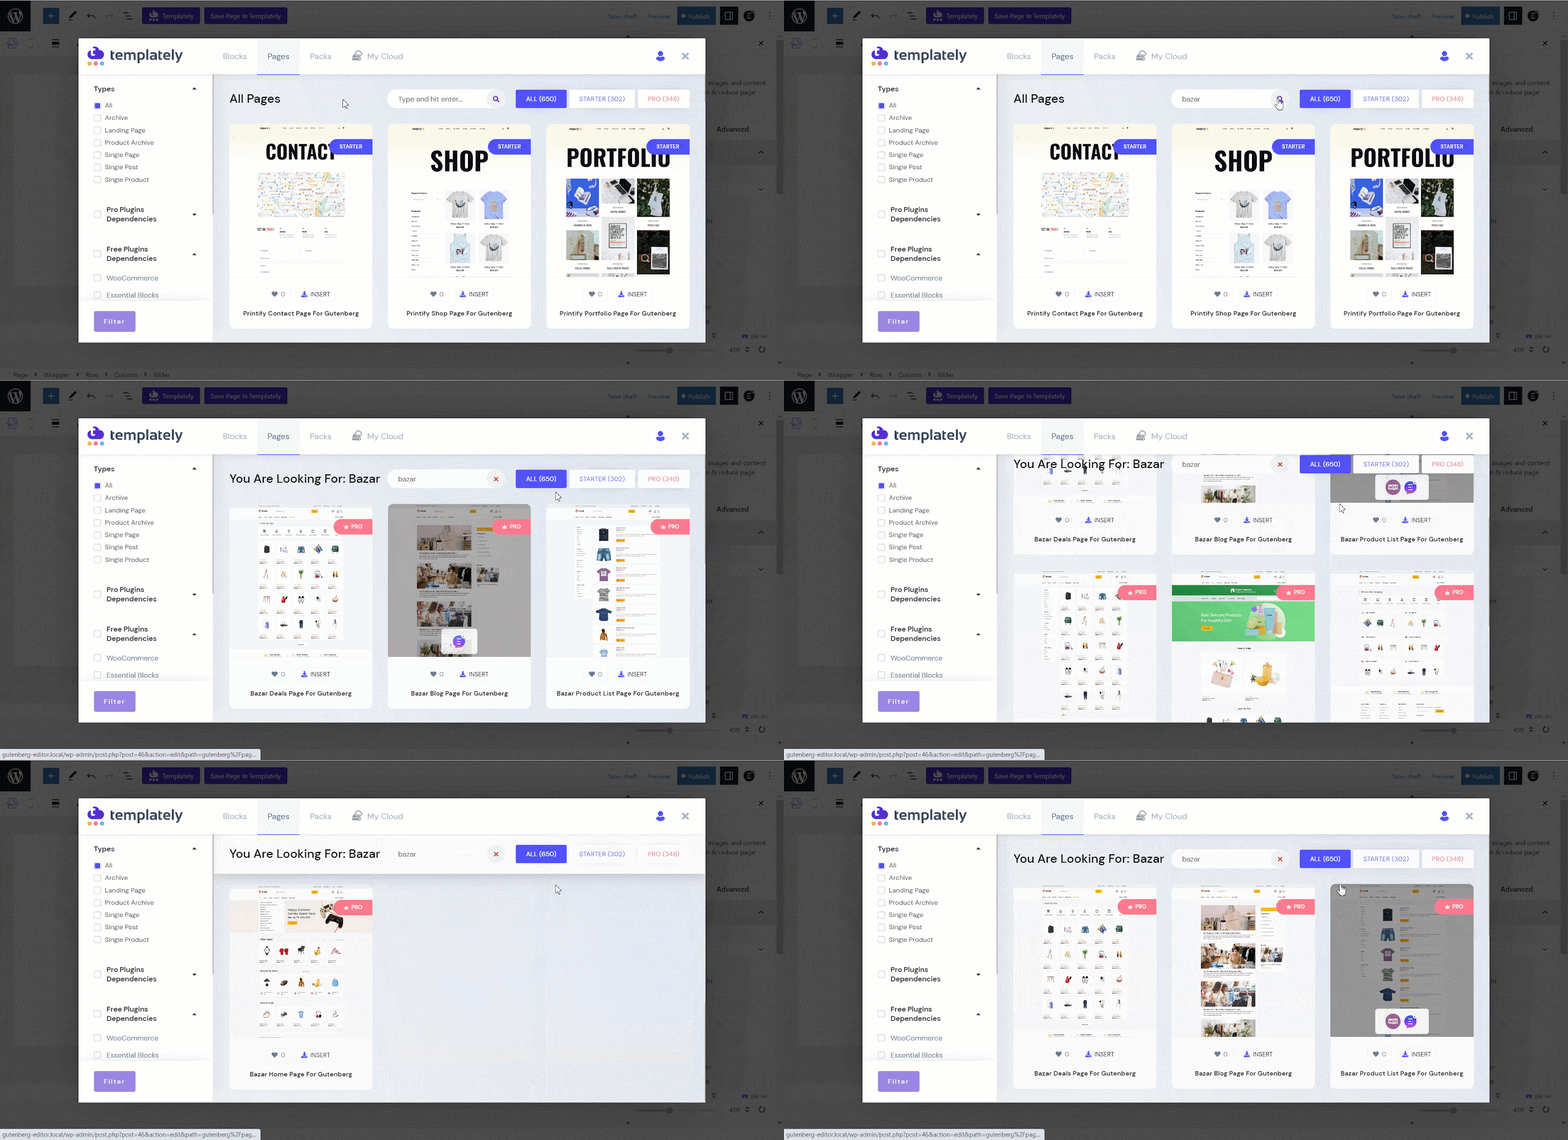
For the tutorial, we’ve chosen the ‘Bazar Homepage’ template. To add the selected template to your website, click the ‘Insert’ button. You can use this same process to add additional pages to your eCommerce multivendor website.
Step 2: Customize Your Multivendor Marketplace Website
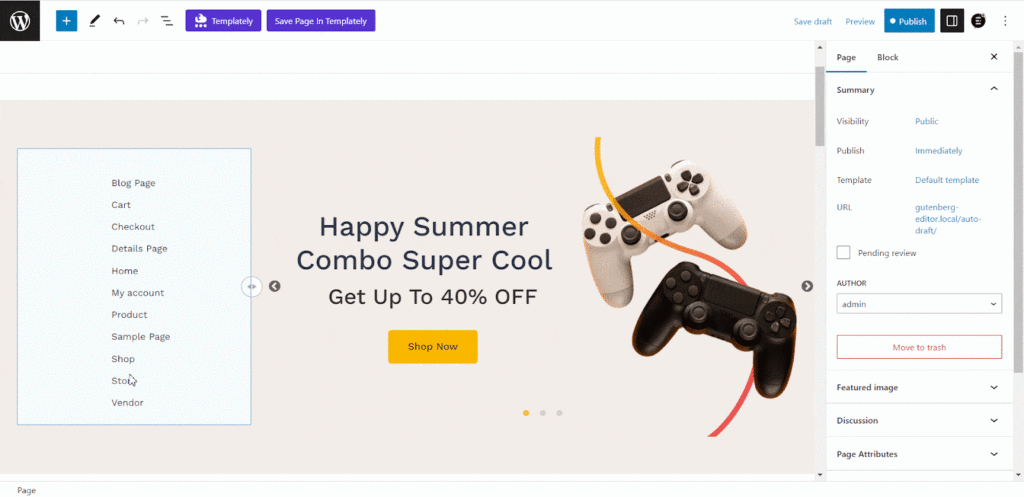
With the ‘Bazar’ template available in Templately, you can quickly create and publish your own eCommerce multivendor website without writing any code. The template covers all the essential components required for an eCommerce multivendor website, and you can customize it to match your branding. Plus, you can easily add more content as per your needs since the template is fully customizable.
Step 3: Preview And Publish Your WordPress Multivendor Website
Once you have finished customizing your website, you can preview it by clicking on the ‘Preview’ button located at the top right corner of the Gutenberg editor. You can select the device option from ‘Desktop’, ‘Laptop’, or ‘Mobile’. And then click on the ‘Preview in new tab’ option to check how your eCommerce multivendor website will appear on different devices.
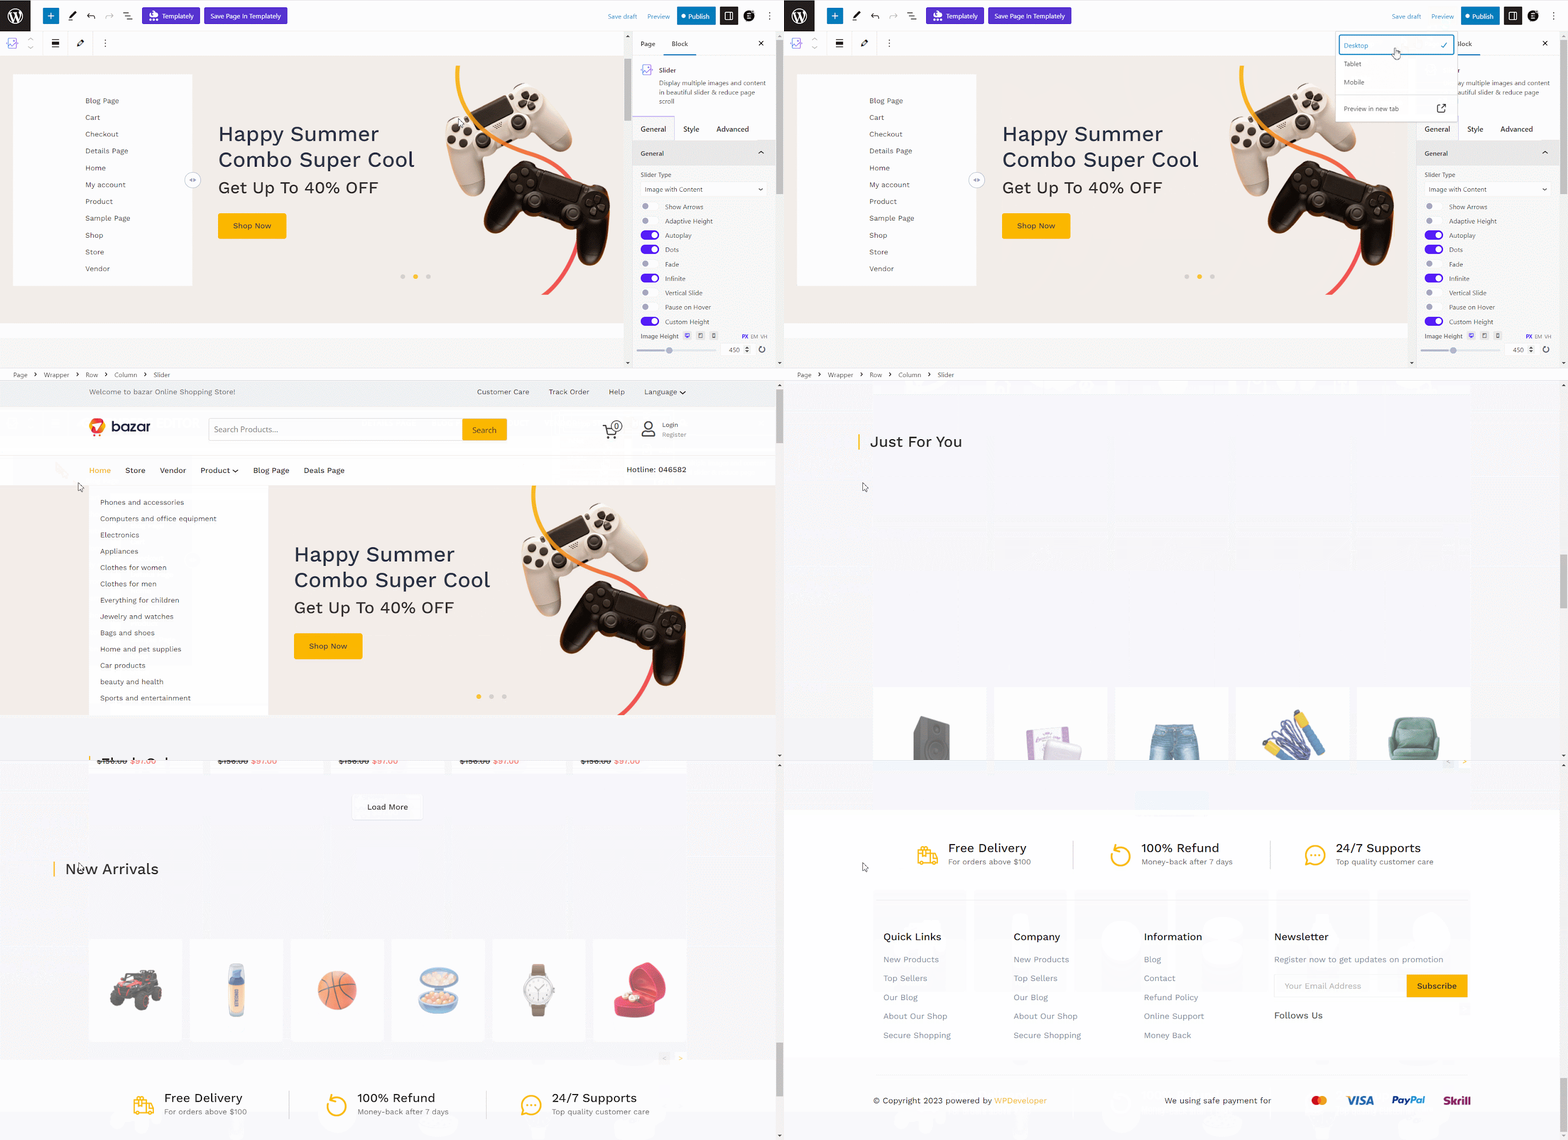
Now that you’re done with everything, simply click the ‘Publish’ button located in the top right corner of the Gutenberg editor. Your website will now be live and accessible to anyone online.

Here concludes our tutorial on creating an eCommerce multivendor website using Bazar. With the tutorial completed, you’re ready to start running your eCommerce multivendor website.
🎉 Pick a Template & Build Your Multivendor Website!
Choosing the right eCommerce website template is a foundational step in building a successful online store. It should not only resonate with your brand but also provide a seamless shopping experience for your customers. Keep these considerations in mind as you select your template, and build your dream online store today.
Hopefully, this blog guideline will help you create your own Artificial Neural Network website for WordPress immediately using your favorite website builder, Gutenberg or Elementor. Also, don’t forget to subscribe to our blog page and join our super-friendly Facebook community of WordPress enthusiasts.


