How To Use The Query Loop Block To Create Unique Layouts
The WordPress theme world is changing rapidly to provide every facility that someone with no coding knowledge will need to create and design his/her own website. The Query Loop Block is one of the latest editions of theme blocks by WordPress. But what does this techy term mean, and why is it essential to know about for a no-coder like us? Let’s delve deeper into the WordPress Query Loop Block in this article so you can learn more about it and how to use it.

What Is The WordPress Query Loop Block?
One of the most comprehensive WordPress theme blocks available in the new Site Editor is the Query Loop Block. It is a more sophisticated version of the Latest Posts Block and was included in WordPress Core in version 5.8. Anyone may use it to create a block that dynamically fetches and displays post material on a page or template.
Additionally, the Query Loop Block is not just for showing blog entries. It can be used to retrieve material from any available custom post type. It can even be used to display products when combined with WooCommerce Blocks.
Now, “Loop”, as the word suggests, is how WordPress refers to a method of repeatedly showing the same information. Therefore, a loop of blog posts is a collection of blog entries that share characteristics like the blog title, featured image, author, publication date, and a brief description. The loop gathers this information from posts (or any other post type) and loops it. On the other hand, a “Query Loop” query component allows a user to order the loop to pull in a specific piece of data.
So, to name a few alternatives, a Query Loop Block can get and show all posts or posts from a certain category. This enables a user to display only posts from “Category A” and hide all posts from Category B or C. With Query Loop, we can display the following things:
- Blog Posts
- Website Pages
- WooCommerce Products
- Other Custom Post Types
Query Loop Nested Blocks
In the Gutenberg editor, “nested blocks” generally refer to the ability to place one block inside another, creating more complex and flexible content layouts. For instance, you can have a “Columns” block as a parent block, and then insert various content blocks like text, images, buttons, etc. as child blocks within the columns. This nesting capability allows for more intricate designs.
The Query Loop Block is made up of two immediate “Nested Blocks”:
- Post Template Block: This block contains additional nested blocks that show post metadata, such as the title and featured image.
- Pagination Block: Allows posts to spill over into pages so that more can be presented.
How To Add The Query Loop Block To An Index WordPress Template
It’s time to get into the step-by-step guidelines for adding Query Loop Block in WordPress. Open your WordPress dashboard and start following the steps below. In this tutorial, we are using the “Twenty Twenty-Three” Default WordPress Theme.
Step 1: Set Up The Index WordPress Template
In the new and improved Site Editor, we’re going to show how to add a WordPress Query Loop Block to a template. Hover your cursor over “Appearances” option on the side panel to get there, then click on “Editor“. The dropdown menu will then appear when you click the icon in the top left corner. Then select “Templates” from the menu.
Find the template you want to edit from the list of available templates. The “Index” template, which indexes or shows website posts, is one of the most obvious templates for this block.
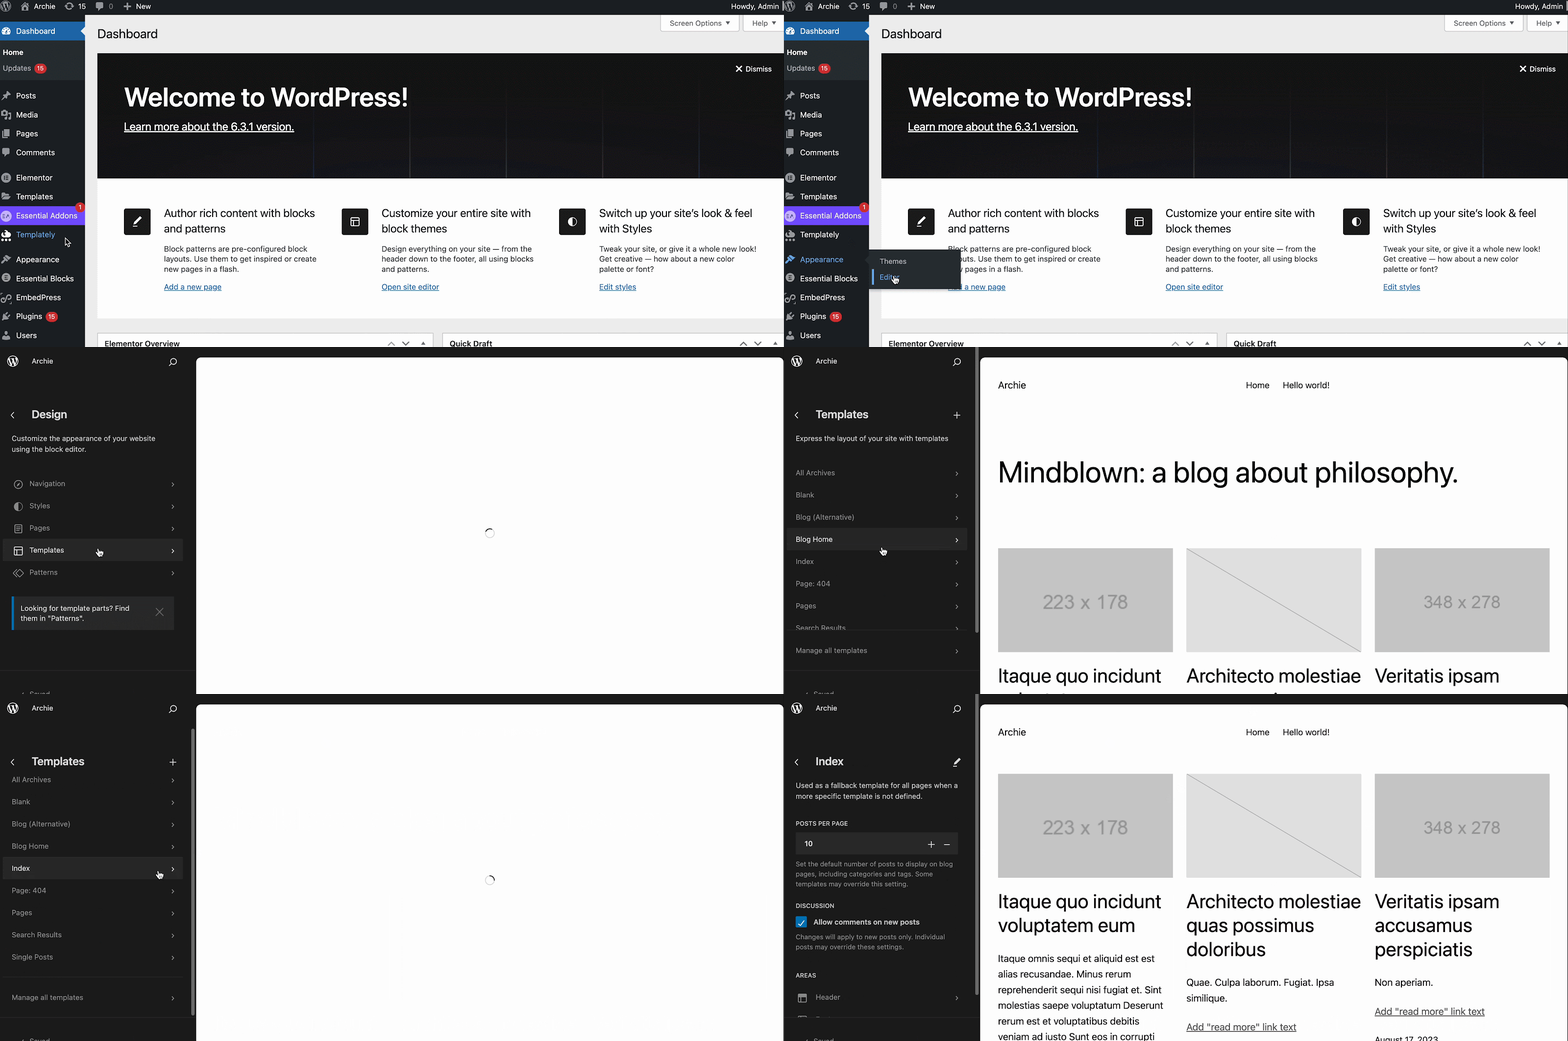
You are currently on the Index Template for Twenty Twenty-two. You’ll see that it already has a setup Query Loop Block.
Step 2: Add A Query Loop Block
Query Loop Blocks can be added by clicking the “(+)” icon. You can either enter “Query Loop” into the search box or scroll down to the “Theme” blocks. The Query Loop block should be dropped into the Site Editor.
Or, just type /query loops, and you will find the block. Now click to add it. WordPress comes with built-in “Patterns” that can help you get your Query Loop designed. If you are aware of a pattern that meets your requirements, you can select it or start from scratch.
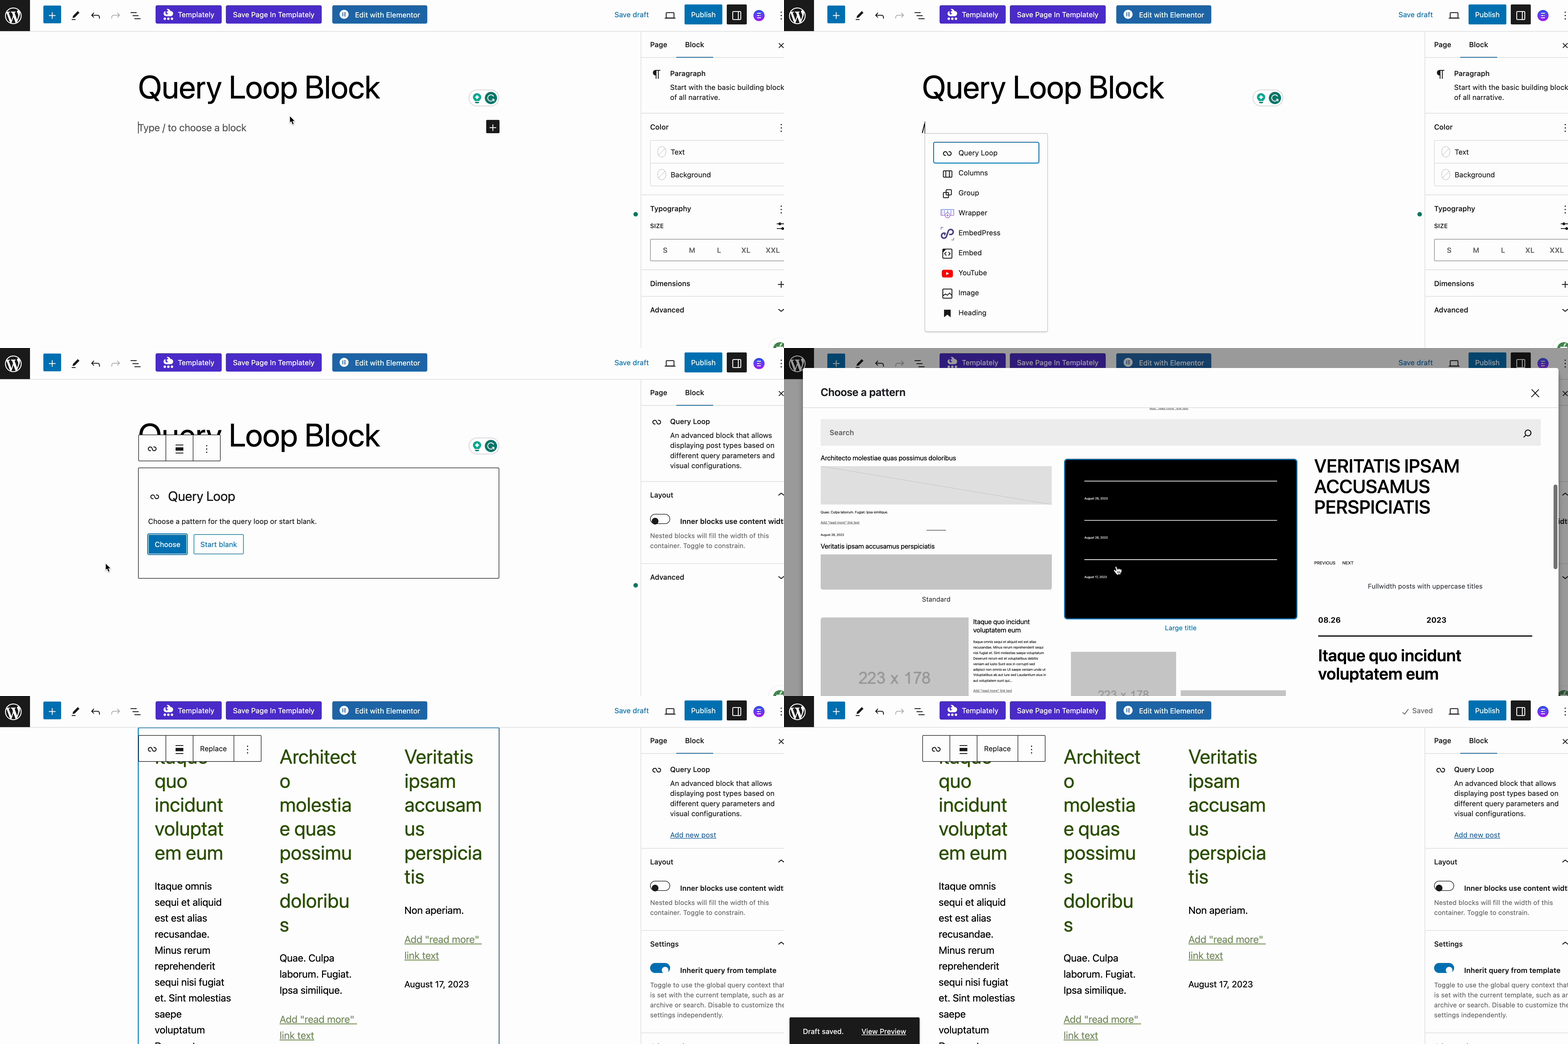
We can also start blank by clicking “Start blank”. There are four standard ways to implement a Query Loop. Select the “Title & Date” variant for this illustration.
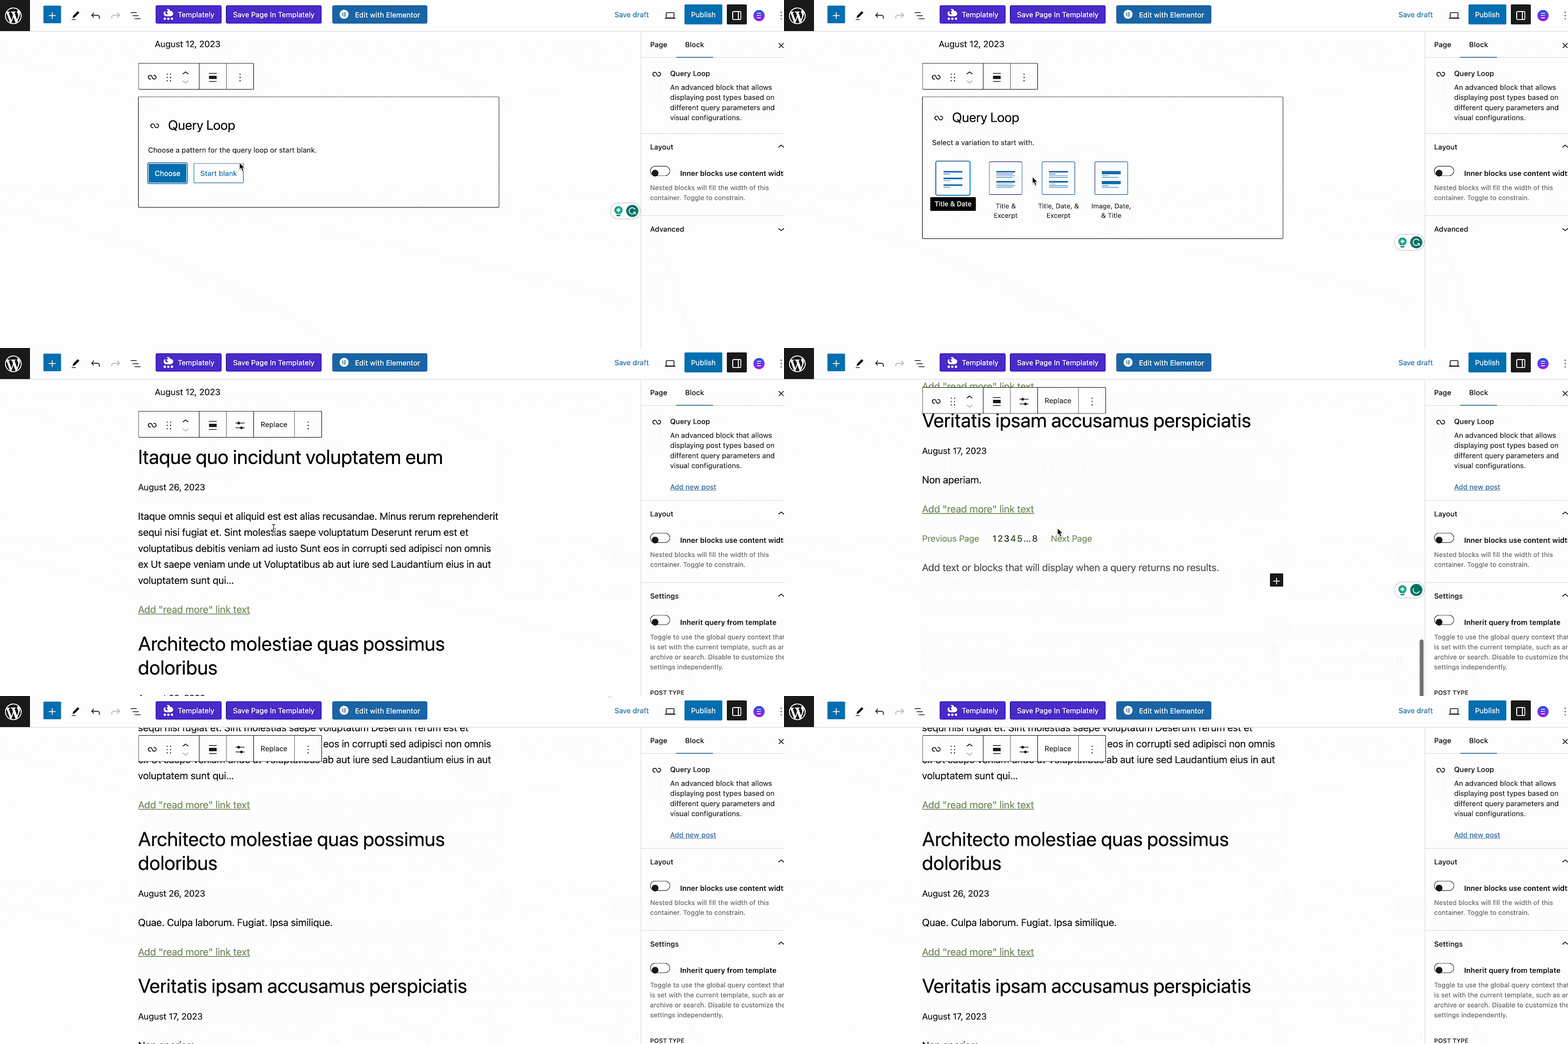
You’ll see that the WordPress Query Loop Block contains nested blocks. This is so that those blocks can supply the Query Loop with the features it needs. These nested blocks are necessary to display “Title” and “Date” information because we selected the “Title & Date” variation. A different variation would have loaded nested blocks in a different configuration.

Step 3: Query Loop Block Toolbar And Settings
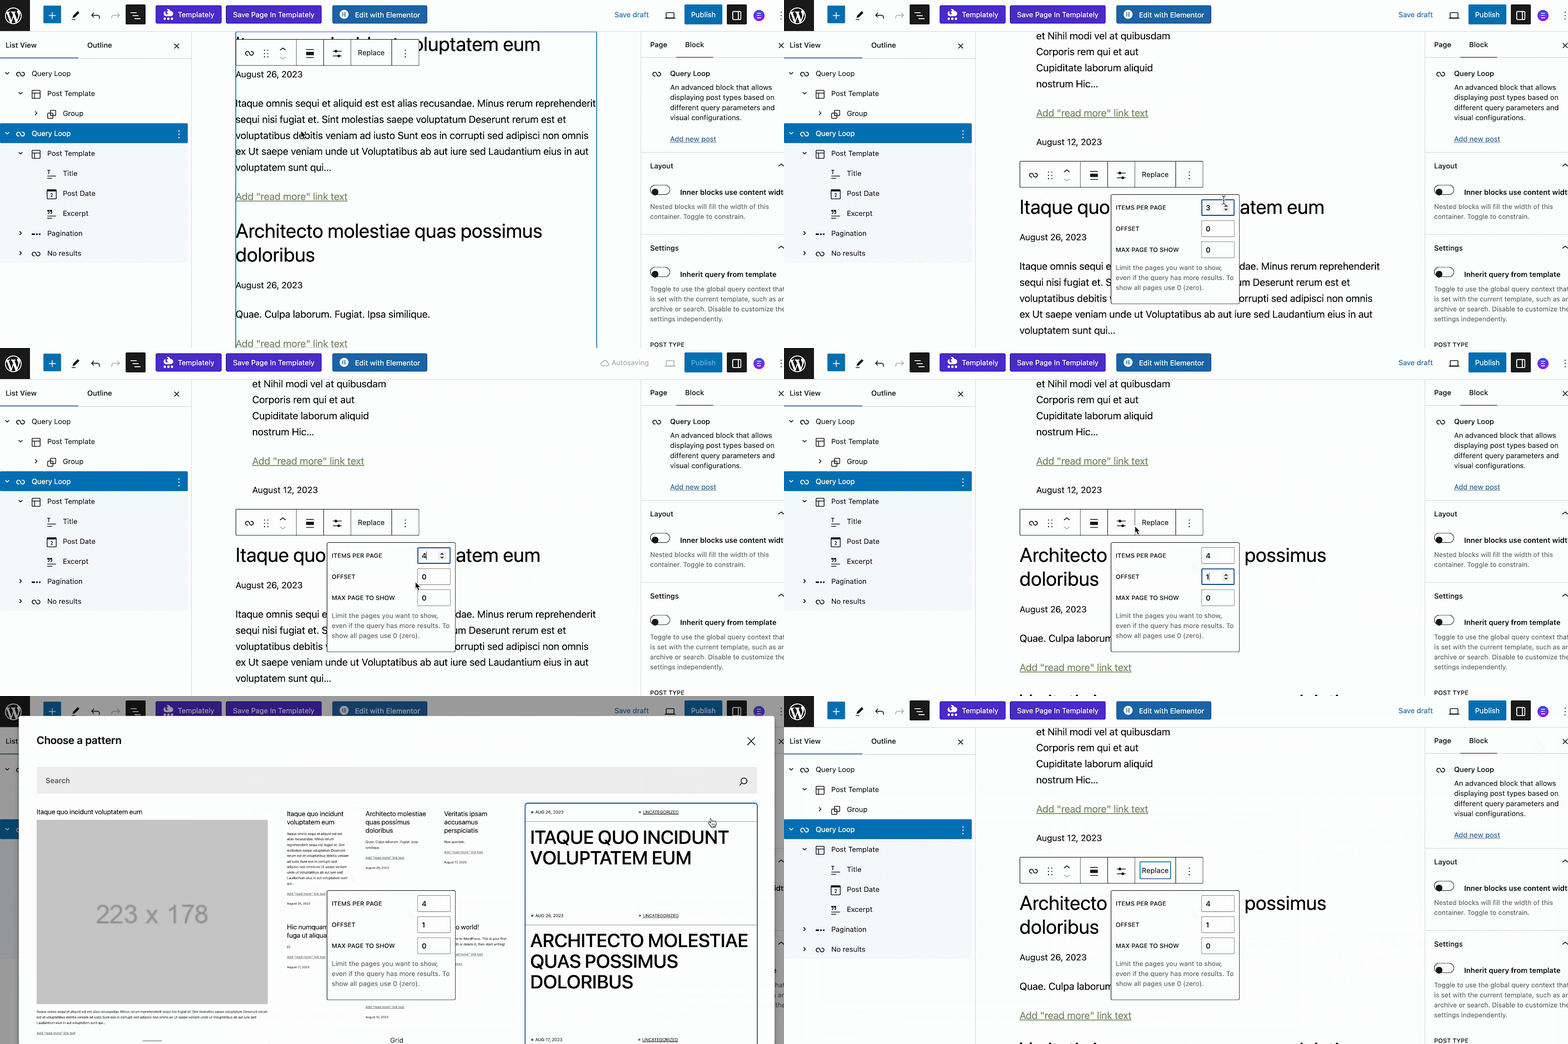
It is easier to access the Toolbar for the Query Loop Block by selecting it in the List View without selecting any nesting blocks first. “Display Settings” is the first special toolbar selection for the Query Loop Block. When you click on that, three choices will appear:
- Items Per Page- Control the number of posts that are shown at once in the loop
- Offset – Skips a certain number of posts’ initial lines.
- Max Page To Show – Limits the number of pages displayed, even if the query returns additional results.
The “Replace” button is the next item on the Toolbar. This enables the option of removing the pattern from the Query Loop Block and substituting a different pattern.
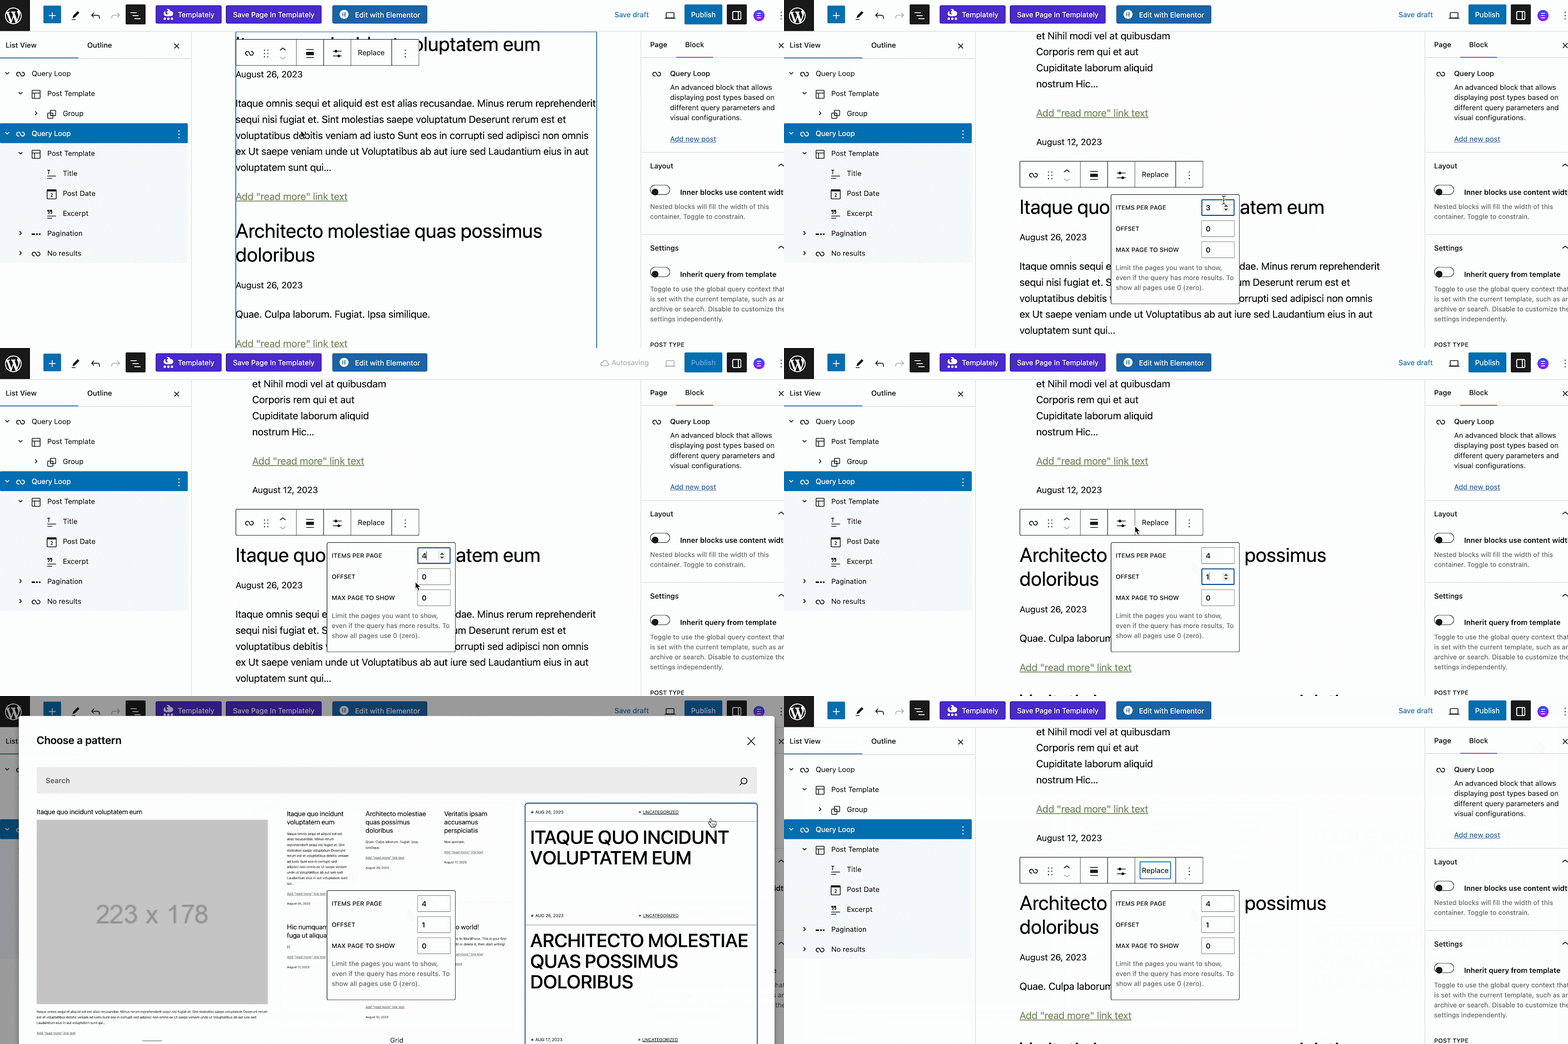
The “Replace” button is the next item on the Toolbar. This enables the option of removing the pattern from the Query Loop Block and substituting a different pattern.
The ability to switch between List View and Grid View is the final distinctive Toolbar option for the Query Loop Block. The post loop is shown in List View “as a list” with the posts stacked. Grid View presents the post loop as a grid with a layout that resembles a table more than a grid.

Query Loop Block Settings Sidebar
The “More Settings” sidebar contains extra configurations for the Query Loop Block. Click the “Show More Settings” option nested in the Toolbar or the “Gear” icon in the top right while the Query Loop Block is chosen to display the sidebar.
Site owners have the option to create a New Post for the Query Loop from this editing page by using the first sidebar setting that is shown. The Layout Toggle comes next, and it alters how Nested Blocks employ layout width in comparison to Query Loop Blocks; we’ll talk more about that later. For the block, users can choose between a custom and an inherited query using the Settings Toggle; more on that below.
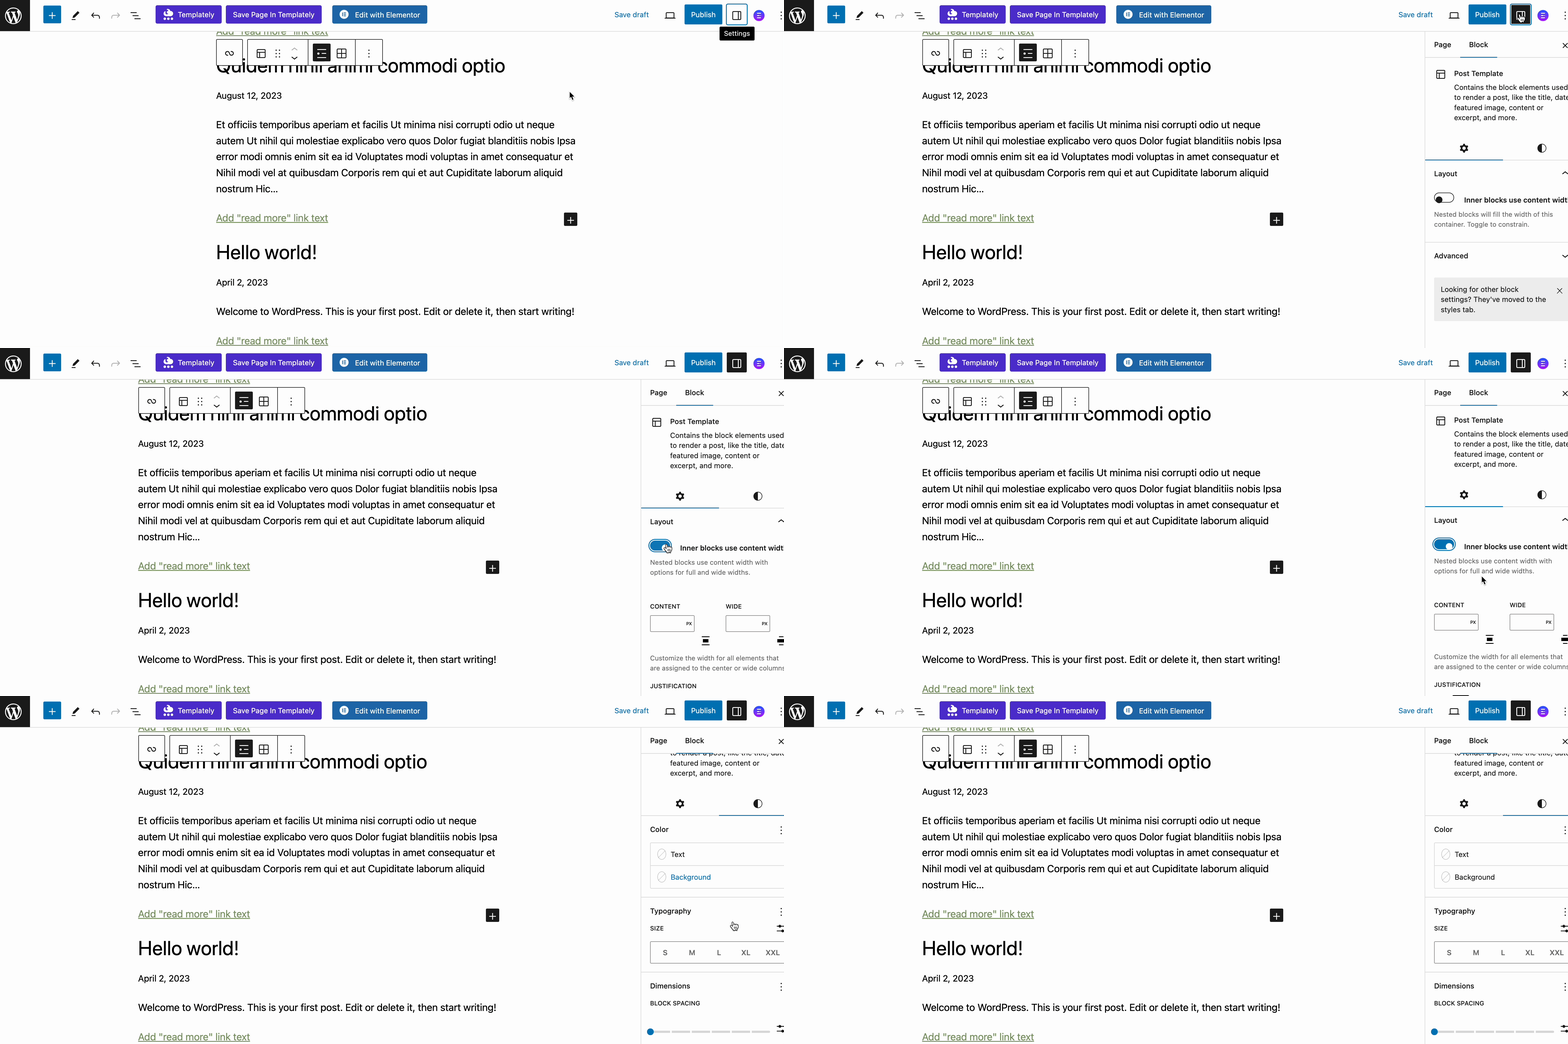
Layout Options: A designer can toggle additional settings on (blue) in the “Layout” settings for nested blocks. One can select whether or not certain blocks use content and width percentages using these options. Additionally, it shows a choice for content justification on the left, center, or right. Nested items are set to full width by default when they are untoggled (grey).
Color Options and Advanced Settings: The color settings and Advanced settings are the last two options. The color choices give designers the ability to select colors for:
- Color of Text
- Background Color
The WordPress Query Loop Block might have advanced settings that allow you to apply an HTML element or a CSS class. The Query Loop Block’s nested blocks each have their own sidebar settings and toolbar options. To find out more about each block and the settings it has, go to the list of nestable blocks above.
This is how easily you can configure the WordPress Query Loop Block in the Gutenberg editor and create stunning, unique custom layouts.
Create Custom Layouts In WordPress Seamlessly
WordPress has always made it possible to create content previews and layouts that are exactly right. To accomplish this, though, we’ve in the past used third-party plugins, themes, or bespoke code. You can customize how content previews are displayed by using the Query Loop Block. Have you enjoyed the tutorial? Subscribe to us to keep getting these stunning Gutenberg editions, tips, and tricks.
