Nowadays displaying a team member section on the site including credibility is being a website trend. Because everyone wants to introduce the team members on the website to showcase team size or contributions! The good news for Gutenberg users is now you can also create a team member section on your Website with Essential Blocks for Gutenberg WordPress plugin.

Why Do You Need To Showcase Team Member Section On Website?
Adding a team member section is an amazing way to present your employees to your visitors and clients. Here you can show off all your wonderful team members with their images, name, job titles, job descriptions, etc. Overall, it’s the perfect way to ensure that your website is appearing with team identity.
⭐ A team member section can help you to enrich your employer branding. When a potential customer comes to your site to check out your product or service and notices your awesome team members, it will definitely give them a positive vibe to check out your service.
⭐ By adding a team member section to your website, you can attract more potential candidates who can get interested to join your amazing team. Because a qualified candidate always tries to join an excellent team full of intelligent and active people.
⭐ When you are showcasing your team members in a specific section including their positions, achievements, etc, it increases your employee satisfaction. And, a satisfied employee always stays confident and keeps serving the company with 100% effort.
How To Create A Team Member Section In Gutenberg?
Currently, Gutenberg is the default editor of WordPress. It has many useful built-in blocks but unfortunately, Gutenberg doesn’t have its own block to create the team member section. So, you have to get a Gutenberg library to get the Team Member block. Among other Gutenberg libraries, Essential Blocks is the new yet popular one.

Essential Blocks is a free WordPress plugin specially designed for the Gutenberg editor. It powers up this editor with its 30+ amazing ready blocks for different functionalities. They allow a wide range of customization options. One of these stunning blocks is Team Member which helps to create an awesome team member section on your site.
Step-By-Step Guide: Create Team Member Section With Essential Blocks
Before using Essential Blocks Team Member on your site, make sure that you are using Gutenberg editor on your WordPress website. Now, check out this Gutenberg tutorial to learn how to create a Team Member Section on your website without coding.
Step 1: Get Essential Blocks On Your WordPress Dashboard
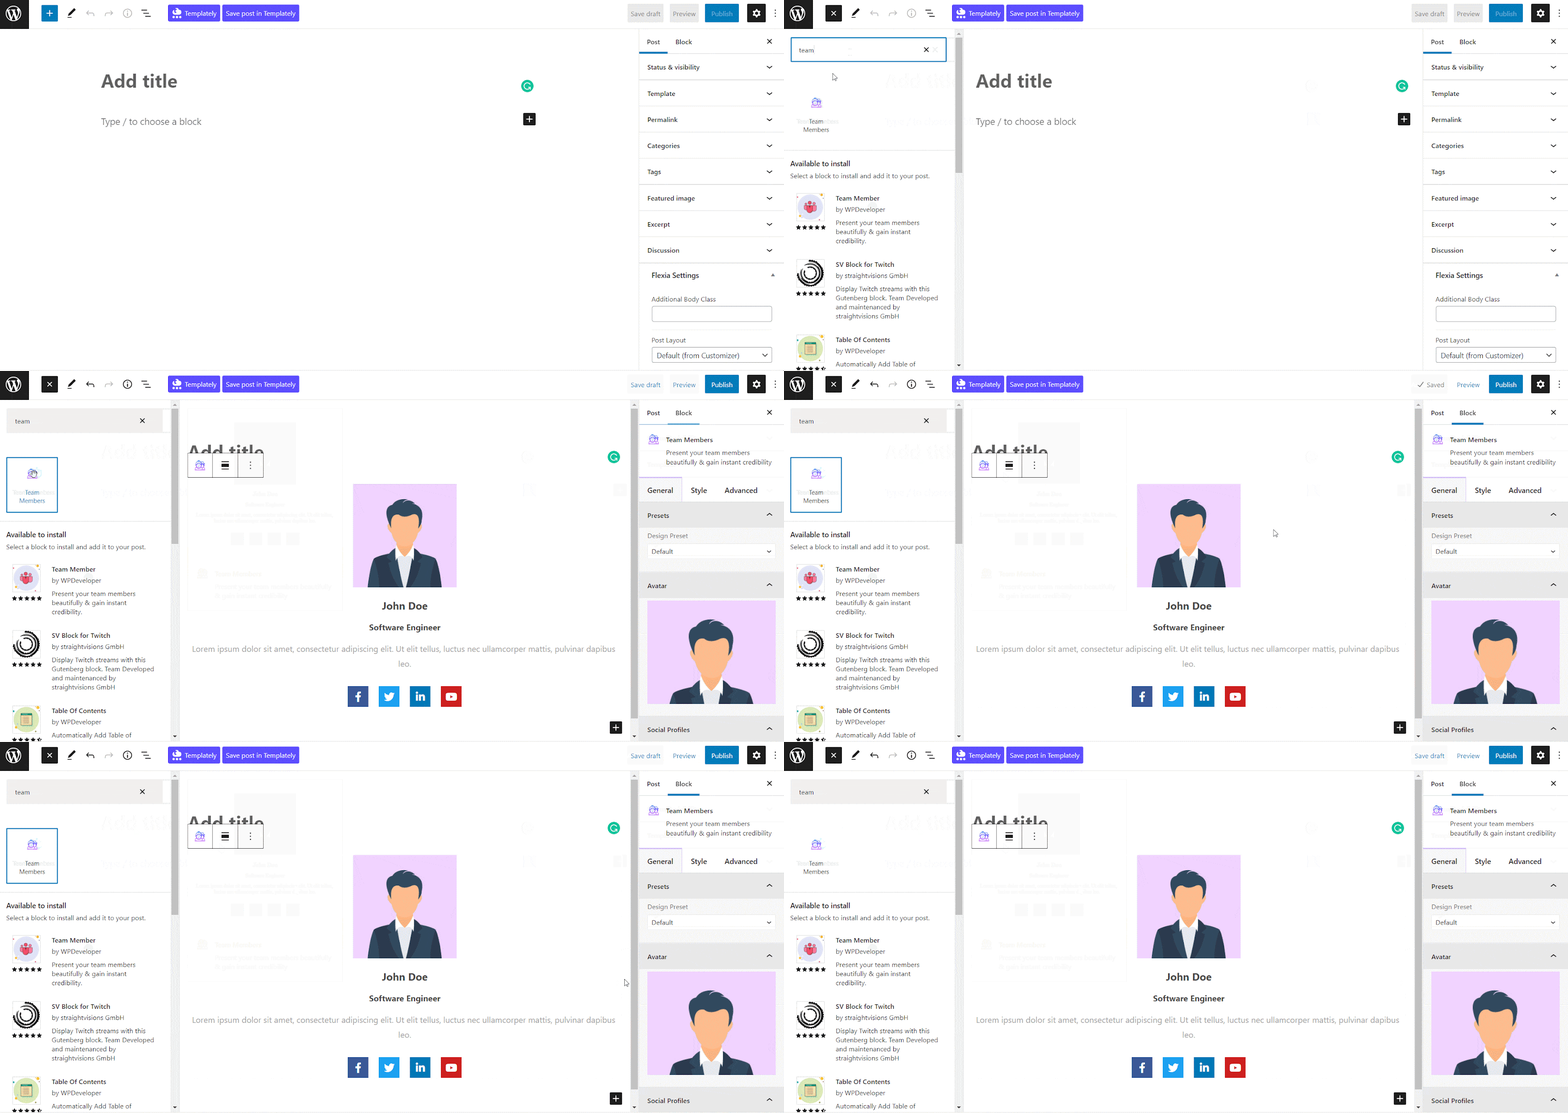
First, login into your WordPress dashboard. Then go to ‘Plugin’ and then click on Add New. In the search bar, search for Essential Blocks for Gutenberg. Now Install and activate the plugin. Open a page or post where you want to create a team member section using the Essential Blocks Team Member block.
From the page or post, click on the ‘+’ icon. You will get the Gutenberg Block Panel. Here, search for Team Member blocks. Then add the block to a specific section, where you want to preview the team members.
Also, you can just click on the block to get it on the content section. Another way to get it is by clicking on the ‘+’ icon of the section where you want to place the block and searching for the Team Member block of Essential Blocks.

Step 2: Configure And Style The Team Member Block
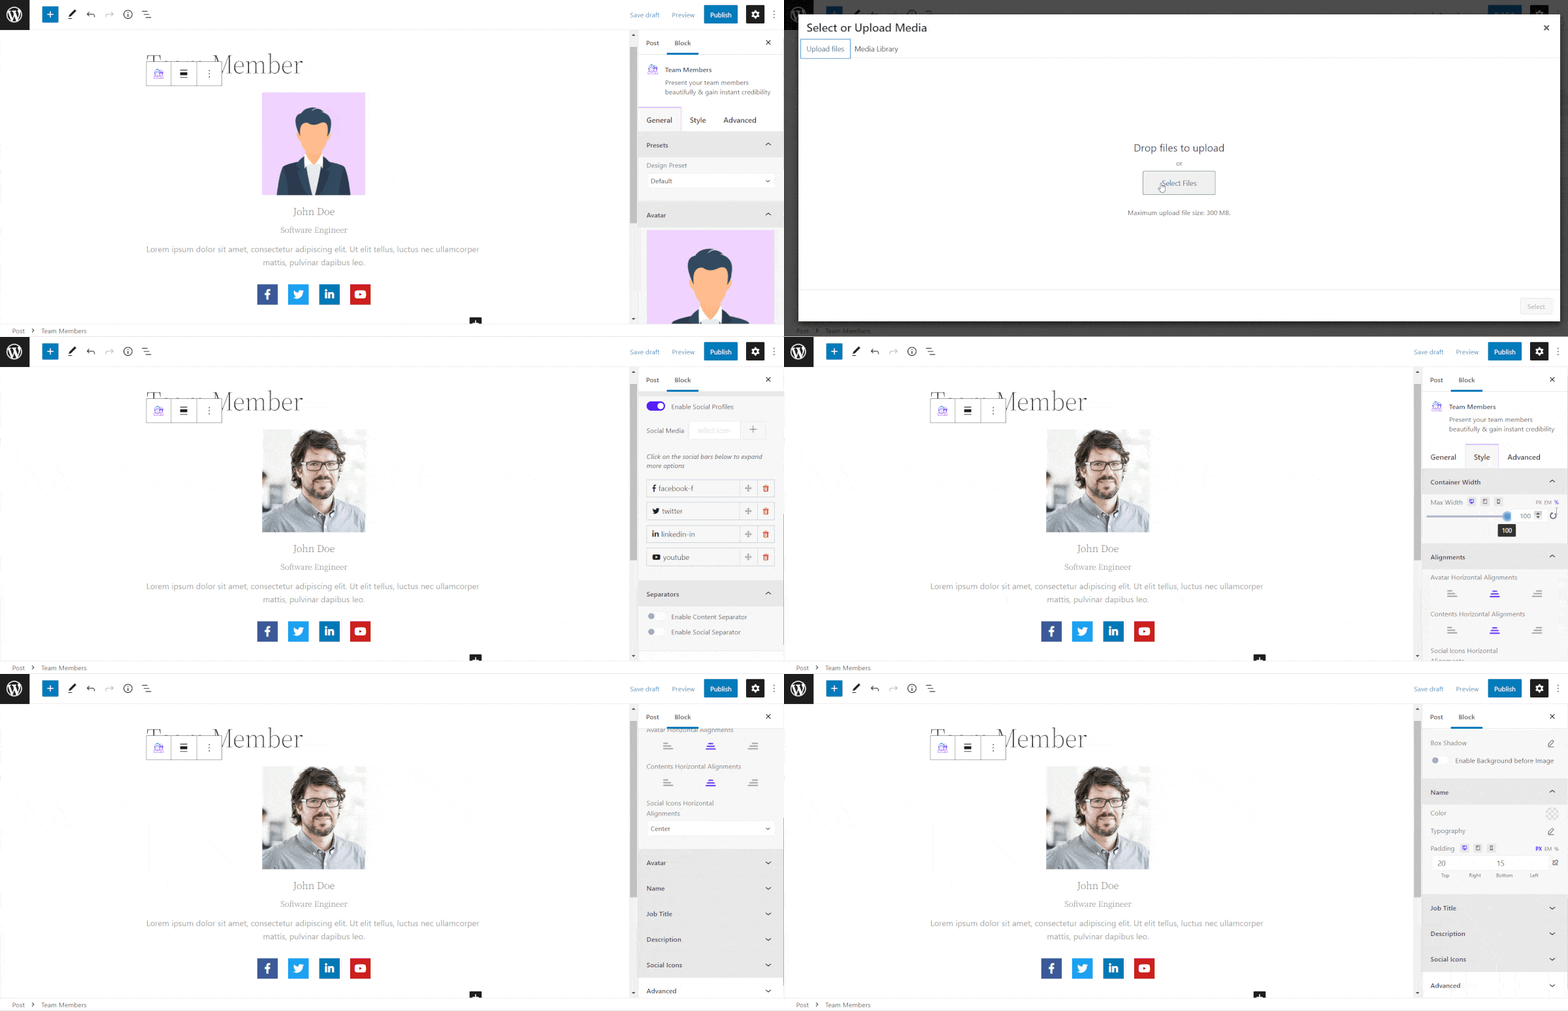
To configure the block, click on the block. You can customize it from the ‘Settings’ icon of the top screen. From the ‘General’ settings, you can modify the presets, avatar, etc. Also, you can upload a new image of your team member’s avatar or use an existing one from the Media Library.
Even you can add multiple social platform links from the general settings. Team Member block allows you to link your team members’ Facebook, Twitter, LinkedIn, and YouTube accounts on your website. It helps your visitor to find them on social media and lets them get to know more about your teammates.

The ‘Style’ tab allows you to customize the block according to your choice by changing color, font, alignment, etc. You can create an amazing and creative team section with this block. From the Advanced tab, you can fix margin, padding, background, etc.
Step 3: Launch The Team Member Section With Proper Data
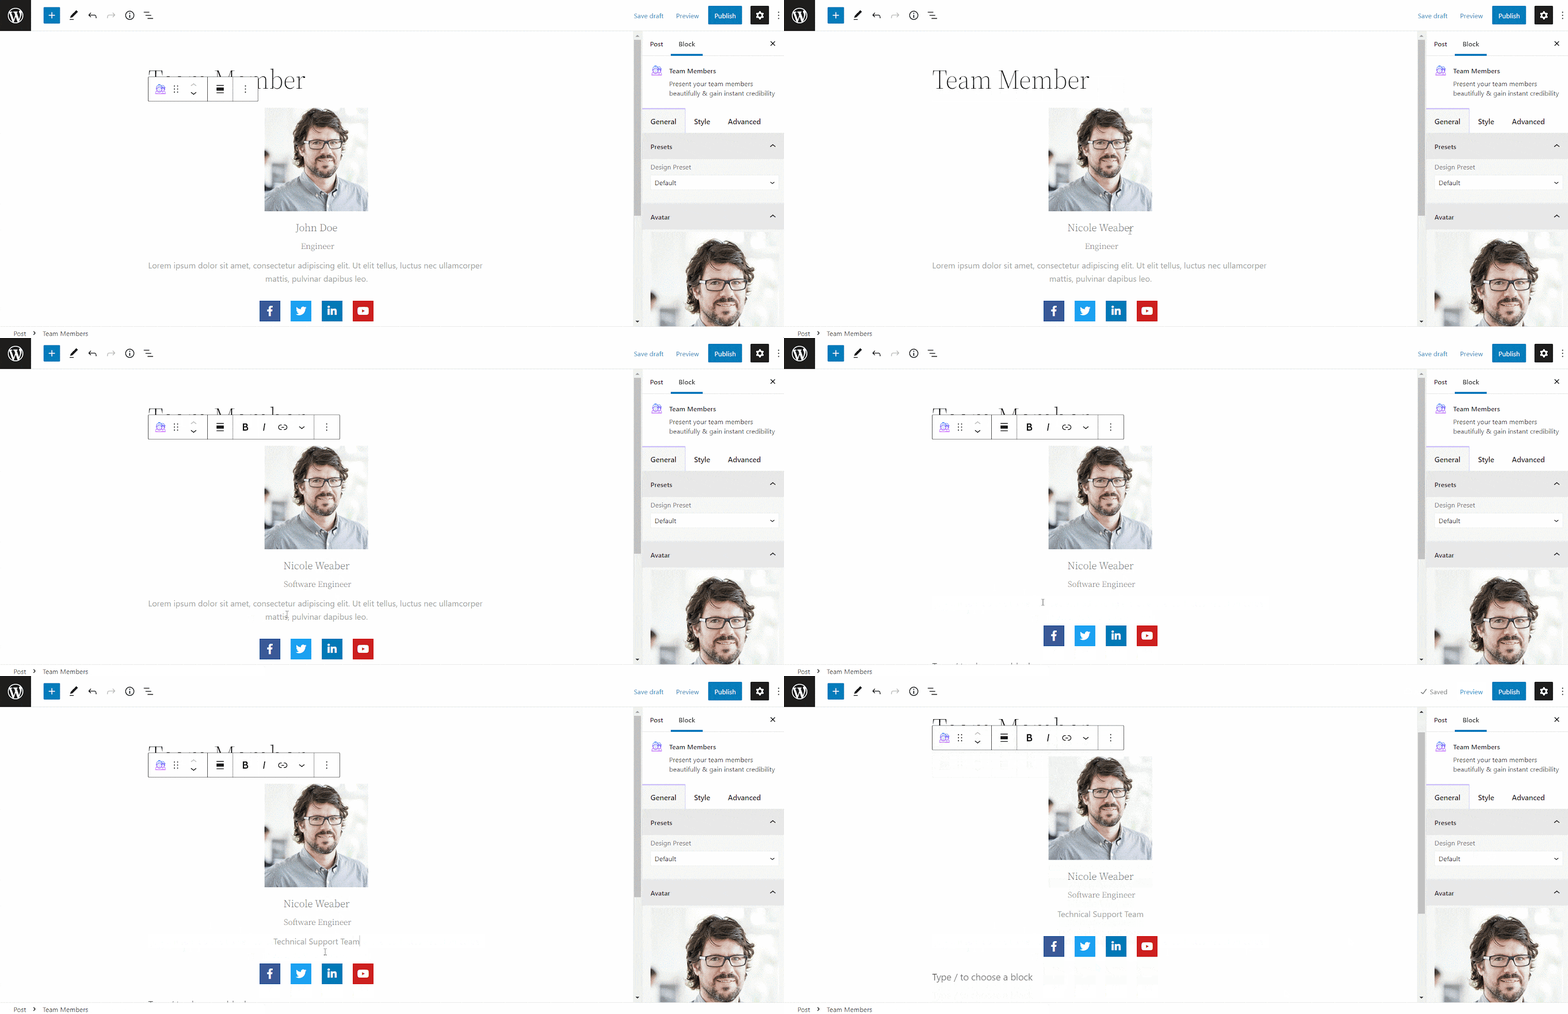
You can edit text fields like the Employee Name, Job Title, and Job Description directly from the block. Simply type in the content without having to open the Block Settings tab. Just click on each section, and modify it with your valued information.

Once all your customization is done, you can check the preview of your content. If you are satisfied, then click on the ‘PUBLISH’ button to make your content public.

Bonus: How To Make Team Section More Interactive
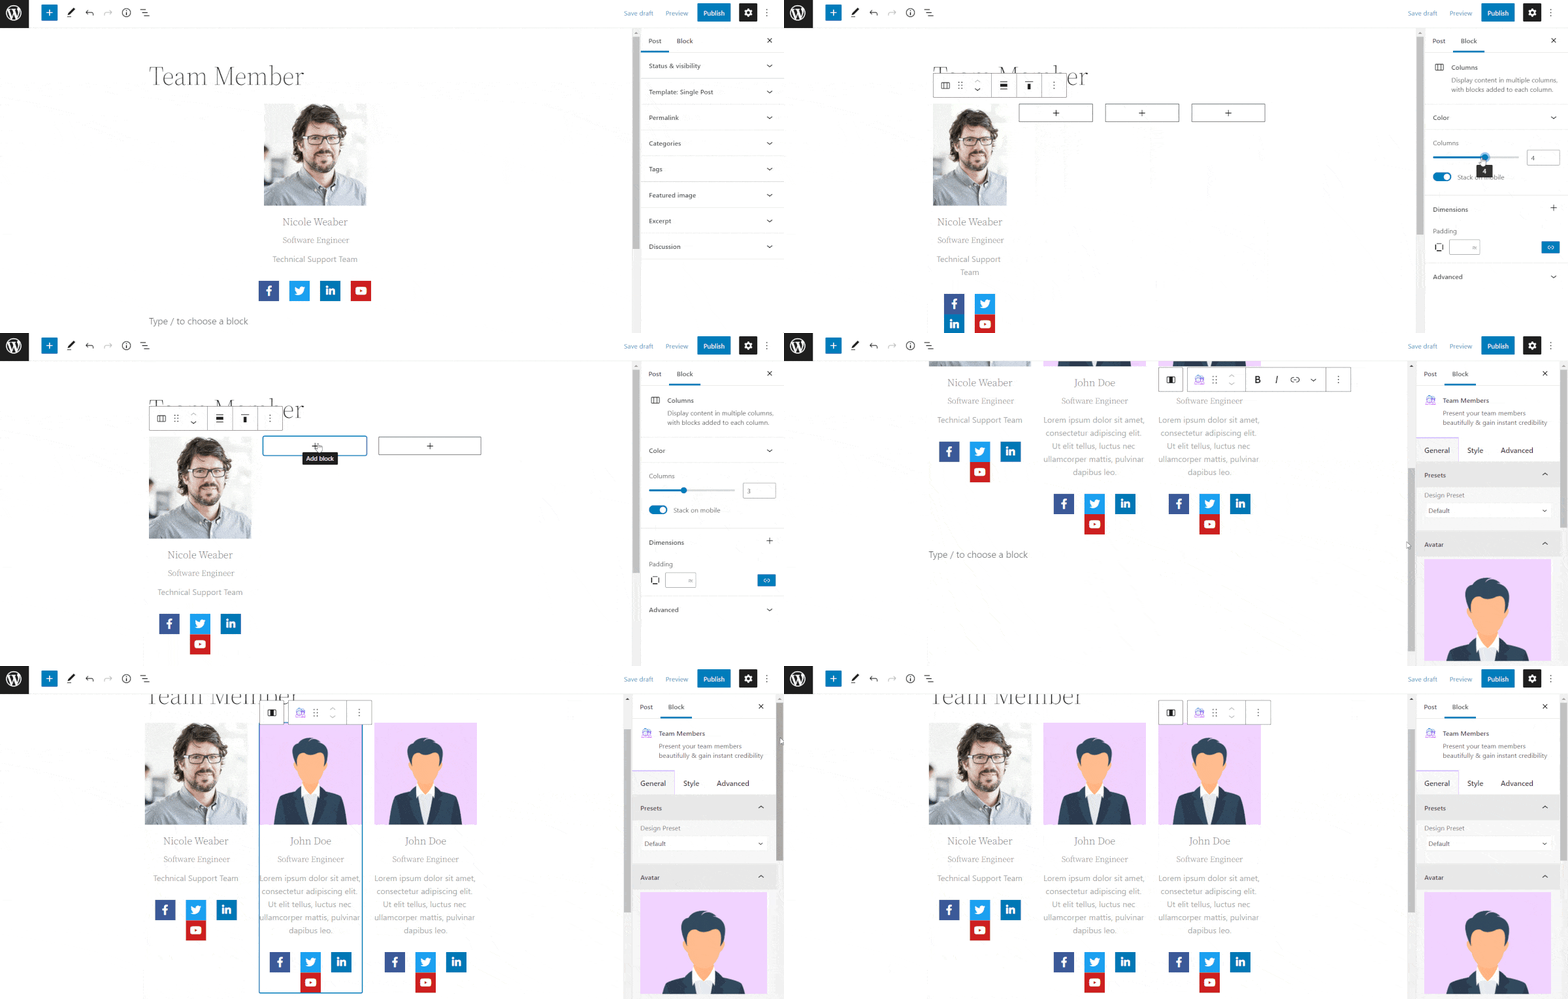
If you want to showcase more than one team member in a row, you can add more columns. It is a common feature of WordPress Gutenberg editors to make more than one column in a section. Just click the block and then click on the top left button of the column. The column setting panel will be open on the right side of the screen. From here, you can add as many columns as you need in a row.
Now, in each column add the Team Member block from the add a block ‘+’ button and then, customize all newly added blocks following the same steps shown above. Your team member section will be done by these simple steps.

By following all these basic steps and a bit more modifying, you can get your Team Member block however you want. Let’s see the final outcome.

Now It’s Your Turn To Try The Team Member Block
So now, you know everything about the Team Member and Essential Blocks for Gutenberg plugin. As it is totally free, you can easily download it and give it a try. Surely, it will help you to create a stunning team member section and make your site more attractive.
If you enjoyed this post, subscribe to our blog and join our Facebook community to connect with web creators and Gutenberg users. Leave your comment below and stay connected.

![Guide for WooCommerce Checkout Flow Optimization [2026] 18 woocommerce checkout](https://essential-blocks.com/wp-content/uploads/2026/01/WooCommerce-Checkout_-A-Complete-Guide-for-2025-150x150.jpg)


