Having a responsive pricing table on your WordPress website can help you to showcase your offers most elegantly. Therefore, if you own an online business, you should consider using a price comparison table on your website. Today, we will tell you how you can easily create a pricing table on your website and increase your conversion rate.
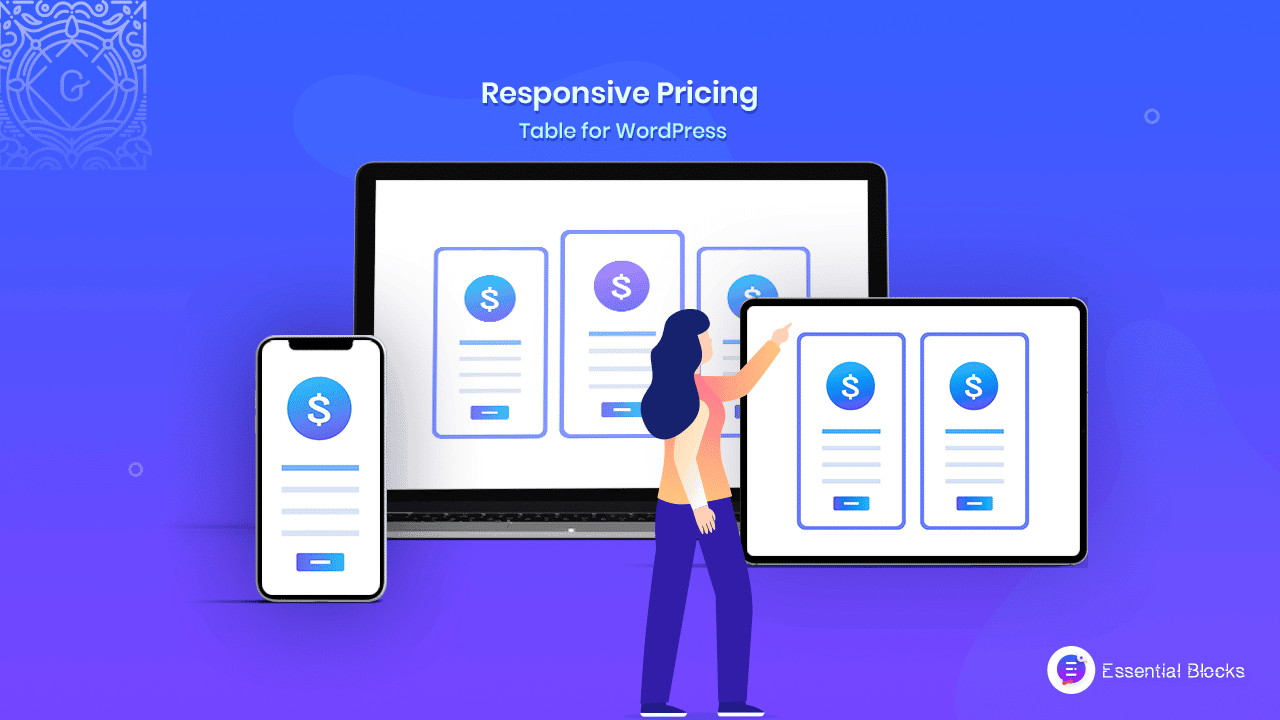
A responsive pricing table is an elegant way to showcase your pricing packages to your visitors. It will help you to display your offers and packages in a way that looks good on each and every device.
So, no matter which device your visitors use, they will see a stunning price comparison table presented to them. Therefore, your visitors will properly understand what you are offering them without any hassle. So, let’s go below and find out how to create a pricing table on WordPress websites.
⚡ Advantages Of Creating A Responsive Pricing Table On Your Website
You can apply different marketing strategies to stay ahead of your competition. However, using a stunning WordPress pricing table, you can easily get a high conversion rate at ease. Here are some interesting points below that might convince you to add a responsive pricing table to your website right now.
⭐ Get A User-Friendly Pricing Table
Nowadays, most customers are using smartphones for online shopping. So, if you do not have a responsive pricing table on your website, your visitors won’t see your price comparison table clearly. It won’t create any interest in them. Besides, all the alignment of the table will be broken and the whole pricing package might not load properly. So, you need to add a responsive pricing table on your website to showcase your offers and packages clearly to all kinds of visitors.
⭐ Build An Unique Comparison Table
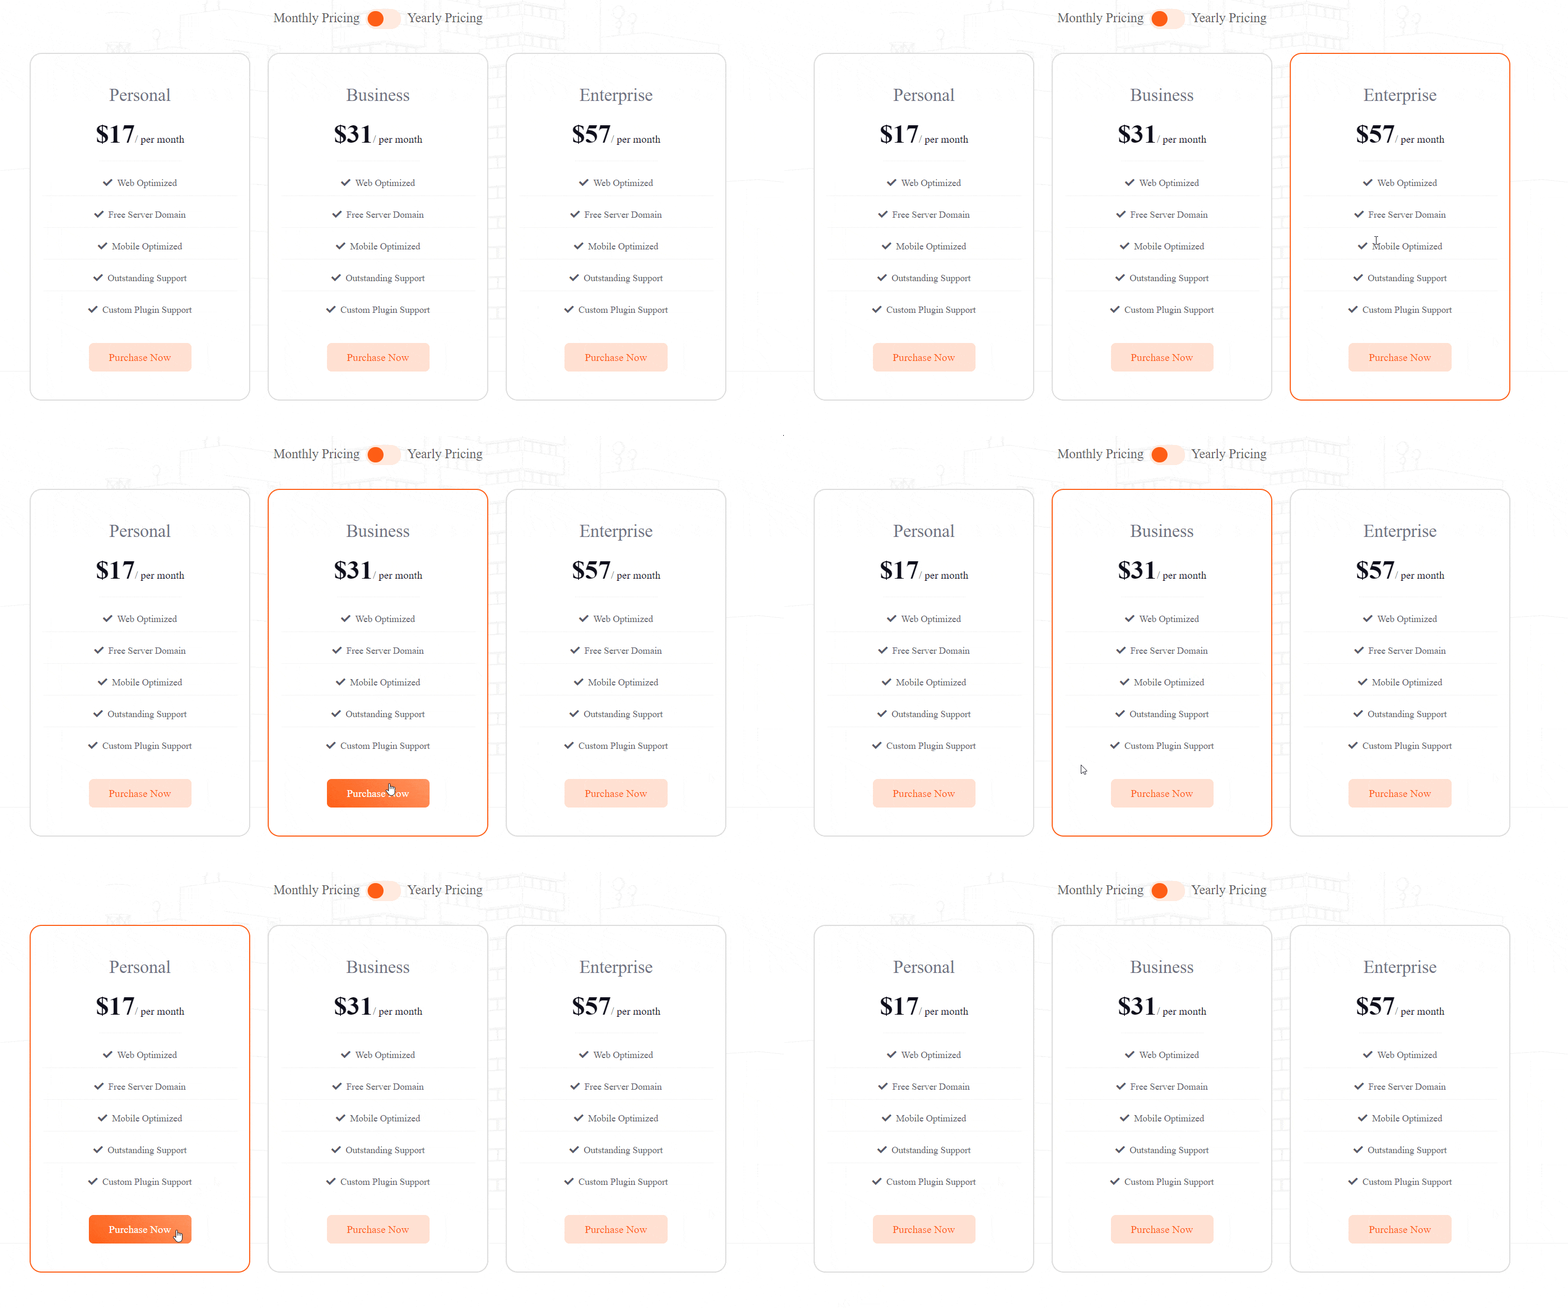
Pricing tables are not only a way to showcase pricing packages but also these could be a great way to compare your different packages and offers. While looking at your pricing table users will get an in-depth idea of your packages and easily make their decisions. Therefore, if you have an online business adding a price table on your website could be a great idea for you.
⭐ Boost Your Conversion Rates
Adding a price comparison table on a website to display information about products or services, could be a great idea for sure. If you have an elegant pricing table on your website, you can easily add value to what you are offering. Your visitors will get a clear idea of what they are getting which will increase your conversion rate.
💡 Easiest Way To Create A Responsive Pricing Table: Step-By-Step Guideline
With the Gutenberg editor, you may create a pricing table in WordPress without any hassle, however, if you want to create a high converting price comparison table, you need to install a block library like Essential Blocks for Gutenberg. This block library will supercharge your Gutenberg experience and let you create a responsive pricing table with ease.
Combining Gutenberg editor with Essential Blocks, you can create stunning pricing tables. You will have the freedom to design an eye-catchy price comparison table within just a few clicks. In addition, you can even create amazing web pages in Gutenberg if you have this block library installed on your WordPress website.

Now, follow this step-by-step guide to create a high-converting responsive pricing table on your website.
Step 1: Insert Essential Blocks To Supercharge Your Pricing Table
To create a responsive pricing table, you have to install and activate Essential Block for Gutenberg on your WordPress website. So, you should go to your dashboard and then to the ‘Plugin’ tab, where you should click on ‘Add Plugins’. Now, simply search for ‘Essential Blocks for Gutenberg’ and click the ‘Install Now’ button.
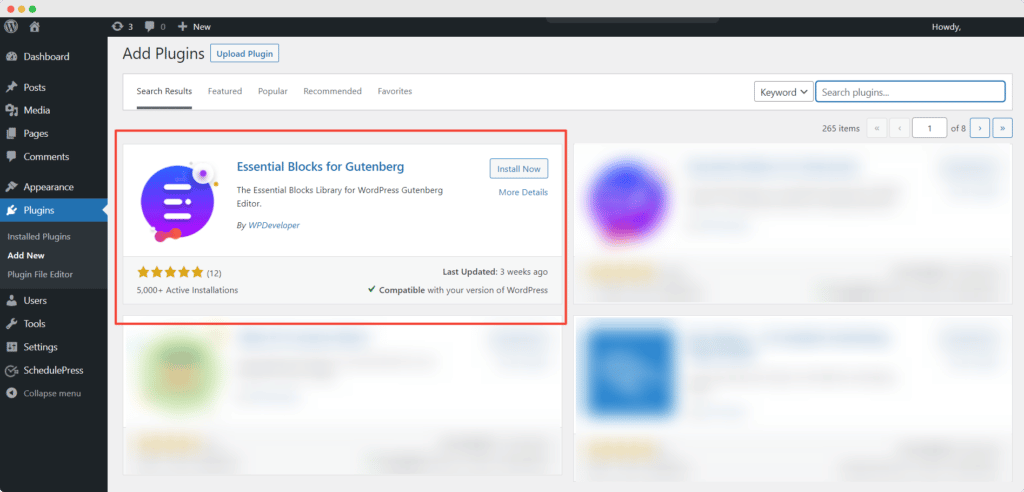
You should click the ‘Active’ button once the installation is complete.
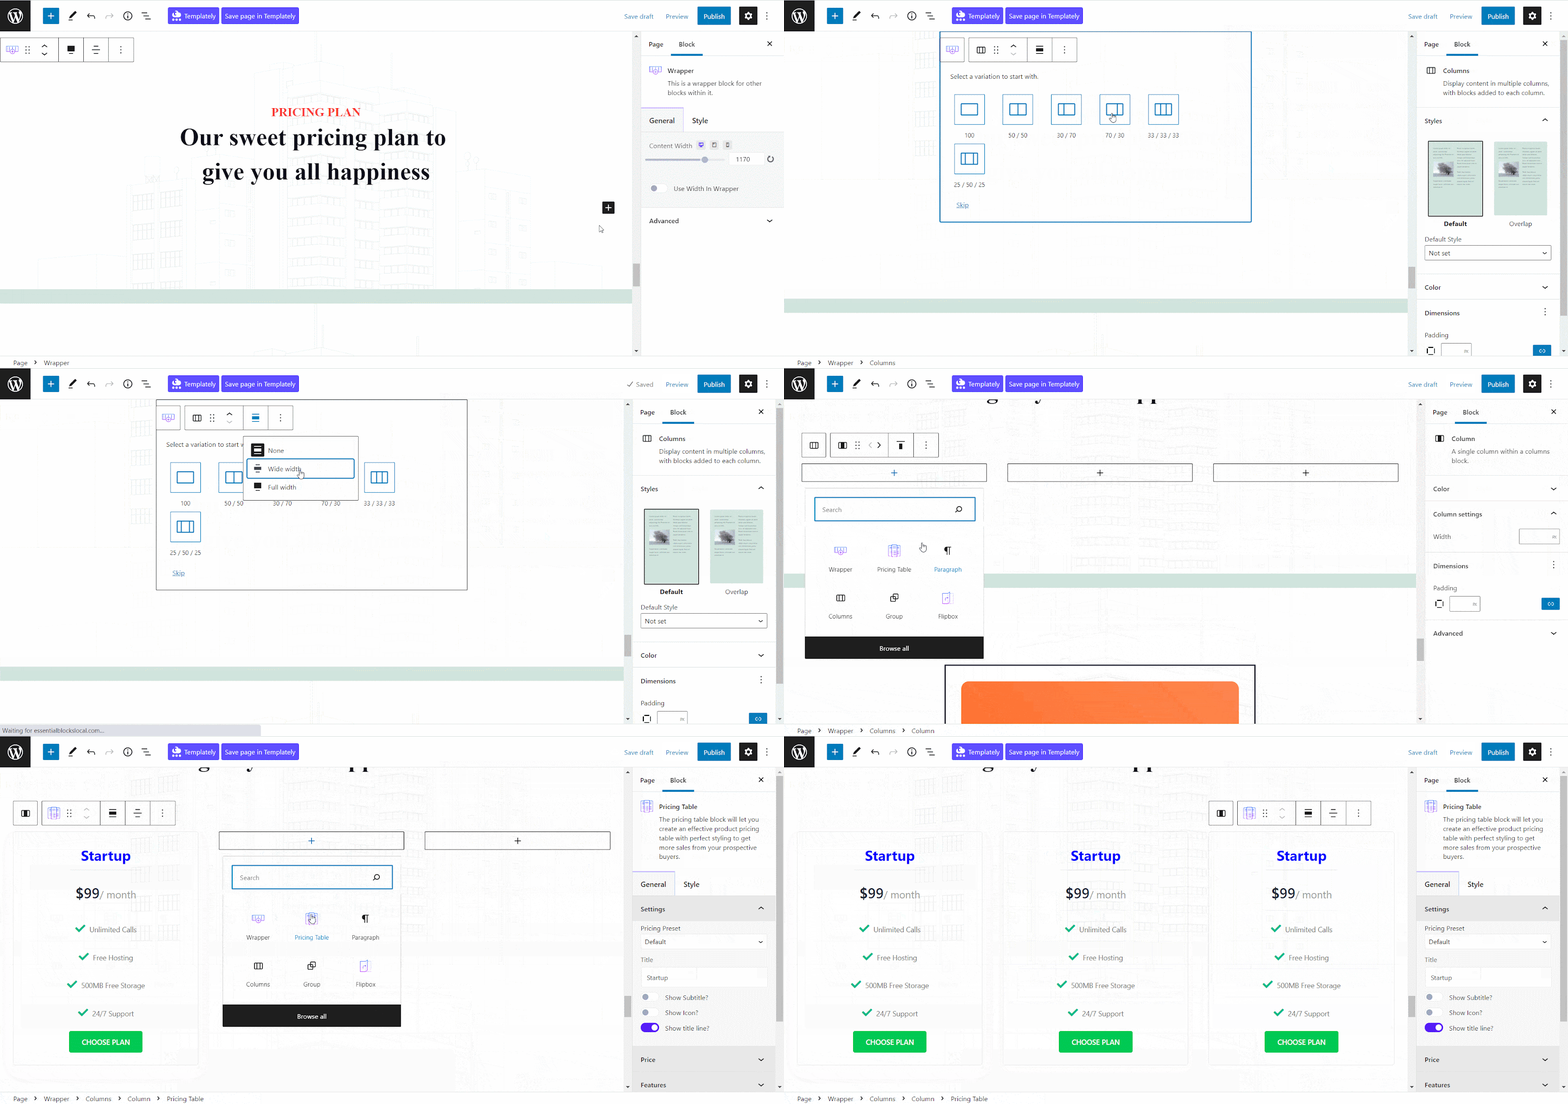
Once you are done with the installation process, you can click on the ‘+’ icon to add a new block to the page. Afterward, find the ‘Pricing Table’ block and click to insert it on your web page. Now, if you want to add just one pricing plan, then you should click on the ‘Change Alignment Icon’ and then select the ‘Full Width’ option to keep your pricing table on the middle section of the page.
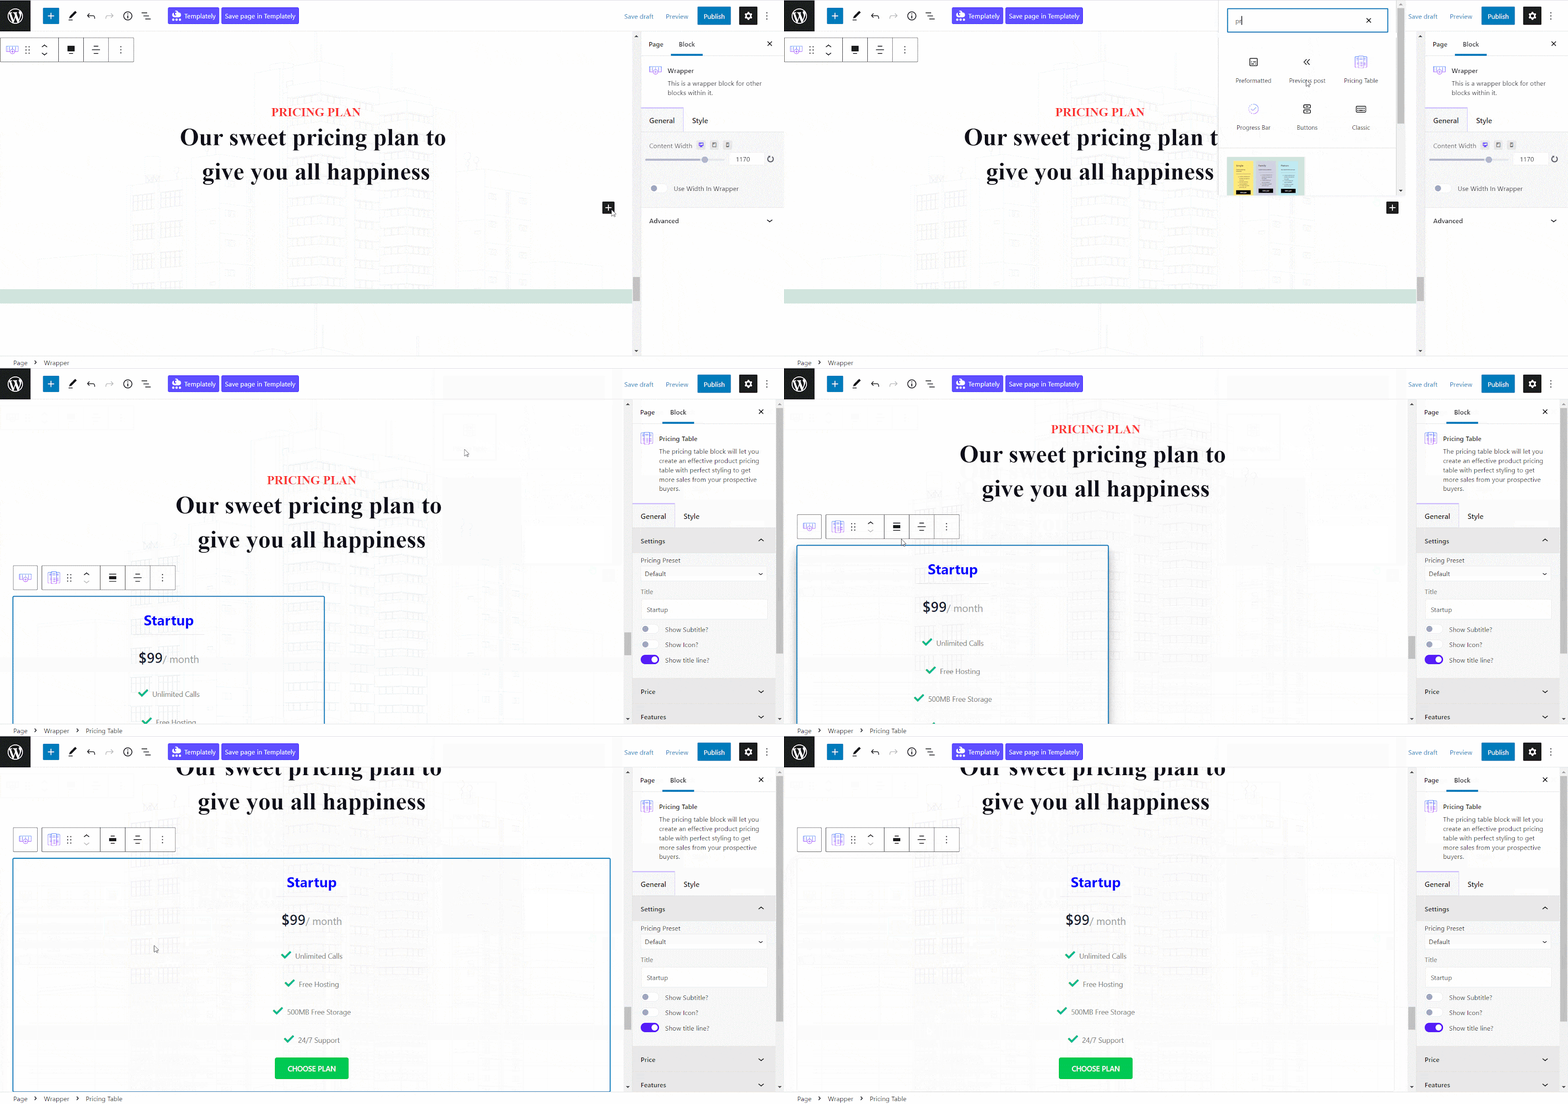
But if you want to add more than one price comparison table, you should add enough columns on the page first then insert the Pricing Table Block. Make sure you are changing your column from ‘None’ to ‘Full Width’ while adding this block. Typically, people use three pricing plans. However, this of course depends on your business type and products.
Step 2: Configure Your Pricing Table Contents
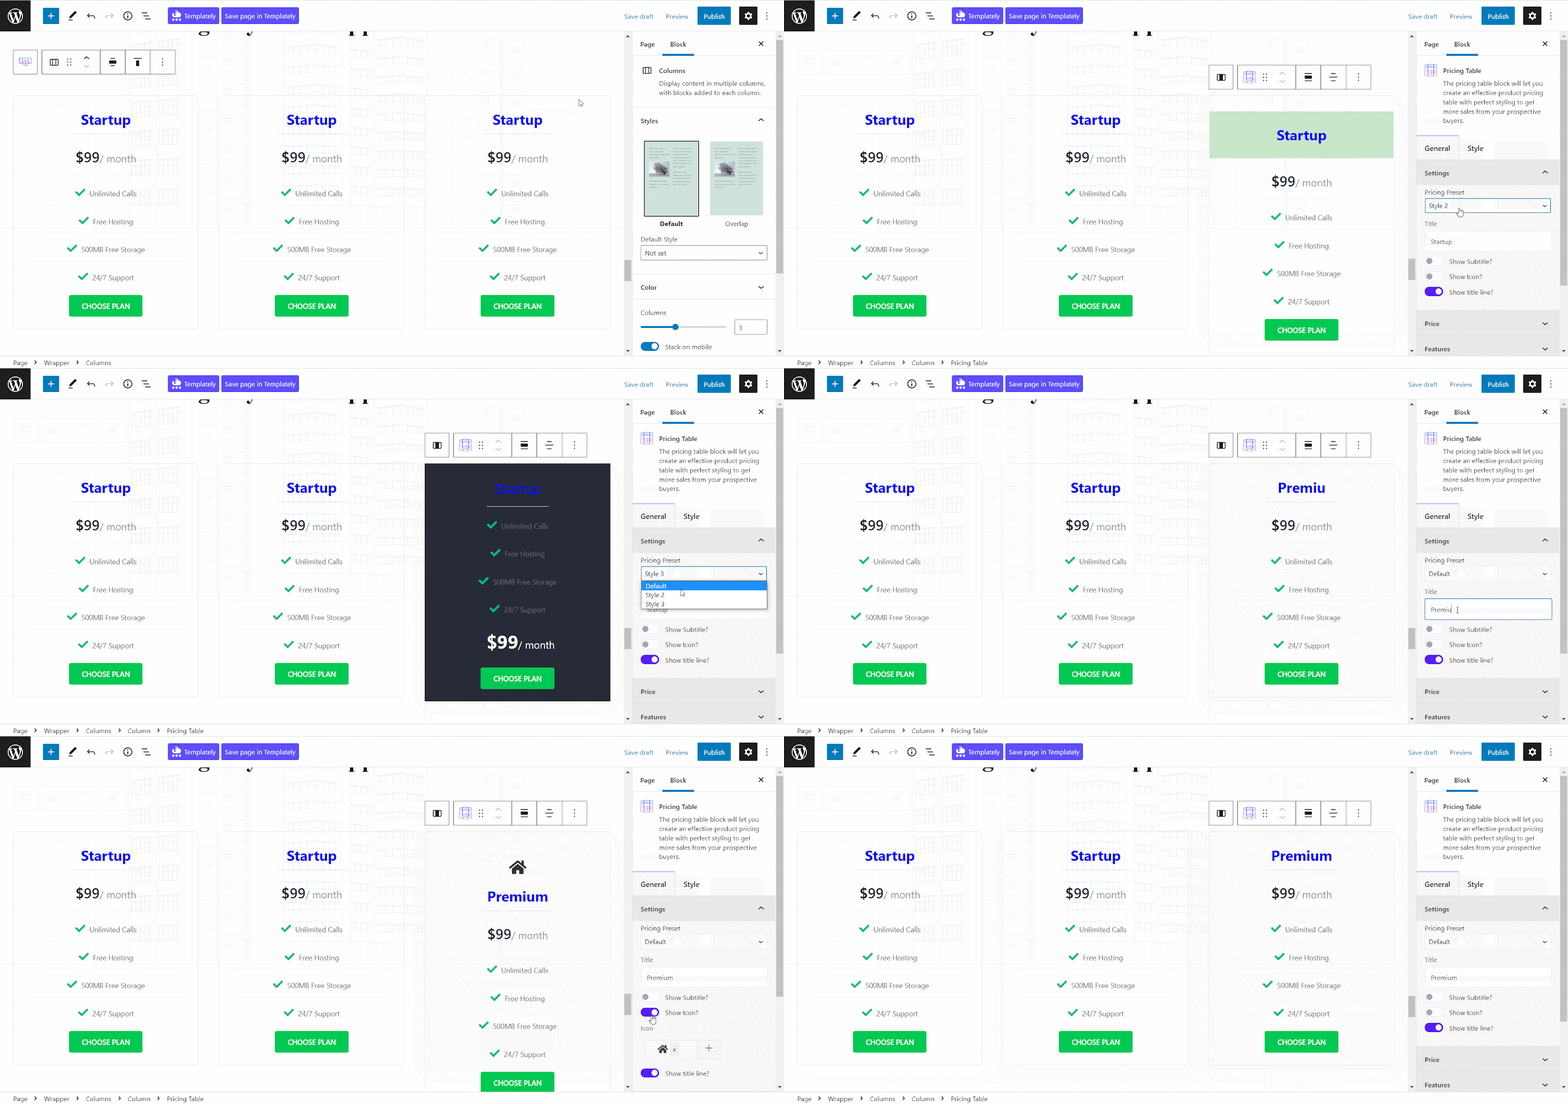
After adding the tables to your website, you need to customize the contents and set up your pricing packages. So, click on any of the Pricing Table blocks that you have inserted, and then from the ‘General’ section go to the ‘Settings’ option.
There you will find different presets for this WordPress pricing table. You can put your title, add an icon, or tag line from there as well. Additionally, you can enable or disable the title line from there.
Besides, from the ‘Price’ section, you can tweak the regular and on-sale pricing, pricing currency, and placement easily. Also, you can add or remove pricing periods and pricing separators without any hassle.

From the Feature section, you can easily add your features and make it clickable, and add relevant links to send your site visitors to. Also, you can tweak the icon from there. Moreover, you can add more features to your responsive pricing table from there without any hassle.
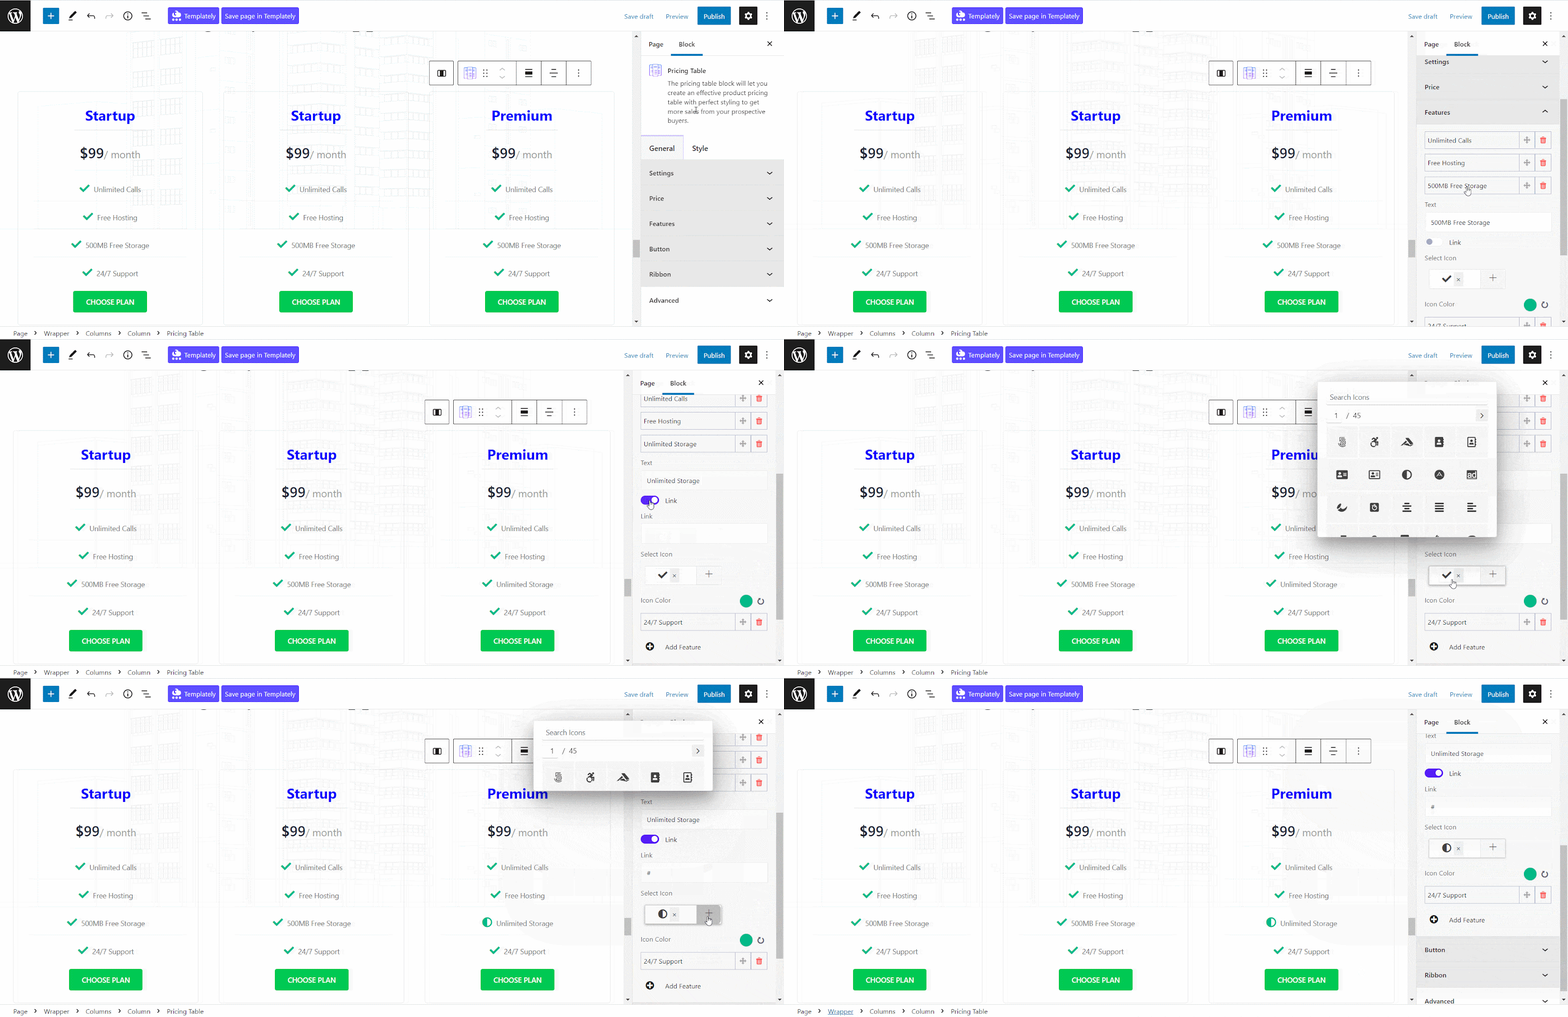
In addition, from the ‘Button’ section, you can enable or disable the button by toggling the ‘Display Button’ option with this Pricing Table block. You will also get the option to add an icon beside the button and adjust its spacing. Also, you could change the button text and add a link to your button as well.

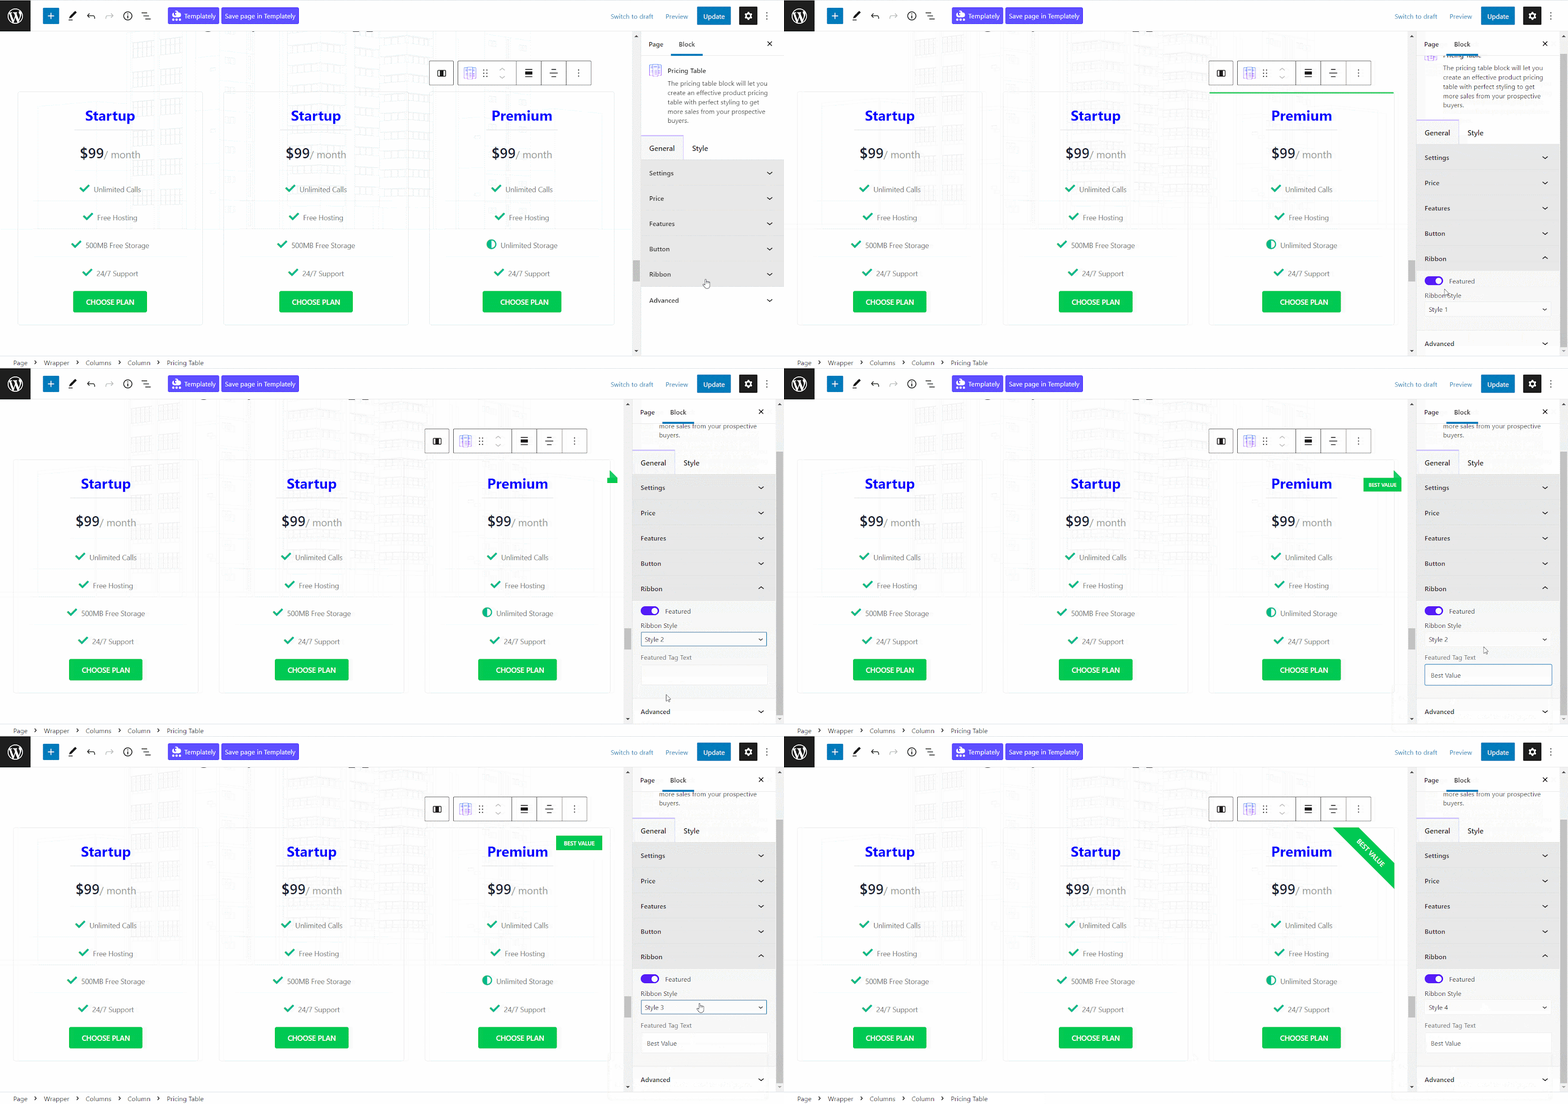
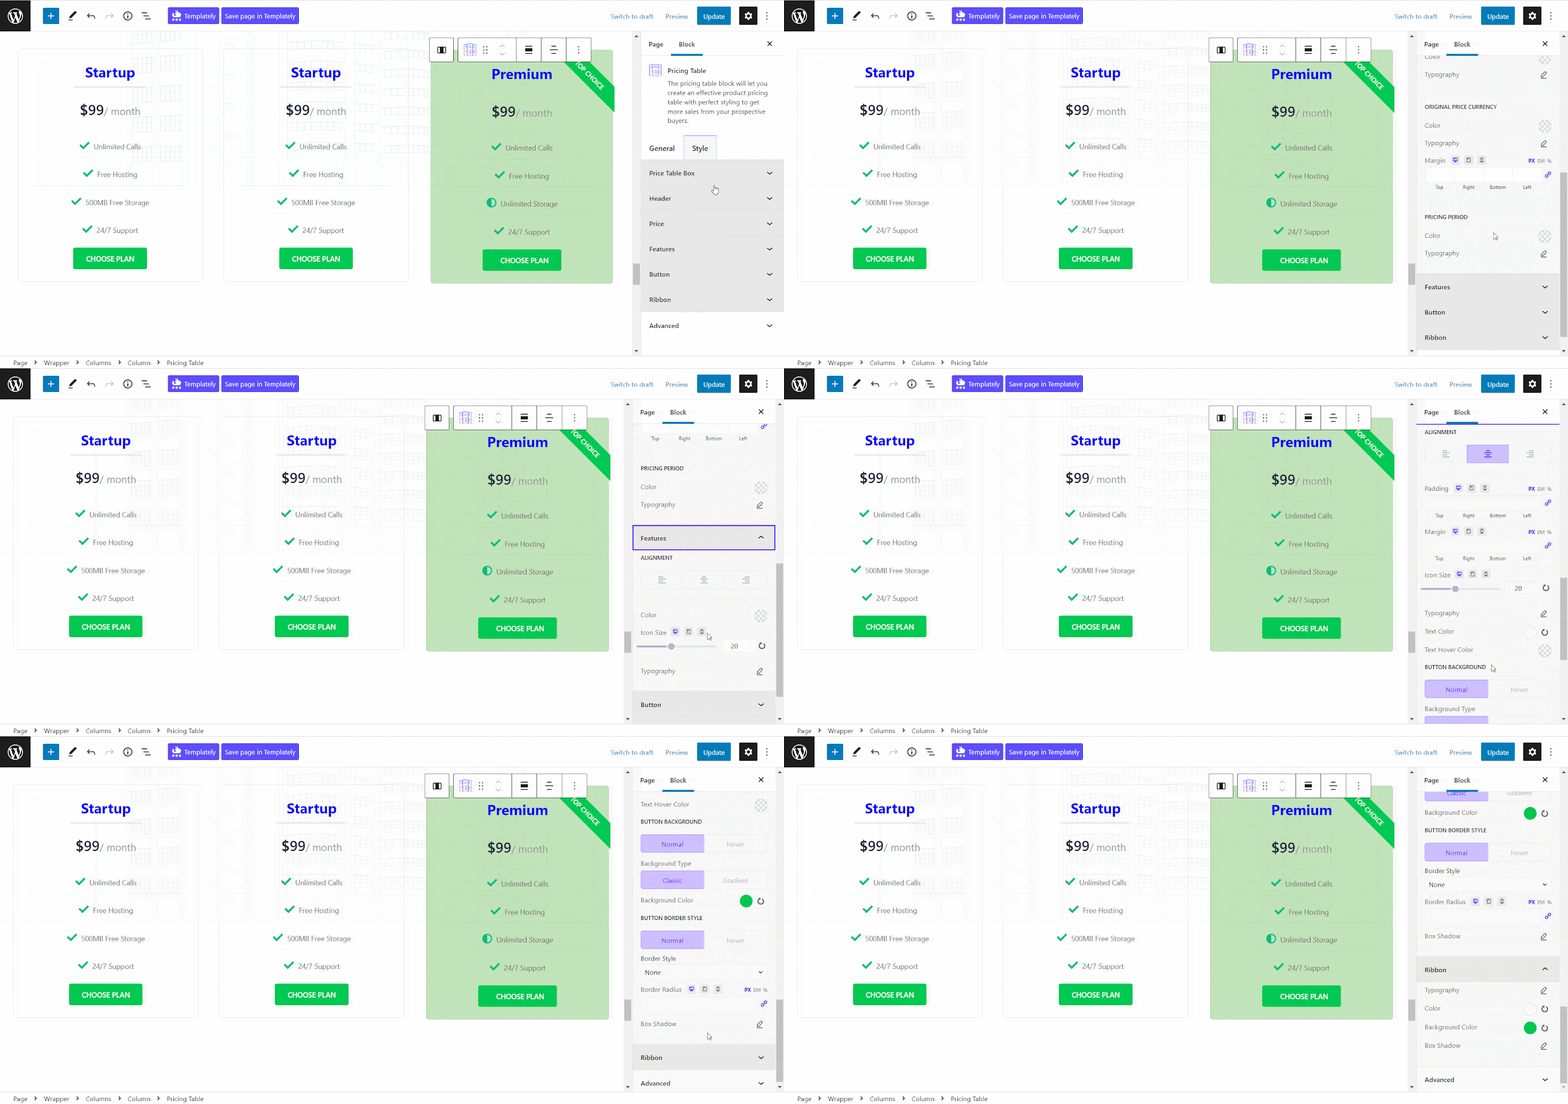
Moreover, you can add a ribbon to this WordPress pricing table and highlight your packages from the ‘Ribbon’ section. You will find 4 different preset styles that you can apply to your ribbon and add text to it. So, using this feature, you can easily attract your customers to any specific package easily.
Essential Blocks for Gutenberg offers ultimate freedom for styling your responsive pricing table. So, you can showcase this WordPress pricing table however it looks good to you.
From the ‘Style’ section, you will find the option to customize the price table box. You can easily change the background color, border style, box shadow, margin, and padding there. Moreover, you could even add a background image and overlay for the price table box without any hassle.
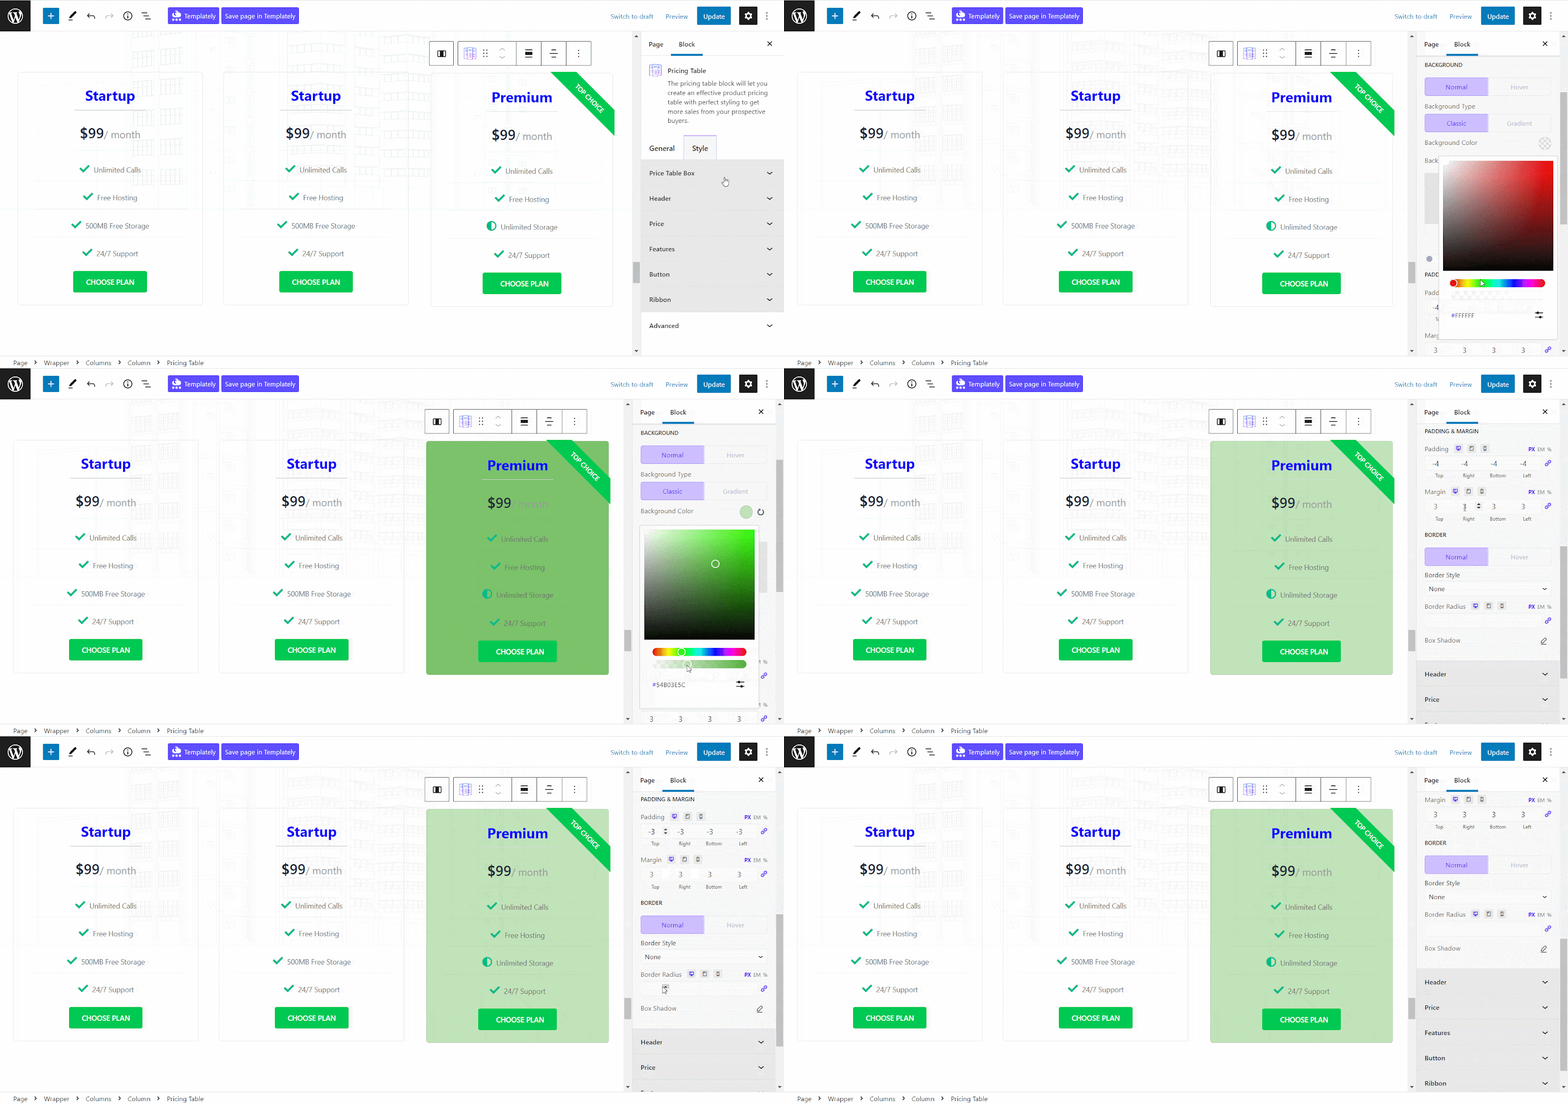
Besides, with this Gutenberg Block library, you can tweak the Header, Price, Feature, Button, Ribbon of your price comparison table and change the texts and background colors, typographies, margins, and paddings at ease. You can also adjust the alignment as well. So, with this Pricing Table block, creating a stunning price comparison table is an easy-peasy task for anybody.
Step 3: Time To Publish Your Pricing Table
Once you have done styling your price comparison table, now it’s time to publish it on your website. You can see the preview before publishing or click on the ‘Publish / Update ’ button to bring your responsive pricing table to your website.
⚡ Grab Your Visitor’s Attention With Stunning Pricing Table
Now that you have a responsive pricing table on your website, your visitors can see clearly your pricing package no matter which device they use. So, from now, you will be able to showcase your pricing package in a better way and convert your visitors into customers easily.
Have you found our blog useful? If you do then subscribe to our blog to get more essential tips to supercharge your website building experience. You can also join our Facebook community and share your thoughts.


